


Setup and Operation
16
SLIU021 – September 2016
Copyright © 2016, Texas Instruments Incorporated
TPS65916 EVM User’s Guide
3
Setup and Operation
3.1
Powering up the Device
To turn on the device, perform the following steps:
1. Make sure supply voltage is off, unplug the USB, and close the GUI.
2. Plug in the USB cable to the EVM through the J1 micro-USB connector.
3. Plug in the other end of the USB cable to the computer USB port.
4. Ensure that VSYS (3.3 V to 5 V) is connected to the pin labeled VSYS of P16 and that GND is
connected to the pin labeled GND of P16 (
).
5. Set supply voltage to between 3.3 V and 5 V with an appropriate current limit. Turn on supply voltage.
The RESET_OUT LED (D1), LDOVRTC_OUT LED (D3), POWER_HOLD LED (D5), LDOVRTC_OUT,
and POWER_GOOD (D2) should light. See
.
3.2
TPS65916EVM Graphical User Interface (GUI)
The GUI for TPS65916EVM gives the user the ability to interact with the internal registers of the device
while also allowing control of some input pins. The GUI can be downloaded from TI.com.
The TPS65916EVM GUI has three pages. The first page is labeled
DUT Config
, the second page is
labeled
Low Level Configuration
, and the third page is labeled
About
.
3.2.1
Communicating with Device – Digital Inputs
The
DUT_Control
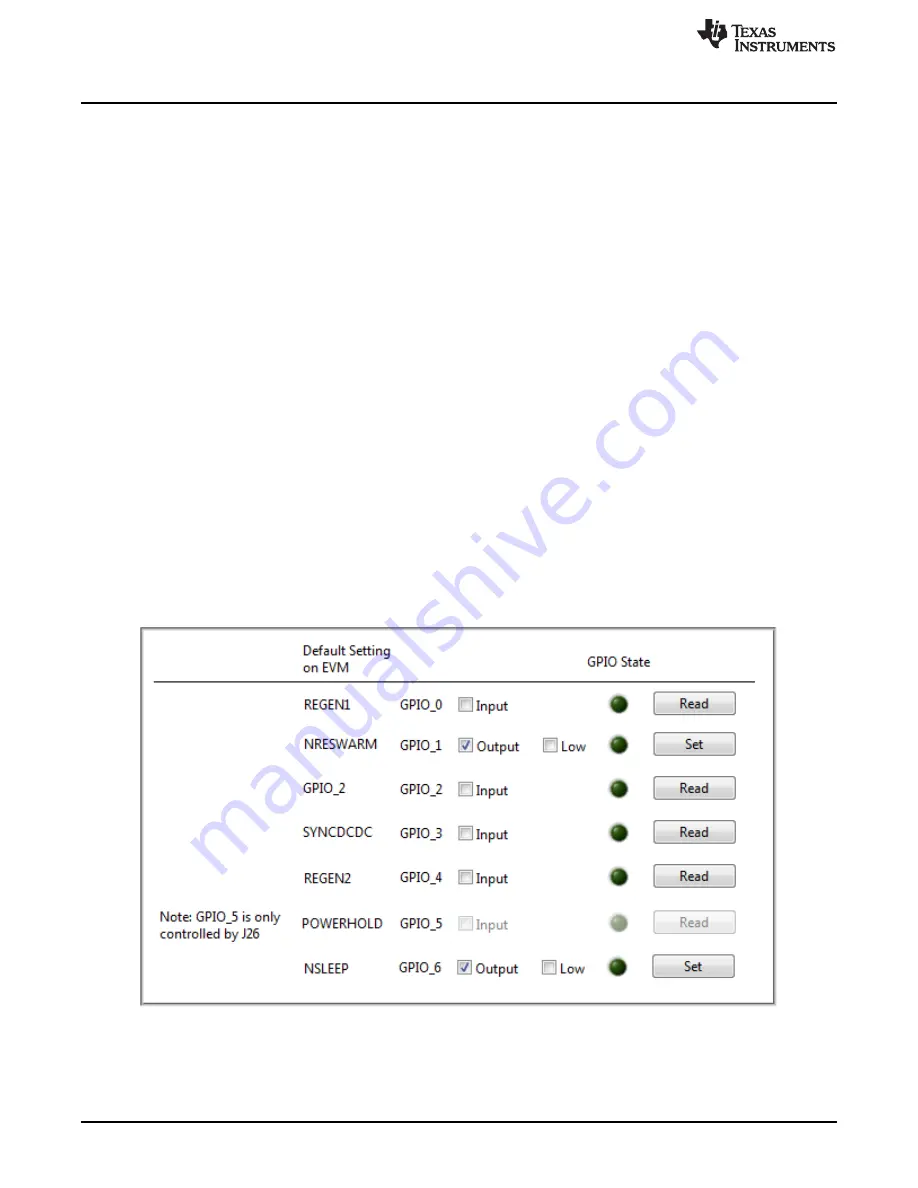
page of the GUI controls the digital input signals to the PMIC. The GUI can control 6
signals. Since all of these signals are inputs to the PMIC, they need to be configured as outputs from the
perspective of the GUI . To set the desired signal as an input or output, check the box next to the
corresponding signal. Checking this box changes the text label to
Output
and configures the signal as an
output. Any GPIO configured as output has a second check box labeled
Low
to the right of it. (
).
Figure 14. Default GPIO Configuration