


TMP104EVM Hardware
3
TMP104EVM Hardware
3.1
Electrostatic Discharge Warning
CAUTION
Many of the components on the TMP104EVM are susceptible to damage by
electrostatic discharge (ESD). Customers are advised to observe proper ESD
handling precautions when unpacking and handling the EVM, including the use
of a grounded wrist strap at an approved ESD workstation.
3.2
Typical Hardware Connections
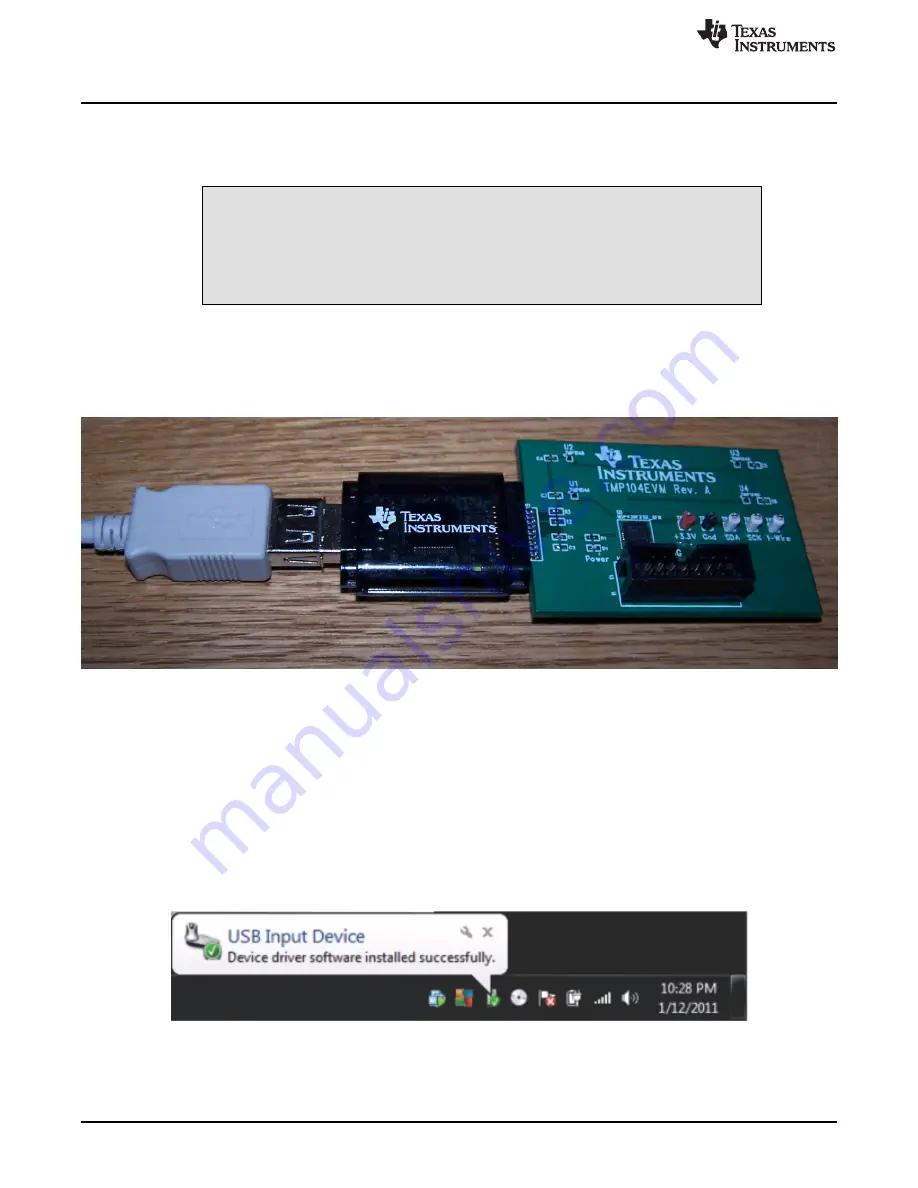
First, connect the TMP104EVM test board to the SM-USB-DIG and then connect the USB cable, as
shown in
. Make sure that all connectors are properly aligned and pushed together firmly. Loose
connections may cause intermittent operation.
Figure 5. Connecting SM-USB-DIG Platform
3.3
Connecting the USB Cable to the DIG
shows the typical response to connecting the SM-USB-DIG Platform board to a PC USB port for
the first time. Typically, the computer responds with a Found New Hardware, USB Device pop-up dialog.
The pop-up window then changes to Found New Hardware, USB Human Interface Device. This pop-up
indicates that the device is ready to be used. The SM-USB-DIG Platform uses the human interface device
drivers that are part of the Microsoft
®
Windows
®
operating system.
In some cases, the Windows Add Hardware Wizard appears. If this prompt pops up, allow the system
device manager to install the human interface drivers by clicking Yes when requested to install drivers.
Windows confirms installation of the drivers with the message shown in
Figure 6. Confirmation of SM-USB-DIG Platform Driver Installation
6
TMP104EVM Evaluation Board and Software Tutorial
SBOU118
–
October 2011
Copyright
©
2011, Texas Instruments Incorporated