


2.1.3 TI Launchpad Firmware Upgrade
The firmware for the TI Launchpad must be upgraded for the first time before using the software. A jumper must
be modified, and the USB cable must be connected to the XDS110 port of the TI Launchpad to download
firmware. The firmware can be programmed to the TI Launchpad using the online tool,
provided on the
Setup
page of the GUI. The firmware bin file can be found at
<Download Directory>
\DAC53701EVM_1.0.1_installer_win\install_image_DAC53701EVM\DAC53701EVM\firmware\acctrl.0.3.0.3b.bin
after unzipping the file
install_image_DAC53701EVM.zip
.
Follow the step-by-step procedure below to upgrade the firmware and install the device drivers successfully:
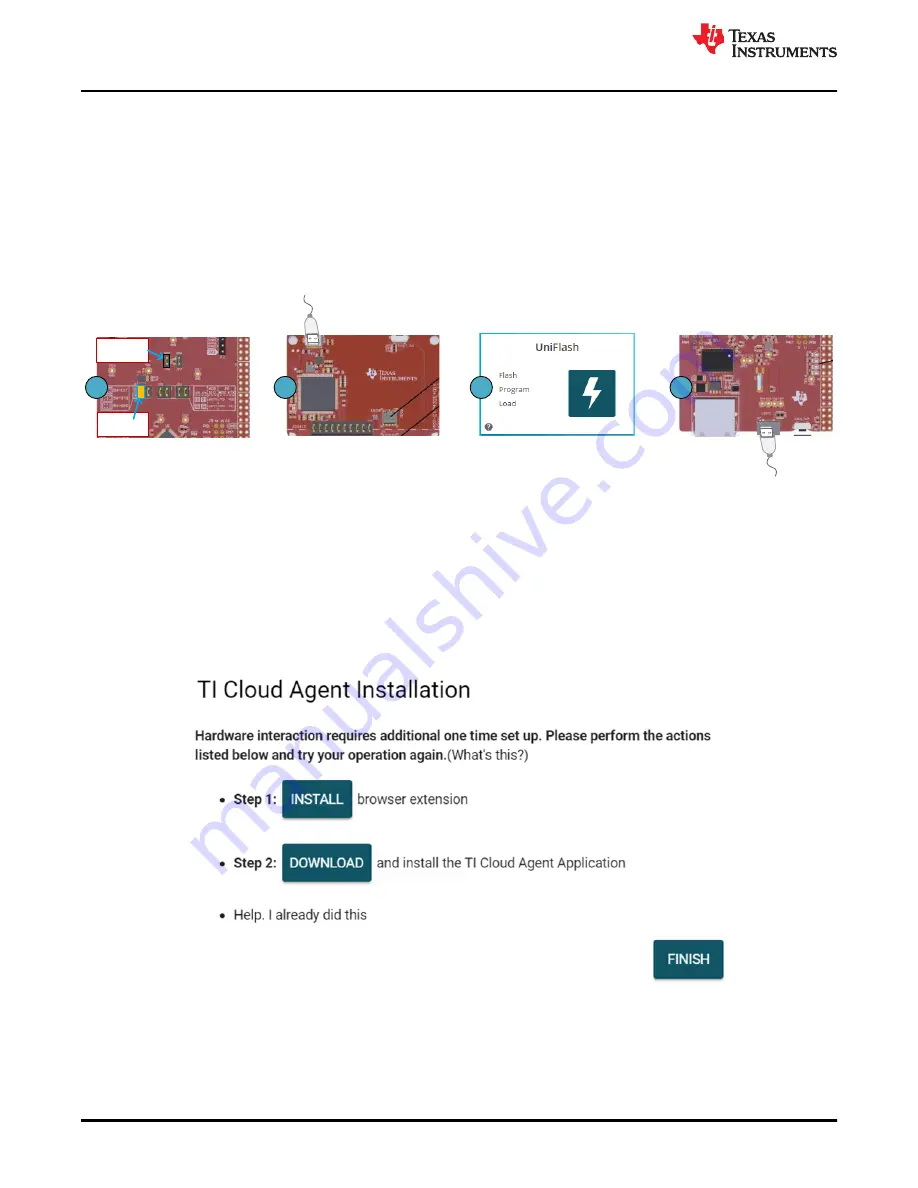
1. Remove jumper JP6 on the TI Launchpad, as shown in step 1 of
3
4
2
Remove
Jumper
Mount
Jumper
1
xxx
xxx
xxx
Figure 2-3. MSP-EXP432E401Y Launchpad (TI Launchpad ) Setup
2. Mount jumper on 5V-OTG. Retain the jumper on 5V-XDS, as shown in step 1 of
3. Connect the USB cable to the port on the XDS110 side of the board, as shown in step 2 of
.
4. Connect the USB cable to the PC and open
. Click on
Start Now
in the
Detect Device
section.
5. If the GUI Composer framework is being installed for the first time on the PC, the browser extension and the
TI Cloud Agent
must also be installed. Follow the 2-step installation flow prompted on the web page, as
shown in
Figure 2-4. TI Cloud Agent Installation
6. Press the
Refresh
or
Finish
button after the installation is complete. This action should detect the Launchpad.
7. Press
Start
and browse for
<Download Directory>\DAC53701EVM_1.0.1_installer_win
\install_image_DAC53701EVM.\DAC53701EVM\firmware\acctrl.0.3.0.3b.bin
. Press
Load Image
followed by
Verify Image
.
System Setup
6
DAC53701EVM
SLAU841 – OCTOBER 2020
Copyright © 2020 Texas Instruments Incorporated