Test Summary
5
SLUUC60 – February 2020
Copyright © 2020, Texas Instruments Incorporated
BQ24800 EVM
2.1.7
Upon First Insertion of EV2400 Into USB Port of PC
Follow the instructions of the
Found New Hardware Wizard
•
Allow Microsoft
®
Windows
®
to connect to Windows Update to search for software, then click
Next
•
Select
Install software automatically (Recommended)
, then click
Next
•
If a window pops up informing that the TI USB Firmware Updater has not passed Windows Logo
testing click
Continue Anyway
•
If a target file already exists
and
is newer, do not overwrite the newer file
•
Click
Finish
2.2
Equipment Setup
•
Set power supply #1 (PS#1) for 0 V ±100 mVDC, with the current limit set to > 5 A. Turn off supply.
•
Connect PS#1 output in series with a current meter (multimeter) to J1 (VIN, GND)
•
Connect a voltage meter across J1 (VIN, GND)
•
Connect a voltage meter across J3 (BAT, GND)
•
Connect a voltage meter across J2 (SYS, GND)
•
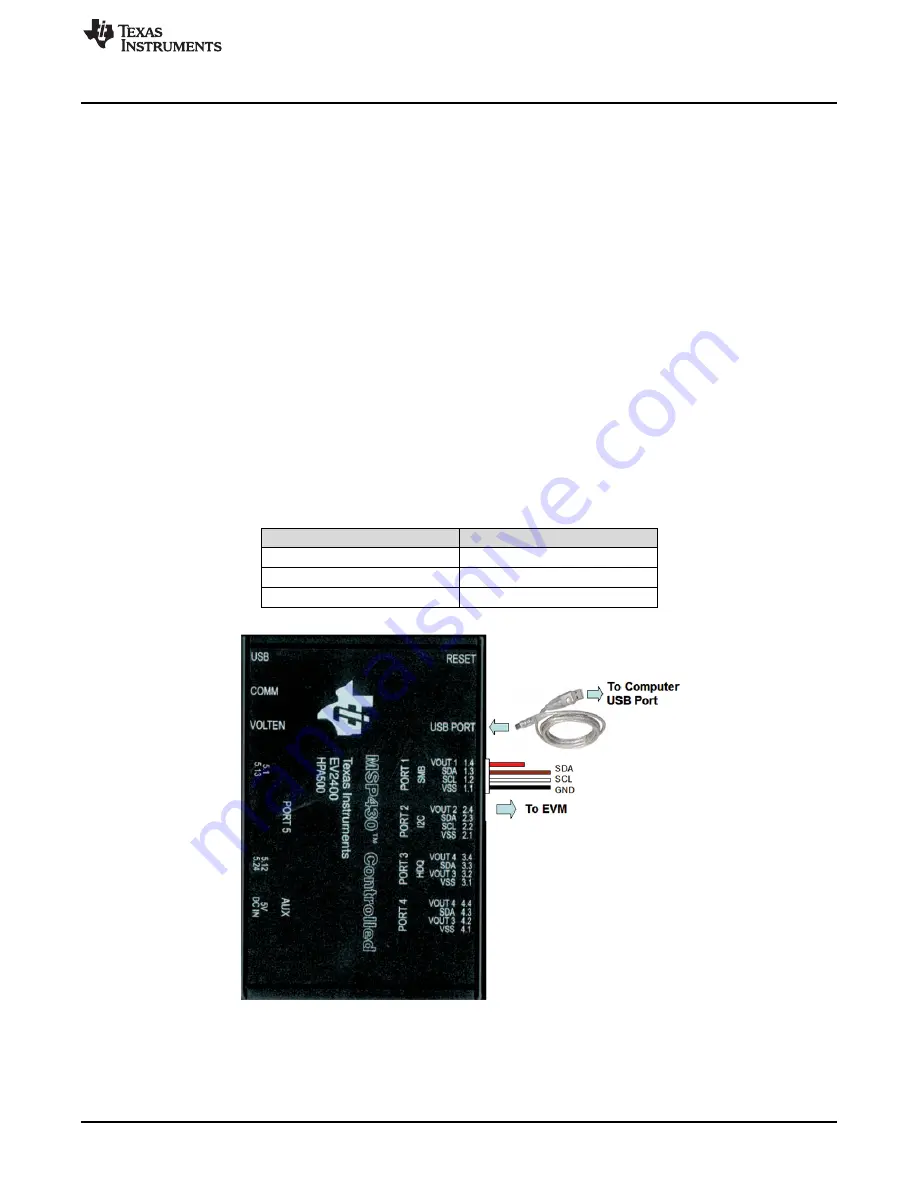
Connect J5 (SDA, SCL, GND) to the EV2400 kit
SMB
port. Refer to
for EVM connections.
Connect the USB port of the EV2400 kit to the USB port of the computer. The connections are shown
in
Table 4. EV2400 and BQ24800 EVM Connections
BQ24800 EVM
EV2400
GND (J5-1)
VSS 1.1
SCL (J5-2)
SCL 1.2
SDA (J5-3)
SDA 1.3
Figure 1. Connections of the EV2400 Kit


