


BOOST-DAC8730-HART Software Setup
6
SLAU699 – May 2017
Copyright © 2017, Texas Instruments Incorporated
BOOST-DAC8730-HART Evaluation Module
3.3
Installing Drivers and MSP430FR5969 LaunchPad™ Firmware
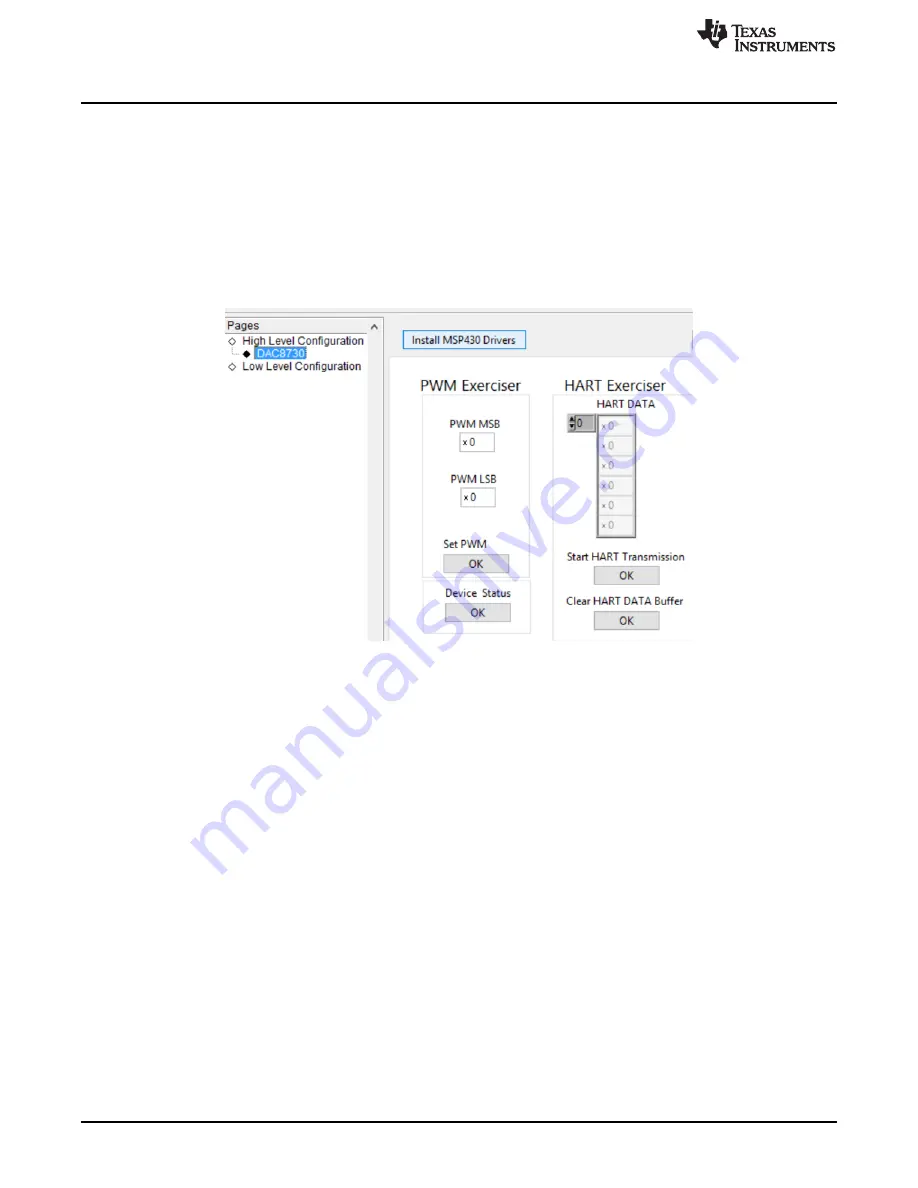
Before connecting the BOOST-DAC8730-HART board to the MSP430FR5969 LaunchPad, the user must
ensure that the MSP430 device drivers are installed on the PC, and that the firmware is flashed on the
MSP430FR5969 LaunchPad.
Driver installation is accomplished by invoking the GUI before any hardware is connected to the PC. In
this step, ensure that no hardware is connected to the PC. To invoke the GUI, click the “BOOST-
DAC8730-HART” icon found in the programs or apps section of the start menu. The GUI will display a
splash screen and a pop-up displaying “No MSP LaunchPad Found”. Press the
OK
button, and the GUI
will start in DEMO mode. Navigate to the DAC8730 page by pressing the “DAC8730” tab under the
Pages
field and press the
Install MSP430 Drivers
button, as shown in
.
Figure 6. Install MSP430 Drivers Button
Once pressed, a batch file will execute from the software and install the necessary files. Several prompts
may appear that query the user to accept software changes made by the application. Press the
Continue
button to proceed with the installation. The next step is to connect the MSP430FR5969 LaunchPad to the
PC (without BOOST-DAC8730-HART) via the micro USB cable. Now press the
Install MSP430 Firmware
button of the GUI to flash custom firmware to the MSP430FR5969 LaunchPad. The LEDs of the
LaunchPad will begin to flash, and a black window may appear during the firmware installation.
Additionally, the text field next to the
Install MSP430 Firmware
should read as “UPLOADING”. When
flashing is complete, the cmd prompt will exit, and the text field will update to display “COMPLETE”. The
MSP430FR5969 LaunchPad has now been successfully flashed.
Now close the GUI by pressing the exit
X
button located on the top right of the GUI page, and disconnect
the LaunchPad USB cable from the PC.