Next steps
To prepare your work station
for software development,
power off the kit, remove
the SD card and insert into
the included USB SD card
reader.
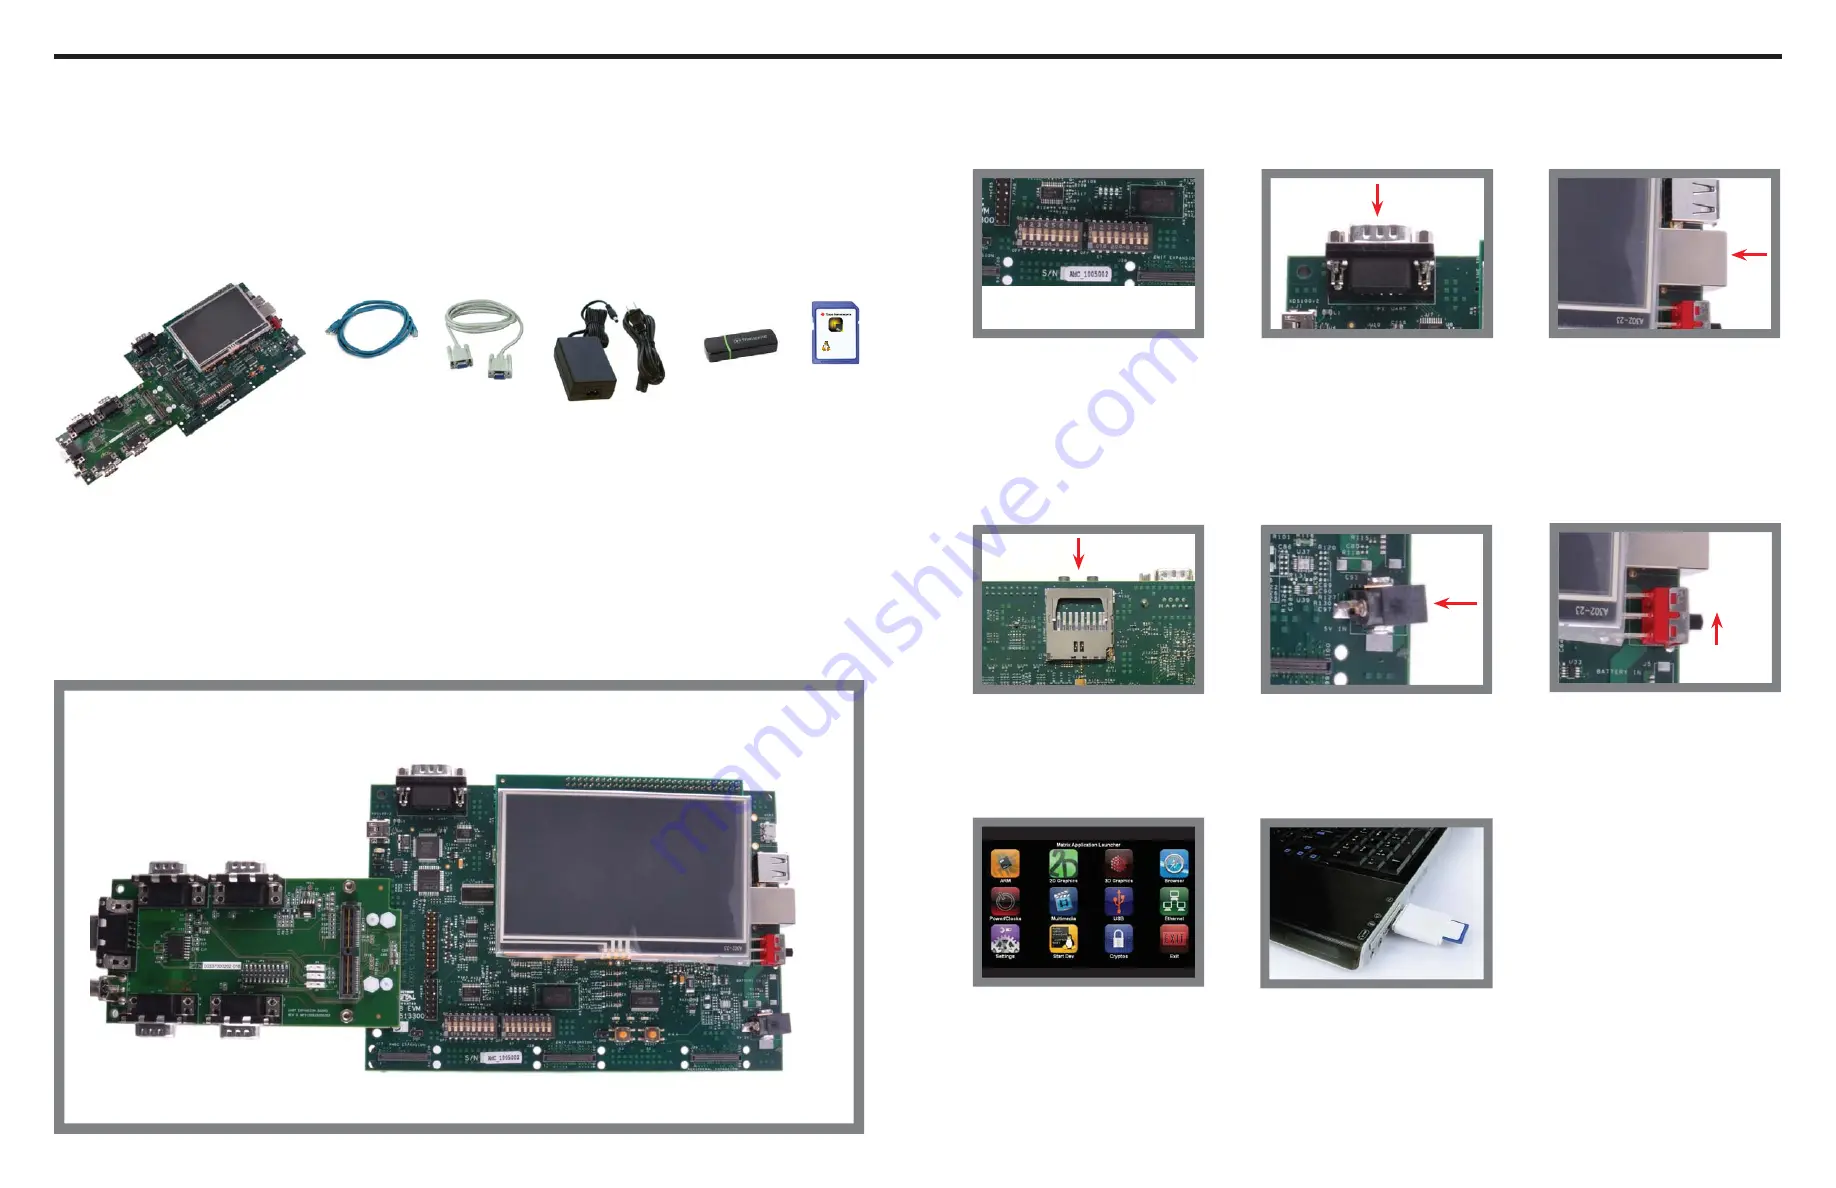
The following items will be used in this Quick Start Guide.
Baseboard, AM1810 SOM-M1,
4.3” LCD, PROFIBUS Daughter Card
(pre-assembled)
Ethernet
cable
USB SD
card reader
Important baseboard locations
(Numbers correspond to the steps on the right.)
4
4
**
6
6
1
1
3
3
2
2
5
5
Serial
cable
SD card
(Linux™
SDK)
Power supply & cord
(use power cord
specifi c to
your region)
* See back of board
Sitara
™
514232-0001A
SPRW210
AM1810 EVM
Linux SDK
Quick start setup (OS demo)
2
Connect the supplied
serial cable to the
UART-1/2 DB-9
connector. Connect the
other end of the cable to
a PC or workstation
3
Connect Ethernet cable to
the RJ-45 jack on the
board. Connect the other
end to a router or Ethernet
switch
1
Verify all DIP switches are
set to
OFF
6
Switch power on
7
You are now ready to
explore the application
launcher which contains
various example applica-
tions and demos. Matrix
GUI shown
4
Insert the Linux SDK SD
card in the AM1810 EVM
SD slot on back of board
5
Connect power to
baseboard
Congratulations on your purchase of the AM1810 EVM and welcome to the Quick Start Guide. This guide
is designed to help you through the initial setup of your EVM. The EVM provides a product-ready hardware
and software platform for evaluating the functionality of the Texas Instruments (TI) AM1810 processor.
8
Connect the USB SD card
reader into your Linux™-based
PC, locate the START HERE
folder on the SD card and
view setup.htm. The setup.
htm fi le includes the software
development guide which will
provide information to guide
you through the software
installation.
(Continued on following page)


