8
• ControlStation 2
Basic functions
Activating and deactivating
After activating, the device is fi rst in standby mode and a
blue dot will appear on the display panel
5
.
With the button
•
1
“Standby” and/or
24
“ ” you can
switch the unit between operating and/or standby
mode. In the operating state, the active audio source
will be shown on the display panel.
Adjusting the volume
Increasing the volume: Press button
•
8
“
+
” and/or
21
“
”.
Reducing the volume: Press button
•
9
“
–
” and/or
22
“
”.
The selected volume will be indicated from 0 to 60 on the
display panel
5
.
Mute
With the button
•
6
“Mute” and/or
18
“ ” you can turn
off the sound. The symbol “– –” will appear on the
display fi eld 5.
Turning the sound back on: Press button
•
6
“Mute” and/
or
18
“ ” again or change the volume.
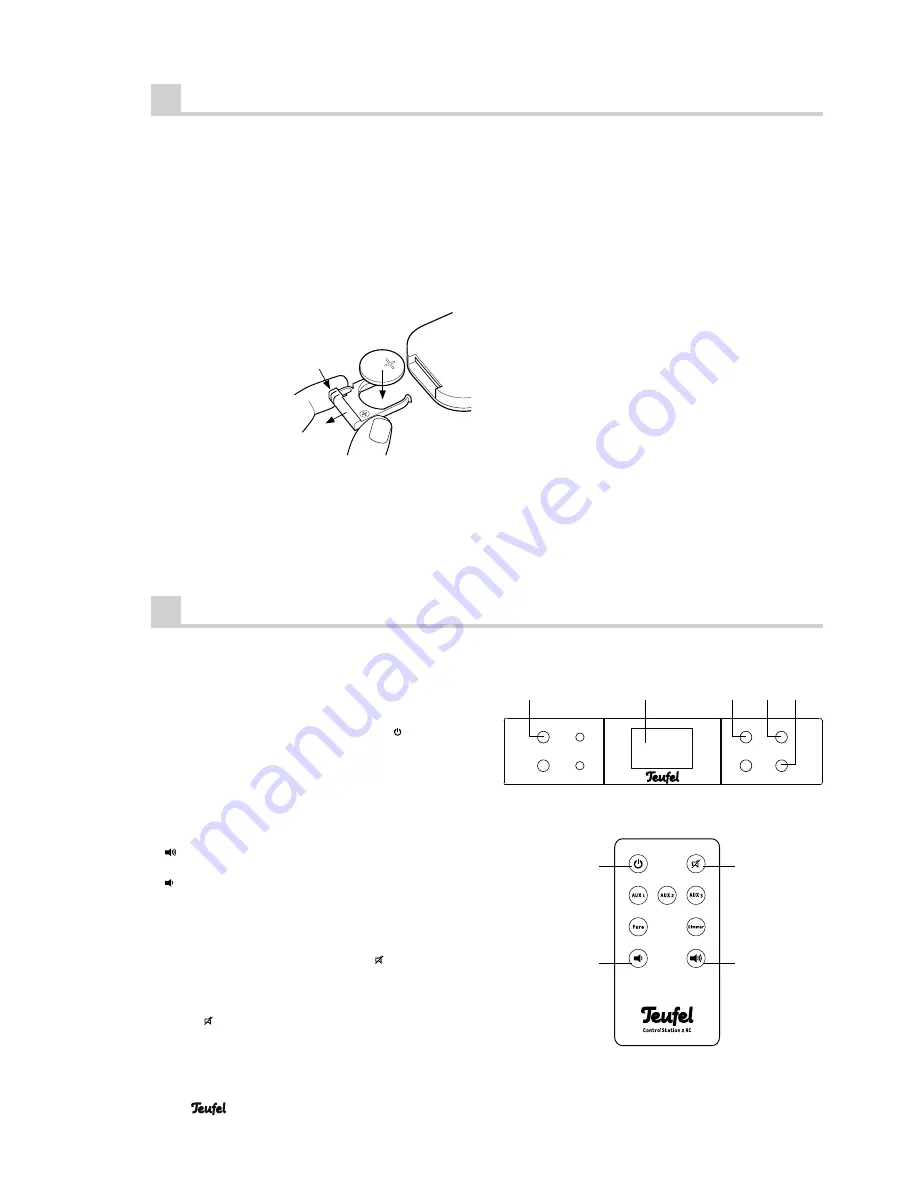
A 3-volt button cell, type CR2025, is used to power the
remote control.
Upon delivery, this button cell is already in the remote
control and is secured by a plastic strip. The strip is vis-
ible on the back of the remote control. Just carefully pull it
out. The remote control is now ready for use.
Changing the batteries
Hold the remote con-
•
trol with the bottom
facing up.
Press the bar on the
•
battery compartment
to the middle (
A
) and
pull out the compart-
ment (
B
).
Take out the empty
•
battery (please ob-
serve the notes on page 11).
A
B
Remote control
Insert the new battery in the holder. Thereby the “+”
•
symbol must be visible on the battery and bracket.
Put the holder back into the unit and push the compart-
•
ment until it locks into place.
Functionality
The remote control transmits the control signals via infra-
red. For this, it is necessary that you point the remote con-
trol towards the ControlStation 2. Make sure no objects
are in the way of the infrared signal.
Fluorescent lamps and energy saving lamps installed in
the direct vicinity may affect the functions of the remote
control or prevent it from working.
18
21
22
24
Phones
Standby
Source
Mic
+
Mute
Pure
–
1
5
6
8
9


