background image

13


Maintenance 

Use only a dry, soft cloth for wiping the unit. Do not use a damp cloth, thinner, or other volatile 
solvents for cleaning.

Accessories

CAUTION:  Use only accessories or attachments recommended for use with your Terratek tool 
specified in this manual. The use of any other accessories or attachments might present a risk 
of injury to persons. Only use accessory or attachment for its stated purpose.

General Maintenance

1. Keep the air vents free from obstruction and clean regularly.
2. Check regularly for any dust particles entering the grills around the motor and the switch. 
Use a soft brush to remove any dust particles. Wear safety glasses to protect your eyes whilst 
cleaning.
3. Monitor the dust bag (if equipped) and empty when approximately half full. Always empty 
into an appropriate container. REMEMBER: dust can be hot and cause fire.
4. Lubricate all moving parts at regular intervals.
5. To clean the body of the power tool, only use a soft damp cloth. Do NOT immerse in water. 
A mild detergent can be used but NOT petrol or any alcohol based product.
6. Should the power cord become damaged only allow a fully qualified electrician to replace or 
repair.

Disposal

Power tools, accessories and packaging should be sorted for environmentally-friendly recycling.
Only for EC countries:

Do not dispose of power tools into household waste!
According to the European Directive 2002/96/EC on waste electrical and 
electronic equipment and its incorporation into national right, products 
that are no longer suitable for use must beseparately collected and sent 
for recovery in an environmentally-friendly manner.

Содержание TTESNG

Страница 1: ...Electric Stapler Nail Gun TTESNG User Manual Please read and retain for future reference IMPORTANT Read all instructions before use ...

Страница 2: ...d 4 Steel pad 5 Gun needle guide 6 Pin 7 Gun needle 8 Spring 9 Lift housing 10 Gun mouth 11 Screw 12 Steel cover 13 Nail punches 14 Wheel 15 Nail punches spring 16 17 Nail groove 18 Lock spring 19 Right housing 20 Lock 21 Screw 22 Circuit board composition 23 connected cords plugs 24 Firing trigger 25 Wrench spring 26 Screw 27 Pressing line plate 28 Power switch Screw ...

Страница 3: ...2 Exploded Assembly Diagram NOTICE Actual product may vary from pictures shown ...

Страница 4: ...3 Fig 1 Fig 2 Fig 5 Fig 6 Fig 3 Fig 4 1 Firing trigger 2 On Off switch 3 Power cord 4 Gun nozzle 5 Cartridge haft 6 Switch lock button ...

Страница 5: ...or future reference Copyright 2013 by ACL Group Intl Ltd All rights reserved This manual or any artwork contained herein must not be reproduced in any shape or form without the express written consent of ACL Group Intl Ltd Diagrams within this manual may not be drawn proportionally Due to continuing improvements actual product may differ slightly from the product described herein A 1 2mm B 10 6mm ...

Страница 6: ...h Keep work area clean and well lit Cluttered or dark areas invite accidents Do not operate power tools in explosive atmospheres such as in the presence of flammable liquids gases or dust Power tools create sparks which may ignite the dust or fumes Keep children and bystanders away while operating a power tool Distractions can cause you to lose control Important SAFETY Information General Safety R...

Страница 7: ...ded surfaces such as radiators cooking ranges and any other fixed appliance with metal surfaces Do not expose your power tool to wet or damp conditions and NEVER use in rain Check regularly the power cord of your machine and any extension cord that you are using for damage Do not carry or pull the machine with the power cord Ensure the cord is clear from hot surfaces oil or sharp objects Never use...

Страница 8: ...USE IN A DANGEROUS ENVIRONMENT Don t use power tools in damp or wet locations or expose them to rain Keep work area well lit 6 KEEP CHILDREN AWAY All visitors should remain at a safe distance from work area 7 MAKE WORKSHOP CHILD PROOF with padlocks master switches or by removing starter keys 8 USE THE RIGHT TOOL Don t force a tool or attachment to do a job for which it was not designed Service Hav...

Страница 9: ...times 16 MAINTAIN TOOLS WITH CARE Keep tools clean and in good working condition for maximum safety performance Follow instructions for lubricating and changing accessories 17 DISCONNECT TOOLS BEFORE SERVICING when changing accessories such as blades bits cutters etc 18 REDUCE THE RISK OF UNINTENTIONAL STARTING Make sure switch is in OFF position before plugging in 19 USE RECOMMENDED ACCESSORIES C...

Страница 10: ...remove the grounding prong from the power tool or extension cord ĚĚŝƟŽŶĂů ƐĂĨĞƚLJ ŶƐƚƌƵĐƟŽŶƐ Wear hearing protection Exposure to noise can cause hearing loss Always wear eye protection Use appropriate detectors to determine if utility lines are hidden in the work area or call the local utility company for assistance Contact with electric lines can lead to fire and electric shock Damaging a gas line...

Страница 11: ... edge of the work piece The work piece is likely to split allowing the fastener to fly free and causing personal injury Avoid unintentional switching on Ensure the On Off switch is in the off position before inserting battery pack Carrying the power tool with your finger on the On Off switch or inserting the battery pack into power tools that have the switch on invites accidents Do not open the ba...

Страница 12: ...cking list are included Package contents A Nailer Stapler B User manual C 400pcs staples and 100pcs nails Functional Description Fig 1 WARNING Disconnect the plug from the power source before making any assembly adjustments or changing accessories Such preventive safety measures reduce the risk of starting the tool accidentally Operation CAUTION Always be sure that the tool is switched off before ...

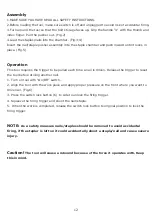
Страница 13: ...d index finger Pull the pusher out Fig 2 4 Load the staples nails into the chamber Fig 3 4 Insert the nail staple pusher assembly into the staple chamber and push inward until it locks in place Fig 5 Operation This tool requires the trigger to be pulled each time a nail is driven Release the trigger to reset the tool before driving another nail 1 Turn on tool with On Off switch 2 Align the tool wi...

Страница 14: ...dust bag if equipped and empty when approximately half full Always empty into an appropriate container REMEMBER dust can be hot and cause fire 4 Lubricate all moving parts at regular intervals 5 To clean the body of the power tool only use a soft damp cloth Do NOT immerse in water A mild detergent can be used but NOT petrol or any alcohol based product 6 Should the power cord become damaged only a...

Страница 15: ...ertify that it conforms to CE EMC LVD MD and RoHS directives EN55014 1 2006 EN55014 2 A2 2008 EN61000 3 2 2006 EN61000 3 3 2008 All provisions of Annex 1 of Council Directive 2004 108 EC EMC directive EN50144 1 A2 2003 EN50144 2 16 2003 All provisions of Annex 1 of Council Directive 2006 42 EC Machinery Directive 2006 95 EC Low Voltage Directive RoHs 2011 65 EU Mr Alan Garnett UK QA Manager 2011 6...

Страница 16: ... do any repairs or replace any parts of this product ACL Group Intl Ltd and its distributor expressly state that all repairs or parts replacement should be done by certified or licensed technicians The buyer assumes all risk and liability arising out of his or her repairs or parts replacement to the original product 12 Months Limited Warranty If within 12 months from the date of purchase you exper...

Отзывы: