Teq AVIT
www.teqavit.com
[email protected] 1-949-709-4040
10
8.1
Menu
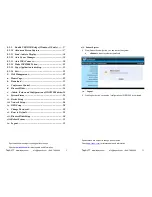
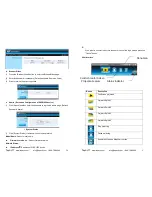
1) Press “Menu” button from the main UI, you will find the menu to enable the
additional feature or to change the application options.
Windows OS Menu
Item
Description
Show Receiver Information
Show Receiver Information on desktop
Web Admin
Open web admin page
Search Receiver
Search another receiver device
Launch SidePad -> MirrorOp
Receiver
Launch SidePad sender
Enable BrowserSlides
Enable BrowserSlides feature
Select Projection Desktop
Select different projection desktop
Projection Quality
Change projection quality
Projection Latency Control
Change projection latency option
Enable IWB USB Bridge
Enable IWB USB bridge
Advanced Screen Capture
Enable advance screen capture
Send Audio to Display
Enable audio projection
Auto Power Management
Enable Auto Power management feature
Auto WiFi Connect
Enable Auto WiFi connect feature
Make Plug&Show Token
Make Plug&Show USB token
Copy Application to Desktop
Copy the application to desktop
About
About this application
Exit
Exit the application
Teq AVIT
www.teqavit.com
[email protected] 1-949-709-4040
23
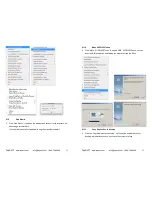
b. Download
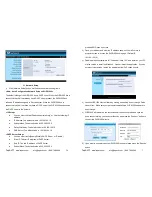
1) Select “Download” function.
2) Please select the “Win 7 / Windows Vista / XP” or “Mac Utility” and execute the
installation program.
Please disable the “Smart Screen Filter” on IE browser; otherwise you might not
able to download the file.
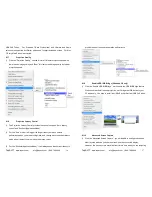
c. Conference Control
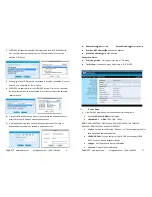
1) Select “Conference Control” function, it will show current connected sender list.
2) Enter password and then press [Login]. (default password: moderator)
3) After login, you can see a User List on the screen which indicates all of users
connected to WIPS1000 box.
4) There are three columns, “Computer Name”, “Play Control” and “IP Address”.
5) Play Control
,
There are six buttons, including Play(Full)
, Play Split #1
, Play Split #2
,Play Split #3
, Play Split #4
and Stop
.
6) Uncheck the “Allow Control from this page only”, it will disable the centralized
control and user can project the screen to WiPS1000 freely.

