background image

OPERATION

12

Tennant 3000/3040/3050 (06--03)

MACHINE SETUP AND OPERATION

FOR SAFETY: Do not operate machine unless

operator manual is read and understood.

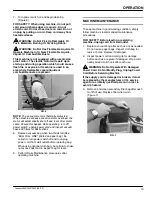
1. Install vacuum bag. To open bag compartment lid,

press button at rear of lid. Place bag down inside

the secondary filter bag and close lid (Figure1).

FIG. 1

NOTE:

Do not use paper bag and optional cloth bag

together.

ATTENTION: Never operate machine without bag

and/or filters in place.

2. Attach vacuum hose to bag compartment lid

(Figure 2).

FIG. 2

3. Place machine on your back as described below

(Figure 3):
a. Fully loosen shoulder straps on harness and

slip straps over your shoulders. Do not tighten

straps at this time.

b. Fasten waist strap buckle and adjust waist

strap so the machine’s weight rests

comfortably on your hips.

c. When waist strap is correctly adjusted, tighten

shoulder straps lightly and fasten shoulder

strap buckle. Do not restrict arm movement by

overtightening shoulder straps.

FIG. 3

4. When all straps are adjusted for comfort, connect

belt clip to power cord and fasten clip to harness

as shown (Figure 4).

FIG. 4

5. Attach optional attachment tool to vacuum hose

(See Optional Accessory Kits).

6. Plug power cord into a grounded electrical outlet

(Figure 5)

.

FOR SAFETY: Do not operate machine unless

cord is properly grounded.

WARNING: Do Not Operate With Damaged

Power Cord. Do Not Modify Plug. Unplug Power

Cord Before Servicing Machine

Grounded Outlet

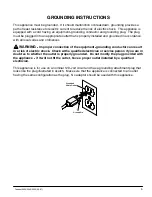
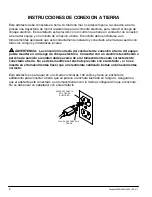
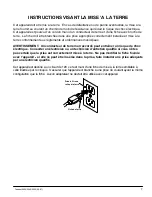
Grounding

Edge/hole

Grounded

3 Hole Outlet

Ground Pin

(120V)

(220V/230V/240V)

FIG. 5

Содержание 3000

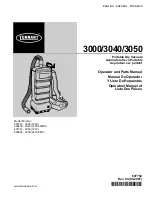
Страница 1: ...e Operador Y Lista De Repuestos Opérateur Manuel et Liste Des Piéces 607752 Rev 04 05 2007 www tennantco com Model Part No 607757 3000 120V 609209 3040 120V 400HZ 607751 3050 120V 609694 3050 240V EMC Portable Dry Vacuum Aspiradora Seco Portable Aspirateur sec portatif 607752 ...

Страница 2: ... return it to a service center 6 Do not pull or carry by cord use cord as a handle close a door on cord or pull cord around sharp edges or corners Do not run appliance over cord Keep cord away from heated surfaces 7 Do not unplug by pulling on cord To unplug grasp the plug not the cord 8 Do not handle plug or appliance with wet hands 9 Do not put any object into openings Do not use with any openin...

Страница 3: ... No tirar de ni arrastrar por el cordón no usar el cordón como un mango no cerrar la puerta sobre el cordón ni tirar del cordón sobre bordes o esquinas aguzadas No pasar el artefacto sobre el cordón Mantener el cordón alejado de superficies calientes 6 No desenchufar tirando del cordón Para desenchufar sujetar el enchufe no el cordón 7 No manejar el enchufe o el artefacto con las manos mojadas 8 N...

Страница 4: ...e condon Ne pas uliliser le cordon comme une poignée le coincer dans l embrasure d une porte ou l appuyer contre des arêtes vives ou des coins Ne pas faire rouler l appareil sur le cordon Garder le cordon à l écart des surfaces chaudes 7 Ne pas débracher en tirant sur le cordon Tier plutôt la fiche 8 Ne pas toucher la fiche ou l appareil lorsque vos mains sont humides 9 N insérer aucun objet dans ...

Страница 5: ...ING Improper connection of the equipment grounding conductor can result in a risk of electric shock Check with a qualified electrician or service person if you are in doubt as to whether the outlet is properly grounded Do not modify the plug provided with the appliance if it will not fit the outlet have a proper outlet installed by a qualified electrician This appliance is for use on a nominal 120...

Страница 6: ...ta del conductor de conexión a tierra del equipo puede resultar en un riesgo de choque eléctrico Consultar con un electricista calificado o persona de servicio si existen dudas acerca de si el tomacorrientes está correctamente conectado a tierra No se debe modificar el enchufe provisto con el artefacto si no se inserta en el tomacorrientes hacer que un electricista calificado instale un tomacorrie...

Страница 7: ...TISSEMENT Un conducteur de terre mal raccordé peut entraîner un risque de choc électrique Consulter un électricien ou un technicien d entretien qualifié si vous n êtes pas certain que la prise est correctement mise à la terre Ne pas modifier la fiche fournie avec l appareil si elle ne peut être insérée dans la prise faire installer une prise adéquate par un électricien qualifié Cet appareil est de...

Страница 8: ...ponents such as batteries hazardous fluids such as antifreeze and oil in a safe environmentally way according to your local waste disposal regulations Always remember to recycle MACHINE DATA Please fill out at time of installation for future reference Model No Install Date Serial No Tennant Company PO Box 1452 Minneapolis MN 55440 Phone 800 553 8033 or 763 513 2850 www tennantco com Specifications...

Страница 9: ...Cord Do Not Modify Plug Unplug Power Cord Before Servicing Machine If the supply cord is damaged or broken it must be replaced by the manufacturer or it s service agent or a similarly qualified person in order to avoid a hazard WARNING Do Not Use Outdoors Or On Wet Surfaces Do Not Expose to Rain Store Indoors The following information signals potentially dangerous conditions to the operator or equ...

Страница 10: ...a path of least resistance for electrical current to reduce the risk of electrical shock This machine is equipped with a cord having an equipment grounding conductor and grounding plug The plug must be plugged into an appropriate outlet that is properly installed in accordance with all local codes and ordinances Do not remove ground pin if missing replace plug before use Grounded Outlet Grounding ...

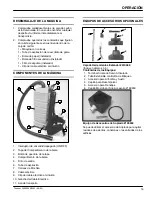
Страница 11: ...7 Backpack Harness 8 Power Cord 9 Power Cord Belt Clip 10 Power Cord Hook 11 Carrying Handle OPTIONAL ACCESSORY KITS 6 4 1 5 2 3 Standard Tool Kit 610988 Includes 1 5 Kit Contents 1 Curved Chrome end with Swivel 2 Button Lock Ratchet Extendable Wand 3 Rug Floor Tool 4 Dusting Brush 5 Crevice Tool 6 Air Driven Brush Attachment 190900 Blower Attachment Kit 190939 The blower attachment can be used to...

Страница 12: ... straps at this time b Fasten waist strap buckle and adjust waist strap so the machine s weight rests comfortably on your hips c When waist strap is correctly adjusted tighten shoulder straps lightly and fasten shoulder strap buckle Do not restrict arm movement by overtightening shoulder straps FIG 3 4 When all straps are adjusted for comfort connect belt clip to power cord and fasten clip to harn...

Страница 13: ...se and filters for obstructions 8 Replace vacuum bag when two thirds full See BAG FULL LINE printed on paper bag Be certain to turn power switch off and to unplug power cord from wall outlet before replacing bag When using optional cloth bag be certain to shake out excess dust and to inspect bag for tears 9 Perform Daily Maintenance procedures after operating machine MACHINE MAINTENANCE To keep ma...

Страница 14: ...250 hours of operation check vacuum motor carbon brushes for wear Replace brushes when worn to a length of 10mm 0 38 in or less Contact Service Center for carbon brush inspection FOR SAFETY When servicing machine all repairs must be performed by a qualified service person STORING MACHINE Prior to storing machine wrap power cord around cord hook clean all filters and install a new vacuum bag Store ...

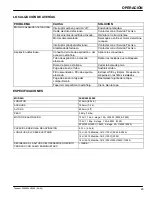
Страница 15: ...ll vacuum bag Empty vacuum bag Air leak in hose Replace hose Clogged secondary filter or foam filter Remove filters and clean Do not operate machine without filters in place Air leak at bag compartment lid Replace lid gasket Loose bag compartment lid Close lid tightly SPECIFICATIONS MODEL 3000 3040 3050 LENGTH 210mm 8 25 in WIDTH 190mm 7 5 in HEIGHT 600mm 2 ft WEIGHT 5 5 Kg 12 lbs VACUUM MOTOR 120...

Страница 16: ...l anticongelante y el aceite de forma segura para el medio ambiente de acuerdo con las normativas o disposiciones locales No olvide reciclar DATOS DE LA MÁQUINA Por favor complete al momento de la instalación para referencia futura No de Modelo Fecha de instalación No de Serie ÍNDICE MEDIDAS DE SEGURIDAD 17 INSTRUCCIONES DE CONEXION A TIERRA 18 ETIQUETA DE ADVERTENCIA 18 DESEMBALAJE DE LA MAQUINA ...

Страница 17: ...senchufe el cordón eléctrico antes de reparar la máquina Si el cordón del suministro se daña o se rompe debe ser reemplazado por el fabricante o su agente de servicio o una persona similarmente calificada para evitar un riesgo ADVERTENCIA No utilice la máquina al aire libre ni en superficies mojadas No exponga la máquina a la lluvia Almacén bajo techo La información siguiente señala condiciones po...

Страница 18: ...arse a tierra En caso de mal funcionamiento o desarreglo la conexión a tierra provee un recorrido de menor resistencia para la corriente eléctrica para reducir el riesgo de choque eléctrico Esta máquina está equipada con un cordón con un conductor de conexión a tierra del equipo y enchufe de conexión a tierra El enchufe debe enchufarse en un tomacorrientes apropiado correctamente instalado de acue...

Страница 19: ...ruptor de encendido apagado ON OFF 2 Tapa del Compartimento de la bolsa 3 Botón de apertura de la tapa 4 Compartimento de la bolsa 5 Filtro de salida 6 Tubo de aspiración 7 Correas de Mochila 8 Cable eléctrico 9 Clip del cable eléctrico al cinturón 10 Gancho del Cable Eléctrico 11 Asa de transporte EQUIPOS DE ACCESORIOS OPCIONALES 6 4 1 5 2 3 Caja de Herramientas Estándar 610988 Incluye números 1 ...

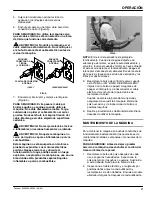
Страница 20: ...IG 1 NOTA No utilice la bolsa de papel junto con la bolsa de tela opcional ATENCIÓN Sin haber colocado los filtros y o la bolsa 2 Sujete el tubo de aspiración a la tapa del compartimento de la bolsa Figura 2 FIG 2 3 Colóquese la máquina en la espalda según la descripción siguiente Figura 3 a Afloje por completo las correas de los hombros y deslícelas por encima de ellos No apriete las correas en e...

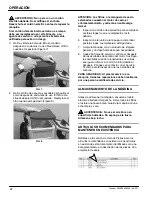
Страница 21: ...s vapores líquidos inflamables o polvos combustibles FIG 6 NOTA El motor del aspirador está protegido térmicamente Cuando la máquina detecta una sobrecarga del motor se parará automáticamente y volverá a funcionar cuando el motor se haya enfriado Si esto ocurre durante el funcionamiento apague el interruptor desconecte el cable eléctrico del enchufe de la pared e inspeccione el tubo de aspiración ...

Страница 22: ... comprobar posibles fugas reemplácela si está gastada 7 Limpie la máquina con un producto de limpieza general y un trapo húmedo según necesidades 8 Cada 250 horas de servicio controle el desgaste de las escobillas de carbono del motor Sustituya las escobillas cuando la longitud de sus cerdas sea igual o inferior a 10mm 0 38 in debido al desgaste Póngase en contacto con el Servicio Técnico para la ...

Страница 23: ...uean Bolsa de polvo está llena Vaciar la bolsa de polvo Fuga de aire en el tubo Sustituir el tubo Filtro secundario o filtro de espuma atascado Extraer el filtro y limpiar No opere la máquina sin los filtros instalados Fuga de aire en la tapa del compartimento Reemplace la junta de la tapa Tapa del compartimento está floja Cierre bien la tapa ESPECIFICACIONES MODELO 3000 3040 3050 LONGITUD 210mm 8...

Страница 24: ...l S L entretien de la machine est effectué avec des pièces fournies par le fabricant ou des pièces équivalentes DONNÉES DE LA MACHINE A remplir au moment de l installation à titre de référence Modèle nº Date d installation Nº série PROTECTION DE L ENVIRONNEMENT Veuillez éliminer les matériaux d emballage les composants d anciennes machines comme les batteries les fluides dangereux tels que l antig...

Страница 25: ...endommagé Ne modifiez pas la prise Débranchez le cordon d alimentation avant d entretenir la machine Si le cordon d alimentation est endommagé ou rompu il doit être remplacé par le fabricant ou son agent de maintenance ou toute autre personne qualifiée afin d éviter tout danger MISE EN GARDE N utilisez pas la machine en extérieur ou sur des surfaces humides N exposez pas à la pluie Entreposez à l ...

Страница 26: ...à la terre offre une voie de moindre résistance au courant électrique afin de réduire le risque de décharge électrique Cette machine est équipée d un cordon muni d un conducteur de terre principale et d une fiche avec mise à la terre La fiche doit être branchée sur une prise appropriée montée correctement conformément aux réglementations et codes en vigueur au niveau local Ne supprimez pas la fich...

Страница 27: ...6 Tuyau d aspiration 7 Harnais de transport 8 Câble d alimentation 9 Attache de ceinture du câble d alimentation 10 Crochet du câble d alimentation 11 Poignée JEUX D ACCESSOIRES EN OPTION 6 4 1 5 2 3 Jeu d instruments standard 610988 instruments 1 5 1 Extrémité incurvée en chrome à roulette 2 Manche extensible à cliquet de blocage par bouton 3 Instrument pour tapis et sol 4 Brosse à épousseter 5 I...

Страница 28: ... b Attachez la boucle de la sangle de la taille et réglez la sangle de la taille de manière à ce que le poids de la machine repose de manière confortable sur vos hanches c Quand la sangle de la taille est bien réglée resserrez légèrement les sangles des épaules et attachez la boucle des sangles des épaules Ne serrez pas trop les sangles pour ne pas entraver vos mouvements FIG 3 4 Quand toutes les ...

Страница 29: ...r mention BAG FULL LINE imprimée sur le sac en papier Assurez vous que la machine est éteinte et que le câble d alimentation est débranché de la prise murale avant de remettre un sac Lorsque vous utilisez le sac en tissu fourni en option veillez à bien enlever toute la poussière excédentaire et à vérifier si le sac n est pas déchiré 9 Exécutez les procédures d entretien journalières après utilisat...

Страница 30: ...ce vérifiez le degré d usure des balais au charbon du moteur de l extracteur Replacez les balais s ils mesurent 10mm 0 38 in ou moins Contactez le centre de dépannage pour faire vérifier les balais au charbon POUR VOTRE SECURITÉ Lors du dépannage de la machine toutes les réparations doivent être effectuées uniquement par un technicien qualifié ENTREPOSAGE DE LA MACHINE Avant d entreposer la machin...

Страница 31: ...bstruction Sac plein Videz le sac Fuite d eau dans le tuyau Remplacez le tuyau Filtre secondaire ou filtre en mousse obstrué Enlevez les filtres et nettoyez N utilisez pas la machine sans filtres Fuite d air dans le couvercle du compartiment du sac Changez le joint du couvercle Détachez le couvercle du compartiment du sac Refermez le couvercle fermement DONNEES TECHNIQUES MODELE 3000 3040 3050 LON...

Страница 32: ...RN BLK WHT BLK WHT GRN GRN BLK BLK AC GRN SWITCH BLK WHT BLK WHT AC BLK WHT BLK 120V WIRING DIAGRAM DIAGRAMA DE CABLEADO DIAGRAMME DE CÂBLAGE 120V 400 Hz WIRING DIAGRAM DIAGRAMA DE CABLEADO DIAGRAMME DE CÂBLAGE SWITCH POWER CORD VACUUM MOTOR ACCESSORY PIGTAIL TWISTLOCK POWER CORD VACUUM MOTOR ...

Страница 33: ...ECTRIQUE 33 Tennant 3000 3040 3050 08 01 M1 S1 240 VAC F1 WHT BLK RED BLK BLU BRN 240V EMC MODEL LADDER DIAGRAM DIAGRAMA ESCALONADO DIAGRAMME D ÉCHELLE REF LEGEND BLK Black BRN Brown BLU Blue WHT White RED Red M1 Motor Vacuum S1 Switch Main F1 Filter ...

Страница 34: ...5 07 34 PARTS LIST LISTA DE PIEZAS LISTE DES PIÈCES 5 10 11 9 16 12 15 6 16 7 8 43 44 39 37 23 50 31 17 13 30 27 26 4 1 28 29 34 35 36 22 25 3 2 13 14 13 17 18 18 17 13 19 21 32 33 13 17 20 40 42 41 24 43 49 46 48 47 54 52 53 59 56 58 57 60 61 62 63 55 17 13 45 51 43 38 ...

Страница 35: ... 38 16 NL SS 2 ASSEMBLY CONJUNTO ENSEMBLE Y INCLUDED IN ASSEMBLY INCLUIDO A CONJUNTA Y COMPRIS EN ENSEMBLE D RECOMMENDED STOCK ITEM PIEZAS RECOMENDADAS EN ALMACÉN ELÉMENTS DE STOCK RECOMMANDÉS REF PART DESCRIPTION QTY 34 140750 SCREW HEX 10 24X1 75 IN ZN 4 35 230639 RING W TABS VAC MTR P PAC 1 36 100122 DGASKET VAC MOTOR 1 37 130418 DFAN VACUUM 3000 MODEL 1 Y 38 190155 DBRUSH CARBON 2 PACK 1 37 13...

Страница 36: ...Y 3 190917 BUSHING HOLDER 1 Y 4 190918 FITTING ELB SWIVEL 1 Y 5 190919 FLAP CLEANING 1 Y 6 190920 TURBINE 1 ASSEMBLY CONJUNTO ENSEMBLE Y INCLUDED IN ASSEMBLY INCLUIDO A CONJUNTA Y COMPRIS EN ENSEMBLE D RECOMMENDED STOCK ITEM PIEZAS RECOMENDADAS EN ALMACÉN ELÉMENTS DE STOCK RECOMMANDÉS REF PART DESCRIPTION QTY Y 7 190921 PLATE BASE 1 Y 8 190922 GUARD BUMPER 1 Y 9 190923 BRUSHARM RIGHT 1 Y 10 190924...

Страница 37: ...G 1 1 2 FPT METAL 1 Y 4 140755 SCREW RND 10 24X4 50 SLOT 4 Y 5 07514 WASHER LOCK INT 10 SS 4 Y 6 140011 WASHER FLAT 0 21B 0 45 03 SS 4 Y 7 611069 FITTING HOSE BARB 1 ASSEMBLY CONJUNTO ENSEMBLE Y INCLUDED IN ASSEMBLY INCLUIDO A CONJUNTA Y COMPRIS EN ENSEMBLE D RECOMMENDED STOCK ITEM PIEZAS RECOMENDADAS EN ALMACÉN ELÉMENTS DE STOCK RECOMMANDÉS REF PART DESCRIPTION QTY 190938 DKIT H E P A FILTER ATTA...

Страница 38: ...ANDARD ATTACHMENT TOOL INCLUDES 1 5 1 Y 1 190902 HOSE END CHROME 1 Y 2 605587 WAND TELESCOPIC 1 ASSEMBLY CONJUNTO ENSEMBLE Y INCLUDED IN ASSEMBLY INCLUIDO A CONJUNTA Y COMPRIS EN ENSEMBLE D RECOMMENDED STOCK ITEM PIEZAS RECOMENDADAS EN ALMACÉN ELÉMENTS DE STOCK RECOMMANDÉS REF PART DESCRIPTION QTY Y 3 605588 TOOL PICKUP RUG FLOOR 1 Y 4 190715 TOOL DUST BRUSH 1 Y 5 190714 TOOL CREVICE 1 ...

Страница 39: ... 3 605500 WHEEL REAR 1 Y 4 605501 MOTOR 115V 1 Y 5 605502 BELT BRUSH 1 Y 6 605503 ASM BRUSH COMPLETE 1 Y 7 605504 ASM BASE PLATE COMPLETE 1 ASSEMBLY CONJUNTO ENSEMBLE Y INCLUDED IN ASSEMBLY INCLUIDO A CONJUNTA Y COMPRIS EN ENSEMBLE D RECOMMENDED STOCK ITEM PIEZAS RECOMENDADAS EN ALMACÉN ELÉMENTS DE STOCK RECOMMANDÉS REF PART DESCRIPTION QTY Y 8 SM52556 BEARING BLOCK BLACK 1 Y 9 605505 SEAL FELT DU...

Отзывы: