TR-240 Users Manual - Preliminary
Page 2 of 7
Rev D – 3 / 09 / 2011
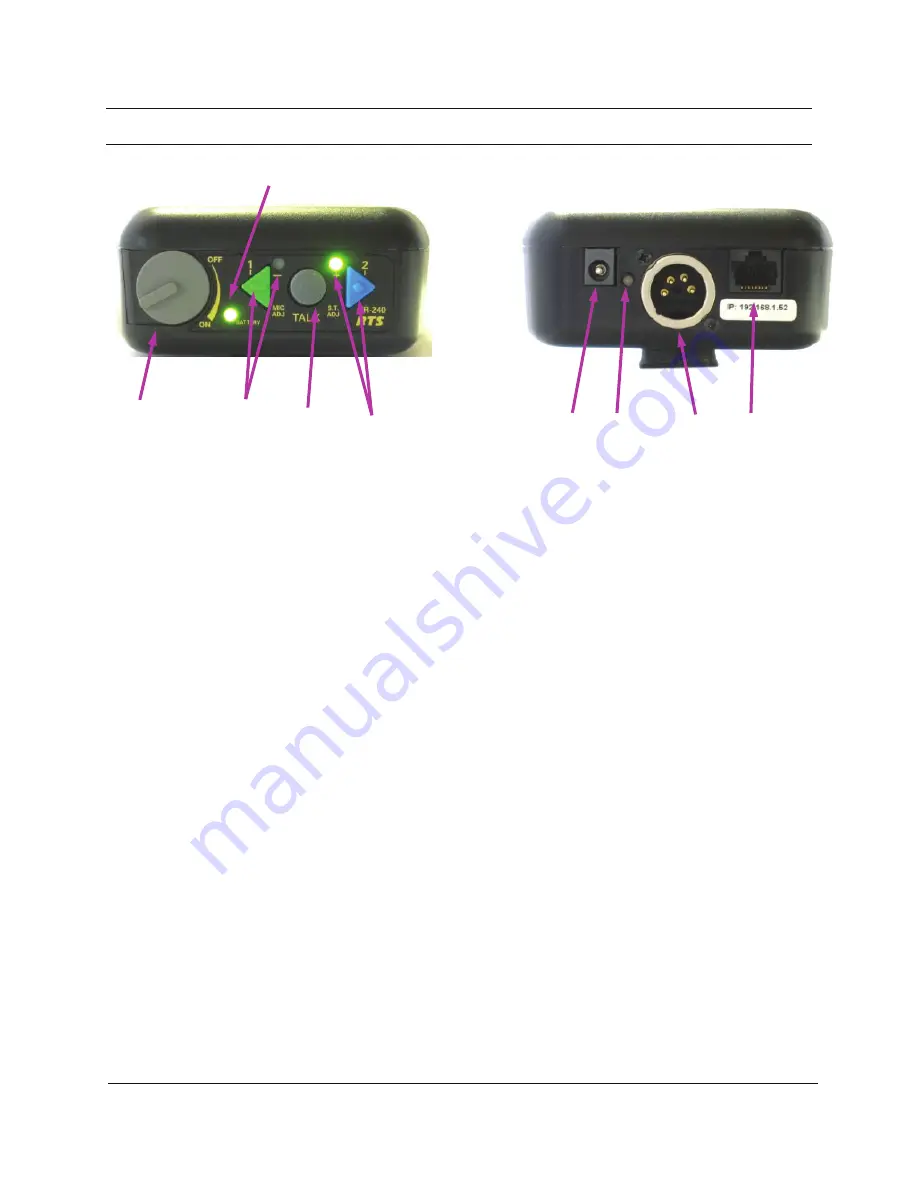
Controls and Connections
1.
On/Off & Volume Control
– Turns the beltpack
power on/off and controls headset volume.
2.
Battery Light
–
a.
GREEN = Battery OK
b.
YELLOW = Battery Low (approx. 15 mins
of use left)
c.
RED = Battery Low (needs charged)
3.
Channel 1 “Green” Button and Light
– Selects the
“Channel 1” intercom. The green light next to the
button will illuminate upon selection.
4.
Talk Button
– When pressed the microphone path is
enabled.
a.
Momentary
– Pressed and hold for over ½
second.
b.
Latch on/off
– Tap button and the
microphone path is enabled. Tap again to
turn off.
The active intercom channel light will remain
illuminated when the microphone path is enabled.
The active intercom channel light will blink when the
microphone path is disabled.
5.
Channel 2 “Blue” Button and Light
– Selects the
“Channel 2” intercom. The green light next to the
button will illuminate upon selection.
6.
Charge Jack
– Used to charge the Li-Ion battery.
Accepts a 5.5mm x 2.5mm plug with the center
positive. Must be supplied with a 12VDC regulated
power supply with at least a 400mA current capacity.
7.
Charge Light
.
a.
RED = Beltpack battery is charging.
b.
GREEN = Beltpack battery is charged.
8.
Headset Connector
– Standard 4-pin XLR
connector.
a.
Pin 1 = Microphone GND
b.
Pin 2 = Microphone HOT
c.
Pin 3 = Hea
d.
Pin 4 = Headphone –
9.
Programming Jack
– This RJ-45 jack is used for
wired Ethernet connections, configuration, and to
update programming in the unit if ever needed.
1
3
4
5
2
6
8 9
7
Top View
Bottom View


