background image

English

   - 29 -

You can select frequency ranges from this screen. For 

highlighting lines you see, use “

” or “

” button. 

You can enter the frequency range manually by using 

the numeric buttons on the remote control. 
Set 

Start

 and 

Stop Frequency

 as desired by using 

numeric buttons on the remote control. 
After this operation, you can set 

Search Step

 as 8000 

KHz or 1000 KHz. 
If you select 1000 KHz, the TV will perform search 

process in a detailed way. Searching duration will 

thus increase accordingly. When finished, press 

OK


button to start automatic search. The TV will search 

and store available broadcasts.

Satellite Installation

If you select 

Satellite

 option from the 

Search Type


screen, you can set a satellite and watch satellite 

channels. When you select Satellite installation, 

Antenna Type

 menu will be displayed.

There are three types of antenna selection. You can 

select 

Antenna type

 as 

Direct

Unicable

 or 

DiSEqC


switch by using “  ” or “  ” buttons.

Direct: 

If you have a single receiver and a direct 

satellite dish, select this antenna type. After selecting 

Direct

, another menu screen will be displayed. 

Select an available satellite and press 

OK

 to scan 

for services.

Unicable:

 If you have multiple receivers and a 

unicable system, select this antenna type. Press 

OK

  to  continue.  Configure  settings  by  following 

instructions on the screen. Press 

OK

 to scan for 

services.

DiSEqC switch

: If you have multiple satellite 

dishes and a 

DiSEqC switch

, select this antenna 

type. After selecting DiSEqC switch, another menu 

screen will be displayed. You can set four 

DiSEqC


options (if available). Press 

GREEN

 button to scan 

all satellites or press 

YELLOW

 button to scan only 

the highlighted satellite. To save and exit press 

OK

 button.

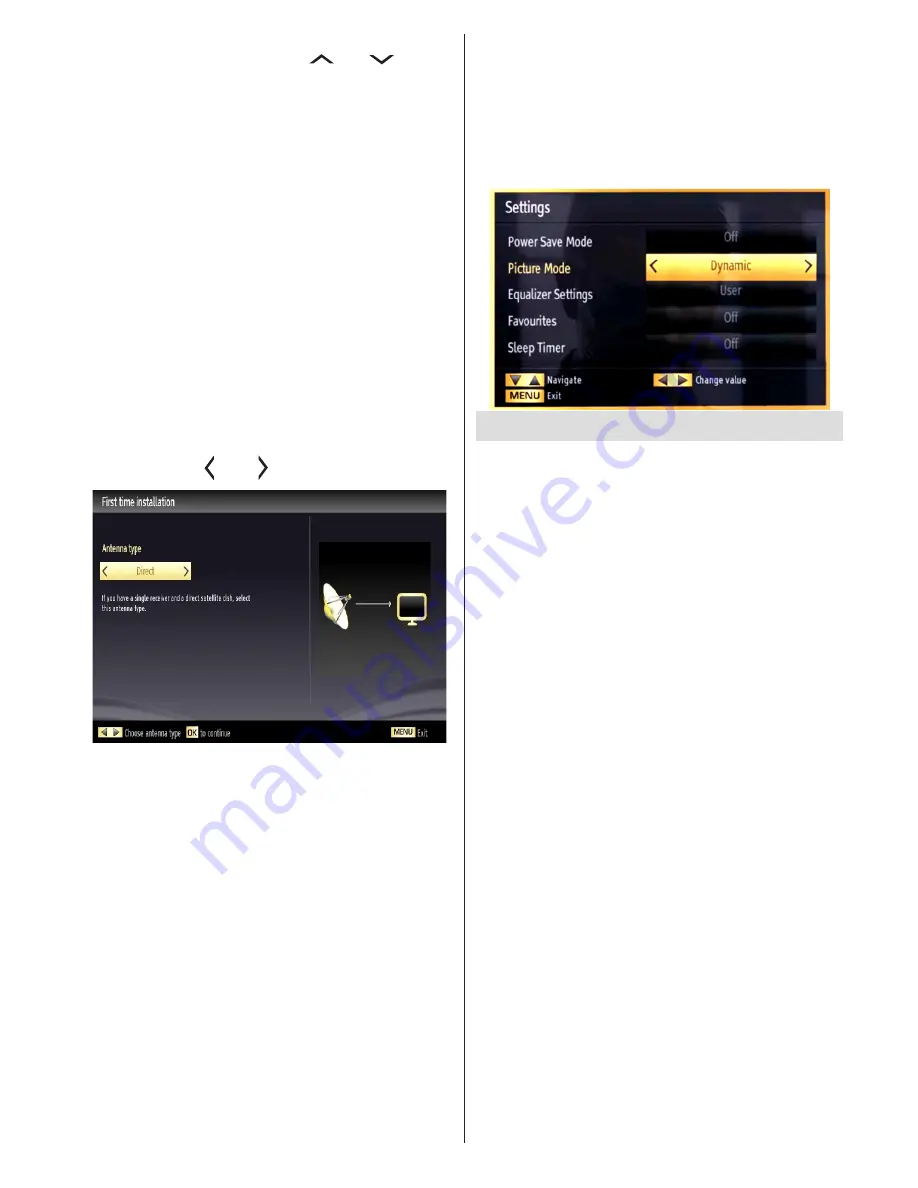
Quick Menu

Quick Settings menu allows you to access some 

options quickly. This menu includes Power Save 

Mode, Picture Mode, Equalizer Settings, Favourites 

and Sleep Timer options. Press 

Q.MENU

 button on the 

remote control to view quick menu. See the following 

chapters for the details of the listed features.

Media Playback via USB Input

You can connect a USB hard disk drive or USB 

memory stick to your TV by using the USB inputs of 

the TV. This feature allows you to play files stored in 

a USB drive. 2.5” and 3.5” inch (hdd with external 

power supply) external hard disk drives are supported.

IMPORTANT!

 You should back up your files before 

making any connections to the TV set in order to 

avoid any possible data loss. Manufacturer will not 

be responsible for any file damage or data loss. It is 

possible that certain types of USB devices (e.g. MP3 

Players) or USB hard disk drives/memory sticks may 

not be compatible with this TV. Note: While formatting 

a USB hard disk that has 1TB (Tera Byte) or more 

file capacity, you can experience problems with the 

formatting process. 
Quickly plugging and unplugging USB devices, is a 

very hazardous operation. Do not repeatedly quickly 

plug and unplug the drive. This may cause physical 

damage to the USB player and USB device itself. 

Do not pull out USB module while playing a file.

Media Browser Menu

You can play photo, music, and movie files stored 

on a USB disk by connecting it to your TV and using 

the Media Browser screen. To do this, perform the 

following: Insert a USB disk to the port on the side 

part of the TV. 
Press 

MENU

 button and select Media Browser tab 

by using 

Left/Right

 and 

OK

 buttons. Main media 

browser screen will be displayed. You can display 

the related content by selecting the Video, Music 

or Picture tab. Follow the button indications under 
each on screen menu for media playback features.
You can set your Media Browser preferences by using 
the Settings dialog. 

Содержание L22F135A3

Страница 1: ...LCD TV Bedienungsanleitung Instruction Manual MODE D EMPLOI L22F135A3 R ...

Страница 2: ...ld be operated only from a 220 240 V AC 50 Hz outlet Warning Do not leave your TV in standby or operating mode when you leave your house Positioning the TV For ventilation please leave a clear space of at least 10cm all around the TV Do not block the ventilation openings Do not place the TV on sloping or unstable surfaces the TV may tip over To prevent damage to the TV do not place any objects on ...

Страница 3: ...th liquids such as flower vases on top of the TV Avoid from dripping or splashing If any solid object or liquid falls into the cabinet unplug the TV and have it checked by qualified personnel before operating it any further Ventilation The slots and openings on the TV set are intended for ventilation and to ensure reliable operation To prevent overheating these openings must not be blocked or cove...

Страница 4: ...nnect power when going away for longer time It is highly recommended to activate Power Save Mode setting to reduce your annual power consumption Also it is recommended to disconnect the TV from the mains plug to save energy more when you do not use Please helps us to save environment by following these steps Repair Information Please refer all servicing to qualified personnel Only qualified person...

Страница 5: ...and hold about a few seconds the TV will switch to standby mode Main menu OSD cannot be displayed via the control button Operation with the Remote Control Press MENU button on your remote control to display main menu screen Use Left or Right button to select a menu tab and press OK to enter Use Left Right Up Down to select or set an item Press BACK or MENU button to quit a menu screen Input Select...

Страница 6: ...S broadcasts 1 Standby 2 Numeric buttons 3 TV AV Channel List DVB T C 4 Volume up down 5 Mute 6 Navigation buttons 7 Menu on off 8 OK Channel List Hold in TXT mode 9 Return Back Index page in TXT mode 10 No Function 11 Media Browser 12 My button 1 13 Coloured Buttons 14 Mono Stereo Dual I II Audio Subtitle Language 15 Subtitle on off Subtitle in Media Browser mode 16 Rewind in Media Browser mode 1...

Страница 7: ...l mounting kit optional we recommend that you plug all your cables into the back of the TV before mounting on the wall Insert or remove the CI module only when the TV is SWITCHED OFF You should refer to the module instruction manual for details of the settings You can use the VGA input for connecting a YPbPr device To do this you need a YPbPr to PC cable Not supplied Connector Type Cables Device S...

Страница 8: ...ss the button on the remote control or press the standby button so the TV will switch to standby mode To turn off the TV completely remove the power cord plug from the mains power socket Note When the TV is switched to standby mode standby LED can blink to indicate that features such as Standby Search Over Air Download or Timer is active The LED can also blink when you switch on the TV from standb...

Страница 9: ...u must select a search type to search and store broadcasts from the desired source Aerial Installation If you select AERIAL option from the Search Type screen the television will search for digital terrestrial TV broadcasts NOTE You can press MENU button to cancel After all the available stations are stored Channel List will be displayed on the screen If you like the sort channels according to the...

Страница 10: ... Menu Quick Settings menu allows you to access some options quickly This menu includes Power Save Mode Picture Mode Equalizer Settings Favourites and Sleep Timer options Press Q MENU button on the remote control to view quick menu See the following chapters for the details of the listed features Media Playback via USB Input You can connect a USB hard disk drive or USB memory stick to your TV by us...

Страница 11: ...Press MENU button to view main menu Select Channel List item by using Left or Right button Press OK to view menu contents Select Edit Channel List to manage all stored channels Use Up or Down and OK buttons to select Edit Channel List Press Up or Down button to select the channel that will be processed Press Left or Right button to select a function on Channel List menu Use P P buttons to move pag...

Страница 12: ... Cinema Auto Only available in Scart mode with SCART PIN8 high voltage low voltage switching HDMI True Black optional While watching from HDMI source this feature will be visible in the Picture Settings menu You can use this feature to enhance blackness in the picture Film Mode optional Films are recorded at a different number of frames per second to normal television programmes Turn this feature ...

Страница 13: ...gital out audio type Install and Retune Menu Contents Automatic Channel Scan Retune Displays automatic tuning options Digital Aerial Searches and stores aerial DVB T stations Digital Cable Searches and stores cable DVB C stations Analogue Searches and stores analogue stations Digital Aerial Analogue Searches and stores aerial DVB and analogue stations Digital Cable Analogue Searches and stores cab...

Страница 14: ...s Satellite Settings Displays satellite settings Other Settings Displays other setting options of the TV set Menu Timeout Changes timeout duration for menu screens Scan Encrypted When this setting is on search process will locate the encrypted channels as well If it is set as Off encrypted channels will not be located in automatic search or manual search Blue Background Activates or deactivates bl...

Страница 15: ... Standby Search to Off this function will be unavailable To use Standby search please make sure that you select Standby Search as On If the Standby Search is set to On when the TV is in standby mode available broadcasts will be searched If the TV locates any new or missing broadcasts a menu screen will be displayed asking you whether or not to execute these changes Channel list will be updated and...

Страница 16: ... SatcoDX operations using the Satelite Settings On SatcoDX menu there are two options regarding to satcodx feature as in the following You can download or upload satcoDX data In order to perform these functions supported for satcodx feature a USB device must be connected to the TV in the first place You will be able to upload current services and related satellites transponders in TV to a USB devi...

Страница 17: ...a while To avoid this do not leave the screen in still picture mode for extended periods No power If your TV has no power please check the power cord plug is connect to the mains power socket Poor picture 1 Have you selected the correct TV system 2 Is your TV or house aerial located too close to a non earthed audio equipment or neon lights etc 3 Mountains or high buildings can cause double picture...

Страница 18: ... appropriate recycling Notice The sign Pb below the symbol for batteries indicates that this battery contains lead Products Battery PC Typical Display Modes The following table is an illustration of some of the typical video display modes Your TV may not support all resolutions Your TV supports up to 1920x1080 Index Resolution Frequency 1 640x350p 60 Hz 2 640x400p 60 Hz 3 1024x768 60 Hz 4 1280x768...

Страница 19: ...G max WxH 15360x8640 4147200bytes Progressive JPEG max WxH 9600x6400 3840000bytes bmp max WxH 9600x6400 3840000bytes Subtitle sub srt Specifications TV BROADCASTING PAL SECAM B G D K K I I L L DIGITAL RECEPTION DVB T MPEG2 DVB T MPEG4 HD DVB C MPEG2 DVB C MPEG4 HD DVB S S2 MPEG2 DVB S S2 MPEG4 HD RECEIVING CHANNELS VHF BAND I III UHF BAND U HYPERBAND NUMBER OF PRESET CHANNELS 10 000 CHANNEL INDICA...

Страница 20: ...GmbH Vertrieb Vestel Germany GmbH D 85748 Garching bei München 1 Die Marke Telefunken ist eine eingetragene Marke der Telefunken Licenses GmbH 1 Telefunken licensed by Telefunken Licenses GmbH Imported by Vestel Germany GmbH D 85748 Garching Munich ...

Отзывы: