background image

34

34

34

34

34

35

35

35

35

35

DOMO 

DOMO 

DOMO 

DOMO 

DOMO 

Messa

Messa

Messa

Messa

Messag

g

g

g

ges Hands F

es Hands F

es Hands F

es Hands F

es Hands Frrrrree

ee

ee

ee

ee

DOMO 

DOMO 

DOMO 

DOMO 

DOMO 

Messa

Messa

Messa

Messa

Messag

g

g

g

ges Hands F

es Hands F

es Hands F

es Hands F

es Hands Frrrrree

ee

ee

ee

ee

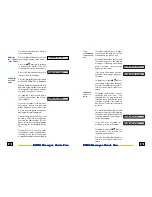
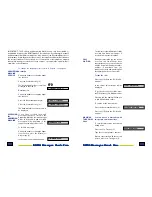
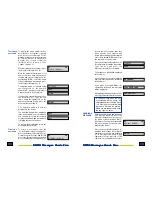
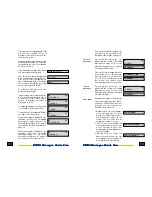
of the viewer (e.g. 1 of 4). Once you

have typed over 160 characters, a

double envelope will also be displayed

in the main part of viewer. The

assignment of characters and

symbols on the keyboard are as

follows -

Key 1: 

1 . - > 1 i

Key 7: 

P Q R S 7

Key 2: 

A B C 2 “ Ç

Key 8: 

T U V 8 ? ü

Key 3: 

D E F 3 $

Key 9: 

W X Y Z 9 ¿

Key 4: 

G H I 4 %

Key *: 

 * + ; ) ( •

Key 5: 

J K L 5 &

Key 0: 

@ _ , ’ / o

Key 6: 

M N Ñ 0 6

Key #: 

(Space) # : = <

You can change between uppercase

and lowercase (and vice versa) by

pressing the R/A-a key (8).

If correct a mistake, press the Borrar

key (17), which will delete the last

entered character.

If a message cannot be sent

immediately, it will be stored as

indicated in the viewer by a flashing

envelope 

*

.

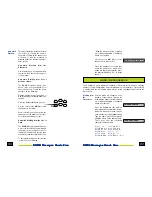
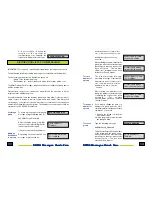
The DOMO Hands Free Messages

telephone allows you to send text

messages (SMT), e-mail and faxes.

Once you have typed a message, or

modified an existing one, pressing

Mensajes/Aceptar key (3) will allow

you to select the despatch format for

the message.

Text Messaging (SMT) is the default

option with E-MAIL and FAX being

accessed by using the 

p

 and 

q

 keys

(20). The following instructions details

how to proceed for each of these

options.

1. - To send a Text Message (SMT)

When this message is displayed in the

viewer -

Choosing
the despatch
format
(Message,
E-Mail or
Fax)

Press the Mensajes/Aceptar key (3).

The user’s telephone number will be

requested. Type the number using the

numeric keyboard (7) or select it from

the Phone Book by pressing the

Agenda key (9). Press the Mensajes/

Aceptar key (3) again.

Next you will be asked (optionally) to

type the user’s name (for purposes of

creating a Private Message). Press the

Mensajes/Aceptar key (3) anyway.

Next the destination extension will be

requested (optional - if there is more

than one extension on the telephone

number). Press the Mensajes/ Aceptar

key (3) anyway. The message will be

displayed in the viewer.

To complete despatch of the

message, press the Mensajes/

Aceptar key (3). Otherwise, press the

cursor keys 

p

 and 

q

 (20) until an M

is displayed.

Press the Mensajes/Aceptar key (3)

and use the cursor keys 

p

 and 

q

 (20)

to choose between the options to

keep or erase. Press the Mensajes/

Aceptar key (3) to confirm the

selected option.

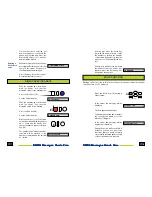
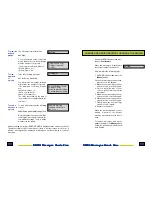
2. - To send an E-mail

When the E-mail option is displayed

in the viewer, press the Mensajes/

Aceptar key (3). Type the email

address and press the Mensajes/

Aceptar key (3) again.

This message will be displayed -

To send the E-mail, press the

Mensajes/Aceptar key (3) and this

message will be displayed -

If you decide not to send the e-mail,

press the cursor keys 

p

 and 

q

 (20)

until this message is displayed -

ç        è

ENVIAR MENSAJE

ç        è

ENVIAR MENSAJE

DESTINATARIO

¿NOMBRE?

¿EXTENSION?

ENVIANDO

ENVIAR: NO

DESTINATARIO

ENVIANDO

ç        è

ENVIAR: SI

ç        è

ENVIAR: E-MAIL

ç        è

ENVIAR: NO

ç        è

ENVIAR: SI

Содержание DOMO

Страница 1: ...USER MANUAL Ver 3 ...

Страница 2: ...e SMT 28 Changing the Extension Number 29 Private Mail 31 Sending a Message 33 Receiving Messages 37 Reading Messages 37 DISTRIBUTION LISTS FOR MESSAGING 40 CHANGE ANSWERING SERVICE LANGUAGE TO ENGLISH 43 TROUBLESHOOTING 44 MAINTENANCE 45 TECHNICALSPECIFICATIONS 45 GUARANTEE CERTIFICATE 46 CONDITIONS OF GUARANTEE 47 Manual Credits and Copyright 48 1 Viewer 2 Key Answering machine 3 Key Messages Ac...

Страница 3: ...ng Calls Insertion of pauses while dialling Viewer window with three lines of information Shortcuts to the Telefonica s Supplementary Services Call Waiting Three Way Calls Call Diversion and Answering Machine Service Text Messaging SMT sending receiving and editing text messages SMT Identification of incoming call numbers Indicator light showing New Calls Text Messages SMT and messages stored in t...

Страница 4: ...shown in the figure Connection of cord to the handset Connecting the telephone line Assembly of base stand Assembly of hand piece So that the handset stays in place when the apparatus is hung on a wall it is necessary to take remove and rotate the piece of assembly as shown in the figure TELEPHONE SETTINGS Once connected to the telephone line you may need to change phone settings to suit your own ...

Страница 5: ...er if you have the caller Identification service enabled when receiving a call the hour and date display will be adjusted automatically Adjusting the contrast of the viewer Setting the hour and dates This Menu option lets you activate or deactivate the beep tone which sounds when you press a key Press the Marcar Menú key 21 until the viewer shows one of the following messages If the beep has alrea...

Страница 6: ...ivate the hands free function Wait for the dialling tone and then press the keys for the required telephone number As you type the numbers will be displayed in the viewer Dialling with the hands free function disabled Press the keys of required telephone number which will be shown in the viewer as they are typed To clear any number incorrectly typed press the Borrar key 17 To pick up the handset o...

Страница 7: ...ogical order To initiate this list make sure that you have ordered the caller Identification Service To automatically ring a number from the stored list do the following Automatic Dialling With the handset down or picked up or with the disabled or activated hands free function Use the cursors pq 20 to select the number to wish to call Once the number is selected put down the handset or activate th...

Страница 8: ...n the Phonebook Press the Grabar key l0 and in the viewer this message will be displayed Type the name and press the Grabar key l0 The telephone will store the name and number Recording of the rellamada in the calendar Recording of the rellamada in the calendar If the stored number has a name associated with it you can modify it by typing it again To conclude it press Grabar key l0 Press the Agend...

Страница 9: ...ice required and with the handset up or down and the hands free function activated press the Green key 18 The number of the Telefónica service required will be prefixed to the number you dialled and the call will be started MUTE FUNCTION You can also press the Green key 18 with the handset down to dial the number to pick up the handset or to activate the hands free function and to press the Marcar...

Страница 10: ...llowing seconds If while maintaining a conversation using the handset you want to continue the same one in hands free mode Activation of hands free mode Changing hands free mode during conversation press the key 11 The handset is disabled and the conversation continues in the hands free mode The viewer will display this message after a few seconds To return to using the handset simply press the ke...

Страница 11: ...The call is made from a public telephone from a different network With the handset picked up and with the hands free function disabled the viewer displays the hour and date the total number of stored calls received and outgoing the number of new received calls from the last time it was inspected and the number of received calls that have been repeated Information in the viewer when the indicator l...

Страница 12: ...sabled press the Borrar key 17 If call entries are not currently being viewed and are not displayed in the viewer confirmation is requested with the key If you have not viewed all the received calls you won t be able to erase them If you want to cancel the operation press the Desactivar Salir key 4 Deleting Calls SUPPLEMENTARY SERVICES The procedure is described in Using the Phonebook starting on ...

Страница 13: ...re stored in the Answering Machine the indicator light will be lit in the viewer and a suitable message will be displayed if the telephone network provides one To listen to messages Pick up the handset or using the hands free function press the Mensajes Aceptar key 3 In the viewer this message appears ANSWERING MACHINE SERVICE ACCESSING the ANSWERING MACHINE The Indicator Light will switch off aft...

Страница 14: ...phones are connected to the same line to text messages each extension must be given a different extension number which must be between 1 and 9 As standard the DOMO Hands Free Messages telephone is programmed at the factory with the extension as 1 If it is necessary to change this number see the section on Change of Extension on page 29 PLEASE NOTE The relative information regarding the extension n...

Страница 15: ...to activation of the service an error message see page 39 will be displayed for several seconds You will then be able to retry the operation by pressing the Mensajes Aceptar key 3 To ACTIVATE or DISABLE the Text Messaging Service SMT If at any time before confirming the activation detailed below you want to stop the process press the Desactivar Salir key 4 If you want to connect your DOMO Free Han...

Страница 16: ...al seconds You will be able to retry the operation by pressing the Mensajes Aceptar key 3 The DOMO Hands Free Messages telephone allows you to receive and send up to 5 private mail messages tothosewhohaveaccesstosuchmail and who have been defined using the following parameters Name Identification of a user with private mail This parameter can consist of 1 2 3 or 4 characters Pin Number This allows...

Страница 17: ...ame from the Correo Privado menu see page 31 press the Mensajes Aceptar key 3 Using the cursor keys p and q 20 access the Borrar Usuario option and press the Mensajes Aceptar key 3 To modify a user name To delete a user name Access the list of names that they have already been created and stored Move through the list using the cursor keys p and q 20 and select the user name to be deleted Press the...

Страница 18: ...hese options 1 To send a Text Message SMT When this message is displayed in the viewer Choosing the despatch format Message E Mail or Fax Press the Mensajes Aceptar key 3 The user s telephone number will be requested Type the number using the numeric keyboard 7 or select it from the Phone Book by pressing the Agenda key 9 Press the Mensajes Aceptar key 3 again Next you will be asked optionally to ...

Страница 19: ... agreement doesn t exist with the operator the extension doesn t exist etc At any time during the above process you can cancel the operation by pressing the Desactivar Salir key 4 When a text message is about to be received the telephone will produce a tone and display this message When the message is received the telephone gives a second tone indicating that the message has been received correctl...

Страница 20: ... indicated in the section on reading Messages page 37 press the Mensajes Aceptar key 3 and you can modify the message content Press the Mensajes Aceptar key 3 and proceed as indicated in the Despatch of Messages on page 34 On seeing this message as indicated in the section on Reading Messages on page 37 press the Mensajes Aceptar key 3 and the message will be deleted From the list of messages that...

Страница 21: ...me After creating the group you will be sent a text message stating that the request has been accepted It has been created Group Name Depending on the destination the message format should be Creating a group Adding a Destination to a group AI Group_Name Telephone_No No_of_terminal Security_Code AEI Group_Name direction_ Email After including the new member in the group you will receive a text mes...

Страница 22: ...ction of this manual If there is another reason for the error a different message will be displayed allowing you another attempt to send the message To view the defined groups To view members of a group To send a message to a group CHANGE ANSWERING SERVICE LANGUAGE TO ENGLISH Pick up the DOMO handset and press the key Contestador When this message is displayed in the viewer replace the handset Now...

Страница 23: ...new one you must first delete one or more of those already created Reinstall and connect the phone directly in the PTR If the problem persists contact Telefónica The redirection was not really activated and a call was received Activate the deviation again Makesurethecordtohandsetiscorrectlyconnected Modify the contrast Change the volume Check that you have activated the Identification of Calls ser...

Страница 24: ...ship for the Sale of Goods of use the right to repair substitution reduction of the price or change of contract It will be necessary for the user to provide an invoice or delivery note The user will be informed how the substitution of the DOMO will take place to conform with legal requirements Telephone 1002 or 1004 The substitution for a DOMO which has been subject to a mishap is not included in ...

Страница 25: ...rinted versions including a double size version for the sight impaired John H Sumner Apartado de Correos 195 Alora 29500 Malaga johnhsumner yahoo co uk This manual was written and typeset by John H Sumner and is based on the Spanish version of the manual Although it has been checked for accuracy by TelefonicaInEnglish no responsibility can be taken for options or services not operating as expected...

Отзывы: