


4
GB
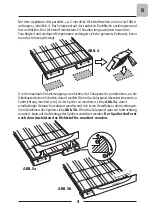
Use the special applicator to apply three parallel beads of glue, approx. 3 mm thick, on
the four feet, see
Fig. 4
, then position the solar panel on the clean roof surface and
press down firmly. Allow the glue to set for at least 24 hours (high humidity levels and
low temperatures will extend the time requirement) before moving the vehicle.
1
2
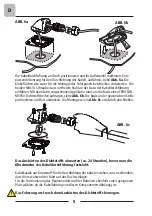
To be able to obtain the strongest power generation, ensure that the solar panel position
is not shadowed by existing structures. When the solar panel is installed in line with the
travelling direction, the spoiler (see
Fig. 5a
) should be installed, to reduce wind noise
and prevent any objects becoming caught in it. To remove the spoiler, check
Fig.5b
.
If the solar panel is installed transversally to the travelling direction, the spoiler doesn't
have to be fitted.
The spoiler should only be installed after the glue has set.
FIG. 4
FIG. 5a
FIG. 5b
Содержание TSP 100W
Страница 1: ...Pannello Solare TELECOTSP 100W Istruzioni di Montaggio...
Страница 7: ...6 IT...
Страница 8: ...Solarpanel TELECO TSP 100W Montageanleitung...
Страница 14: ...6 D...
Страница 15: ...Panneau Solaire TELECOTSP 100W Instructions pour l installation...
Страница 21: ...6 F...
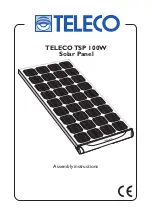
Страница 22: ...TELECOTSP 100W Solar Panel Assembly instructions...
Страница 28: ...6 GB...
Страница 29: ...Zonnepaneel TELECO TSP 100W Montageaanwijzingen...
Страница 35: ...6 NL...


