


GW-483S Installation Guide
Rev. B
WARNING
Insert user cables directly into the user’s house.
Use Min 26AWG for local phone lines cables.
Do not run cables beyond 140 feet outdoors!
Cables may NOT be connected to Telecommunication Network Voltages.
Do not connect any port or cable from/to the public telephone network!
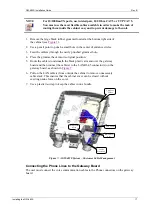
Locking the Gateway Board
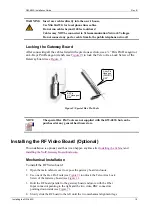
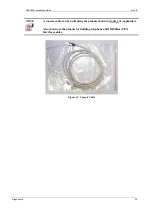
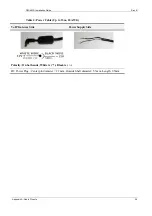
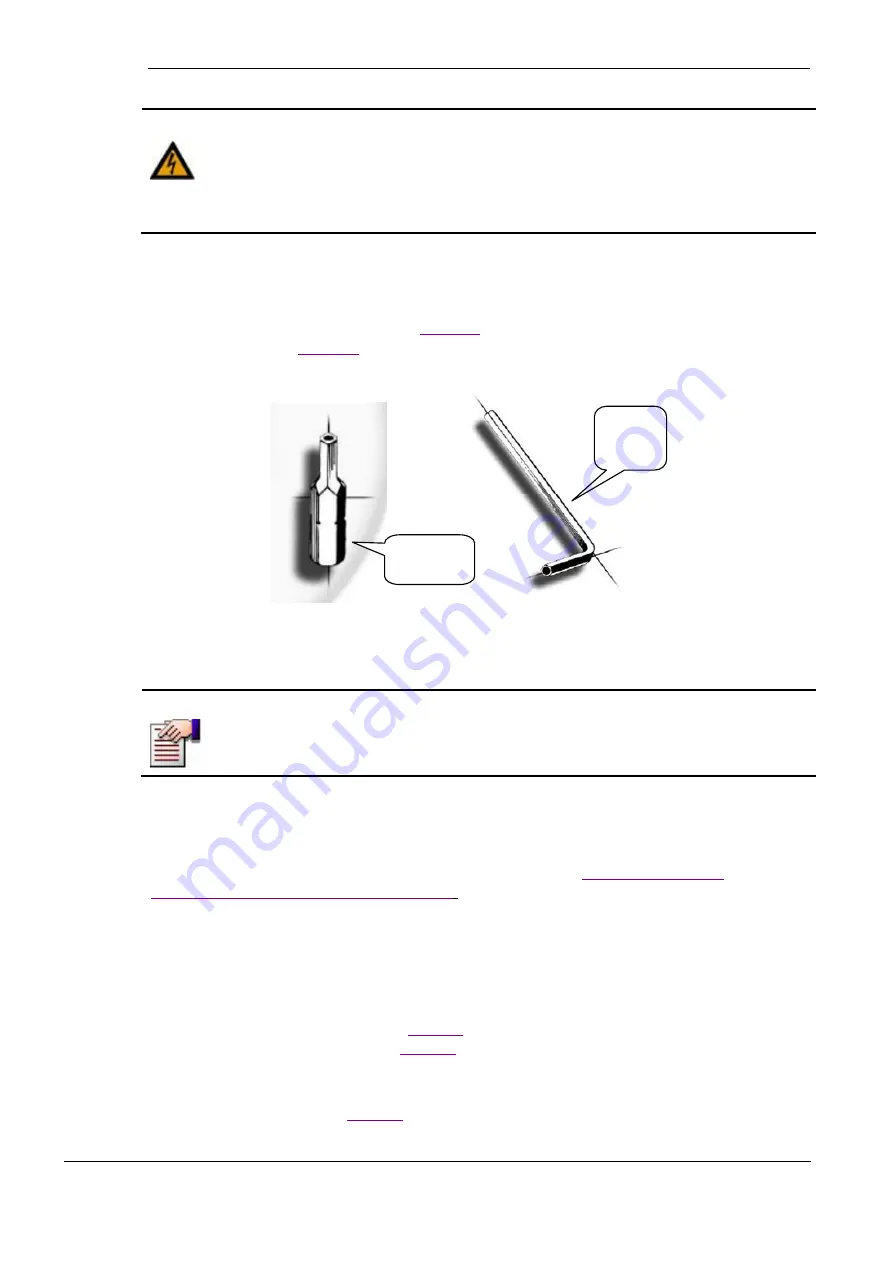
After connecting all the cables listed in the previous section, use a ¼” Bits Pin Hexagon or
an L-Keys Pin Hexagon wrench (see
) to lock the Telco Area Lock Screw of the
Bit Pin
(¼” Hexagon)
5/32”
L-key Pin
Hexagon
(DIN 911)
5/32”
Figure 9: Special Hex Pin Tools
NOTE
The special Hex Pin Tools are not supplied with the GW-483S but can be
purchased at any general hardware store.
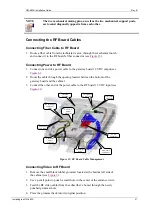
Installing the RF Video Board (Optional)
This installation is optional, and thus it can happen anytime after
Installing the VoIP Gateway Board Enclosure
Mechanical Installation
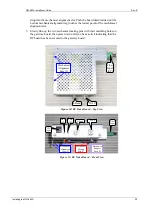
To install the RF Video board:
1.
Open the main cabinet cover to expose the gateway board enclosure.
2.
Use one of the Hex Pin Tools (see
) to unlock the Telco Area Lock
Screw of the Gateway board (see
3.
Hold the RF board parallel to the gateway board enclosure with the Fiber
Input connector pointing to the right and the two video BNC connectors
pointing downwards (see
4.
Slowly slide the RF board to the left until the two mechanical alignment legs
Installing the GW-483S
19


