


Iris Packet Broker (IPB) 7.13.2
30
Hardware Installation and Maintenance Guide
3
IPB Installation
Rev. 001-140228
Some pages on the IPB System Management Web GUI are not accessible via IrisView: Access Control,
Logout, and the Software Update option on System Software page. You can only access these pages
when directly accessing the IPB device.
The main System Status page appears (
). This page consists of two panes:
Menu Pane, which allows selection of other pages, such as System settings and
Port settings.
Port Status pane, which displays a summary of configured ports.
Refer to the
IPB Software User Guide
for details about configuring the IPB using this
GUI.
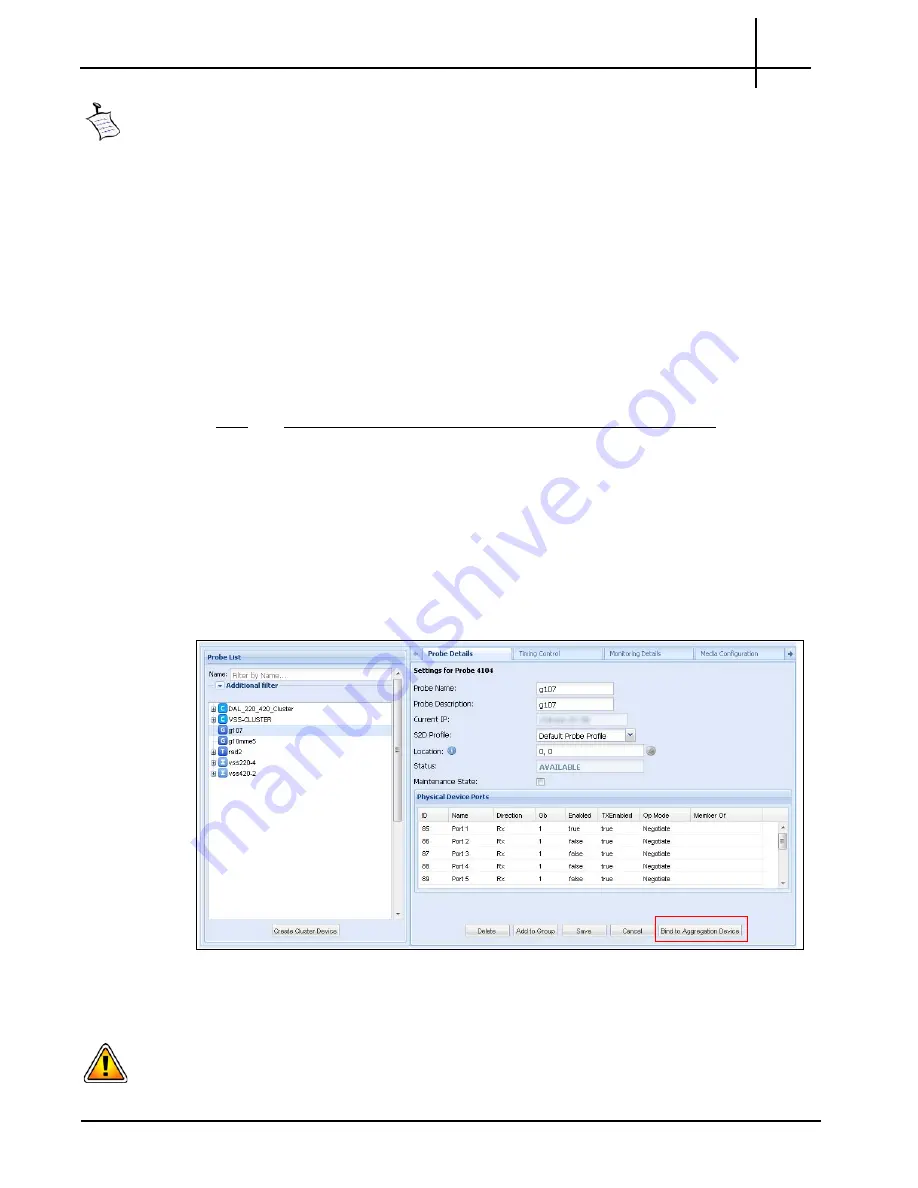
Bind G10s to IPB420 Devices
For first time setup, it is recommended you follow these steps to ensure optimum provisioning of the IPB.
Step
Action
1.
Bind the G10 probe to the IPB. On the Probes tab, select a G10 probe in the Probe List
pane.
2.
Click the
Bind to Aggregation Device
button in the Probe Details tab (
).
This button is only visible if at least one IPB device has connected to the Iris server. A
message appears warning you of the following consequences:
Any currently configured physical links on the G10 probe will be deleted
Loss of data will occur on G10 probe and IPB.
Once binding starts, the changes cannot be reverted.
Figure 3.12 - IrisView Admin Probe Management Tab (IPB)
3.
Select the IPB to associate with the G10 and then click OK. The G10 will be moved
under the IPB device in the Probe List pane.
If you need to unbind a G10 from an IPB420, first ensure the G10 is not currently being upgraded
during execution of a software campaign. Refer to
for details.
Tektronix Communications | For Licensed Users | Unauthorized Duplication and Distribution Prohibited


