background image

Page 25                                                                                                                                                                                                                                                                                                   Page 26  

Note:  Pressing the DSC key at any time aborts the current function and selects 
the Send Call Main Menu


1. 

Press


DSC

 key. 

The Send Call Menu appears in the text area of the display. 

 
Rotate the 

Channel/Select

 knob to select “GROUP” Press the 

Channel/Select

 knob to enter 

The Send Call Menu reconfigures to display 

the Call Type selection menu. 


2. 

Select “GROUP”.  Press the 

Channel/Select

 knob to enter.

The Send Call 

Menu reconfigures to display the select “CH”. 

u  

3. 

Rotate the 

Channel/Select

 knob to select the take channel  Press the 

Channel/Select

 knob to enter.

 The Send Call Menu reconfigures to display 

to appear, the default call type is ROUTING 

l  
 

4. 

Press the 

Channel/Select

 knob to send a GROUP CALL, then press ”PTT” 

to communicate.  


5.3.4.1  Sending an Individual Call ship (MMSI not in Buddy List) 

Individual calls are initiated with the following procedure.  

Note: Pressing the DSC key at any time aborts the current function and selects 
the Send Call Main Menu.


1. 

Press 

DSC

 key. 

The Send Call Menu appears in the text area of the display. 

2. 

Rotate the 

Channel/Select

 knob to select “INDIVIDUAL”. Push the 

Channel/Select

 knob to enter. 

The Send Call Menu reconfigures to display the call shore call ship selection 

menu .rotate the 

Channel/Select

 knob to select call ship, push the 

Channel/Select

 knob to select to call ship .the“ MUNUAL MMSI and 

“BUDDY LIST ”appears on the screen. select the “MUNUAL MMSI push the 

Channel/Select

 knob to enter the MMSI Enter screen


On the MMSI Enter screen, rotate the 

Channel/Select

 knob to change the 

individual digits in the MMSI number. Once each digit is set, press 

3. 

the 

Channel/Select

 knob to enter the digit and advance to the next.  At the 

end the MMSI number, the Text Area of the display reconfigures to show 

the “

select ch

 “ menu. 

The characters available in the digit string are 0-9 and "<" (back arrow).  

Selecting the "<" and pushing the 

Channel/Select

 knob selects the previous 

character in the MMSI for editing. 

 (

Only in the case of a call to a ship, it is permitted to enter a talk channel from a 

ific list of intership channels; a call to a coast station, the coast station will 
specify the channel to talk on in its acknowledgement.)


4. 

Rotate the 

Channel/Select

 knob to select the talk channel.  Push the 

Channel/Select

 knob to enter the channel


and proceed to the MMSI Enter 

screen.  Otherwise, go to step 5. 


5. 

From the Confirmation Screen, push the 

Channel/Select

 knob to send the 

call. 

The Text Area displays the CALLING {MMSI} message while the call is 
made. 

If the call is acknowledged, the text area momentarily displays the {MMSI} 
ACKNOWLEDGED message and the radio tunes the Talk Channel and 

returns to normal VHF operation. 
If the call is NOT acknowledged, the Try Again Confirmation menu is 

displayed. See 5.3.3.1.1. 


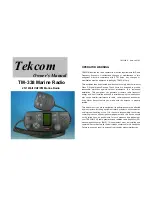
Содержание TM-338

Страница 1: ...installed and used in accordance with the instructions may cause harmful interference to radio communications and human body Never transmit before you make sure the antenna is properly located This d...

Страница 2: ...hannel Selection 15 Transmission and Reception 16 Modes Description 16 Function Description 17 Position Indication 18 DIGITAL SELECTIVE CALLING 19 Introduction 19 DSC Menu Navigation 19 Sending a DSC...

Страница 3: ...otary channel selector and rotary squelch adjustable knob give you more convenient operation of the radio l Outstanding performance of waterproof complying with Japanese Industry Standard level 7 l 23...

Страница 4: ...press and release toggles between USA and INT band WX Press and release to select Weather channel mode When in WX mode the radio continually monitors the active weather channel for the NOAA weather a...

Страница 5: ...elease the DISTRESS button to send a DSC Distress call MMSI and Nature of Distress are included in the signal Position and time are included in the broadcast if appropriate NMEA data is available See...

Страница 6: ...toggle between channels 16 and 9 Hi Low Press and release HI LO button to toggle between 23 Watt power output and 1 watt output HI or LO icon appears on LCD display to indicate the setting PTT Push t...

Страница 7: ...enough from any compass like devices to avoid any interference caused by the speaker magnet in your radio during their operation l Provides accessibility to the front panel controls l Allows connectio...

Страница 8: ...ing surface using the supplied bolts spring washers plain washers and nuts L Caution if you can not reach behind the mounting surface to attach the nut on the bolts use the supplied self tapping screw...

Страница 9: ......

Страница 10: ...ed into the radio 3 Channel 16 9 Channel 16 9 is the distress and safety channel It is used for establishing initial contact with another station and for emergency communications Channel 16 is monitor...

Страница 11: ...weather channels are scanned When in DSC Mode scan has no function and an error tone is produced Pressing and holding SCAN button for greater than 1 second toggles the Scan Function between normal and...

Страница 12: ...to encourage manual input of the position DIGITAL SELECTIVE CALLING 5 1 INTRODUCTION 5 1 1 DIGITAL SELECTIVE CALLING DSC Digital Selective Calling is a semi automated method of establishing a radio ca...

Страница 13: ...continuous tone until acknowledgement received or press any key is pressed to terminate the acoustic alarm During the distress call sequence the Distress Cancellation menu is present in the Text Area...

Страница 14: ...omatically set to Channel 16 and the Text Area of the display reconfigures to show the confirmation screen 4 Press the Channel Select knob to confirm the sending or press 16 key to quit 5 rotate the c...

Страница 15: ...hip push the Channel Select knob to select to call ship the MUNUAL MMSI and BUDDY LIST appears on the screen select the MUNUAL MMSI push the Channel Select knob to enter the MMSI Enter screen On the M...

Страница 16: ...ect the talk channel Press the Channel Select knob to enter call ship send menu item Only in the case of a call to a ship it is permitted to enter a talk channel it is permitted to enter a talk channe...

Страница 17: ...ithin the signal it is displayed in the Text Area of the LCD 5 4 3 ALL SHIPS CALL When an All Ships Call is received the Base Station automatically tunes to the Channel 16 and the Emergency Alarm Tone...

Страница 18: ...d Backlight Selects the display backlight setting either HIGH LOW or OFF setting Note the display backlight is always on unless set to OFF with this function Buddy List Selects the Buddy List Entry ro...

Страница 19: ...C key to display the Set Up menu Rotate the Channel Select knob to select Buddy List Press the Channel Select knob to select Buddy List for enter The display reconfigures to show the Buddy List entry...

Страница 20: ...b to enter The display reconfigures to show the Buddy List 2 From the Buddy List rotate Channel Select knob to select the name to remove PressChannel Select to enter The Confirmation Menu appears 3 Fr...

Страница 21: ...turn to the Set Up Menu 6 10 ALARM ADJUSTMENT 1 Press and holdDSC key to display the Set Up menu 2 Rotate the Channel Select knob to select KEY BEEP Press the Channel Select knob to select Key Beep fo...

Страница 22: ...string are 0 9 and back arrow Selecting the and pressing the Channel Select knob selects the previous character in the MMSI for editing 6 From the Confirmation Menu Rotate the Channel select knob to s...

Страница 23: ...select YES and press Channel Select to reset the category and return to the Set Up Main Menu Select NO to abort function and return to the Set Up Main Menu All features are returned to factor y settin...

Страница 24: ...k the connection to the base station l Check the volume control 2 No sound comes from the speaker l Set VOL to a suitable level l Set squelch to the threshold point 3 Transmitting is impossible or hig...

Страница 25: ...D 28 157 400 162 000 D 28 157 400 162 000 D 60 60 156 025 160 625 D 61A 156 075 156 075 S 61 156 075 160 675 D 62 62 156 125 160 725 D 63A 156 175 156 175 S 63 156 175 160 775 D 64A 156 225 156 225 S...

Отзывы: