


7
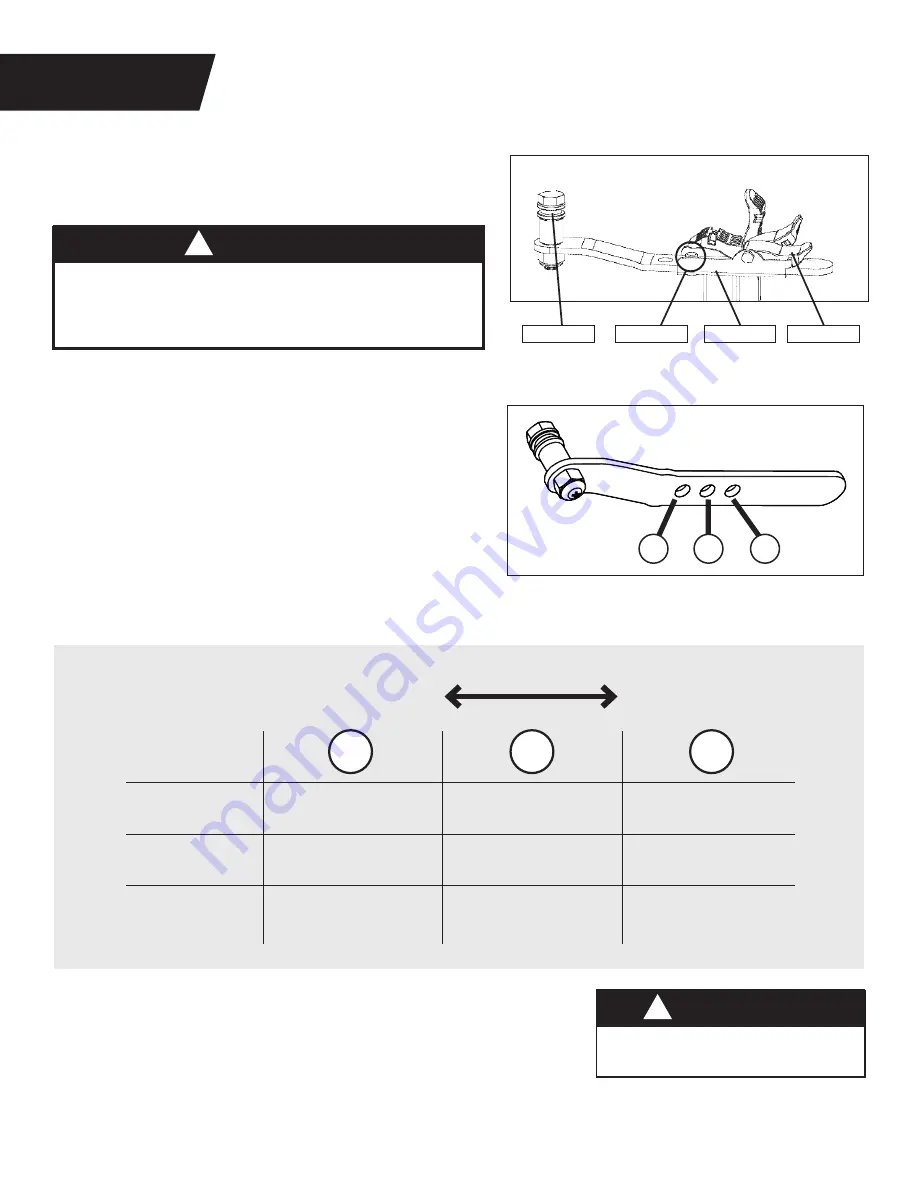
UNLOCKED
Bracket Pin
Cam Lock
Pivot Pin
Bracket
LOCKED
FIGURE 4
FIGURE 4
S T E P 3
A S S E M B L E R O L L E R H I N G E S
T O TA B L E B E D
Figure 7
NEVER disassemble the Roller Hinge Pivot Pin.
ALWAYS insert the 3-Hole Roller Hinge (with the Pivot Pin on top
and facing out) in the same direction as the arrow label located
inside of the Cam Lock for proper assembly.
WARNING
!
Figure 7:
Familiarize yourself with the 3-Hole Roller
Hinge and Cam Lock terms.
Figure 8:
The Roller Hinges control the
responsiveness or rate of rotation of the inversion
table. There are three holes; the hole selection
depends both on your body weight and the
rotational responsiveness you desire. The “A” setting
is the top hole closest to the pivot pin, “B” is the
middle hole, and “C” is the bottom hole. For users
just learning to use the inversion table, start in the
“C” hole setting.
A
B
C
More Responsive
Less Responsive
80-120 lb
(36-54 kg)
120-220 lb
(54-100 kg)
220-300 lb
(100-136 kg)
Partial
Full
-
Full
-
Partial
-
Full
Partial
A
B
C
Figure 8
Partial: 0-60°. A less responsive setting for users who prefer
partial inversion.
Full: 0-90°. A more responsive setting for users who want the
option to lock out in full inversion.
Your Roller Hinge setting and balance may vary depending on your
bodyweight distribution. Refer to User Guide for troubleshooting.
Do not use Setting A for
users over 220 lb (100 kg).
WARNING
!
Содержание EP-560
Страница 24: ...This page intentionally left blank 22 ...
Страница 27: ......


