4
①
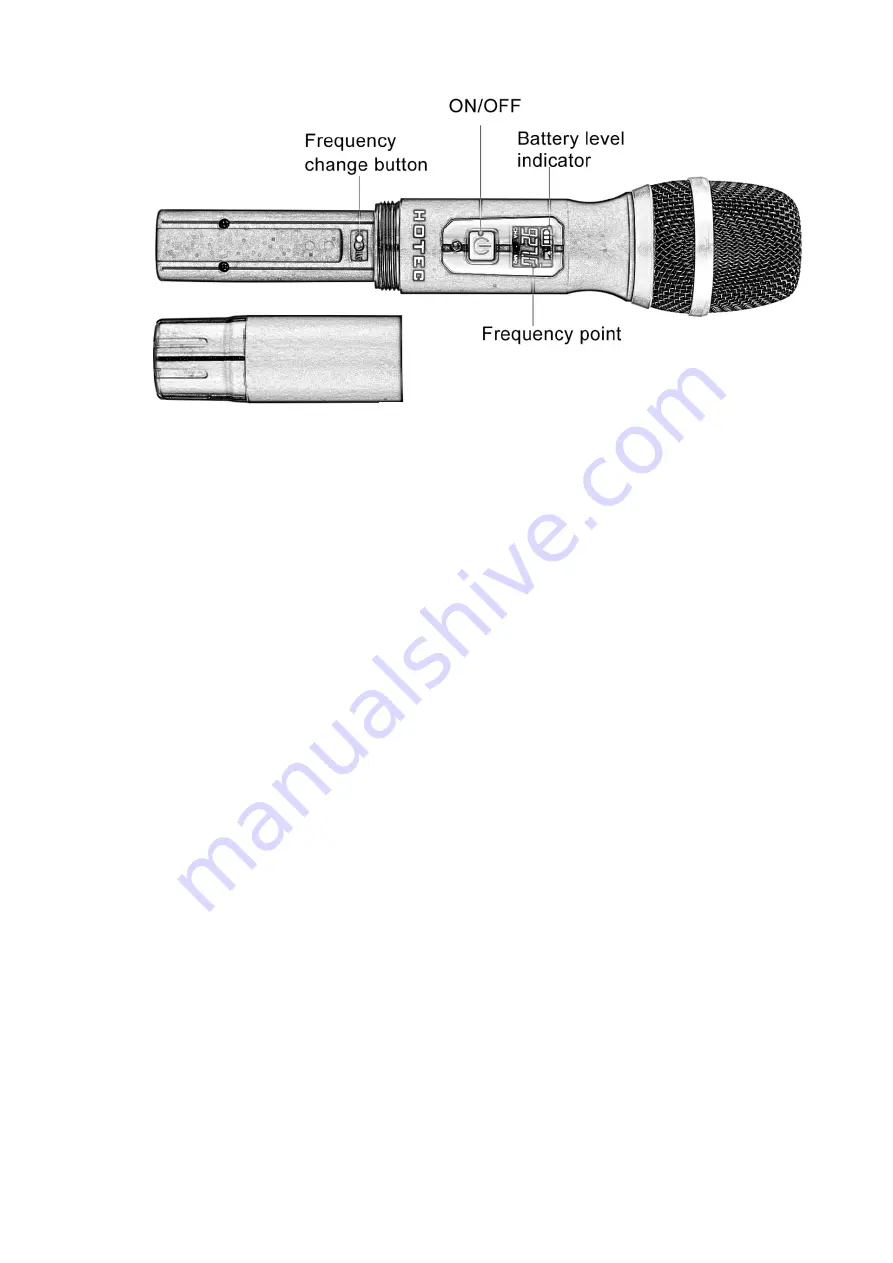
ON/FF: short press this button to power on / off the hand held microphone
②
Battery level indicator: This indicator tells you how much battery is left.
Change the battery when the battery level is low.
③
Frequency point: this shows what frequency the hand held mic works.
Make sure each mic is working on different frequency.
④
Frequency change button: You can find this button when open the battery
compartment. Short press this button to change the frequency in case there
is interference. Each press adds 0.4MHz.
CONNECTION DIAGRAM
1. Use this H-U26 to amplify your voice in live performances
Make sure your speaker, mixer or PA/amplifier has 1/4” microphone input
and microphone volume control.
Step 1: Plug the mini Receiver into the 1/4” microphone input of your audio
device like speaker, mixer and amplifier.
Step 2: Turn the microphone volume to minimum before plug in the mini
Receiver to avoid feedback or harsh loop back.
Step 3: Power on the microphone and Receiver. When you see the RF/AF
indicator at the right color, you are ready to use. If not, follow the trouble
shoot steps to pair the Receiver and microphone manually.
Step 4: Change the microphone volume from your audio device.
Step 5: If there is any interference, short press the hi-lo button to change
the frequency.
Hand held Microphone
Hi/lo


