


OSD Menu
4. TIME Menu
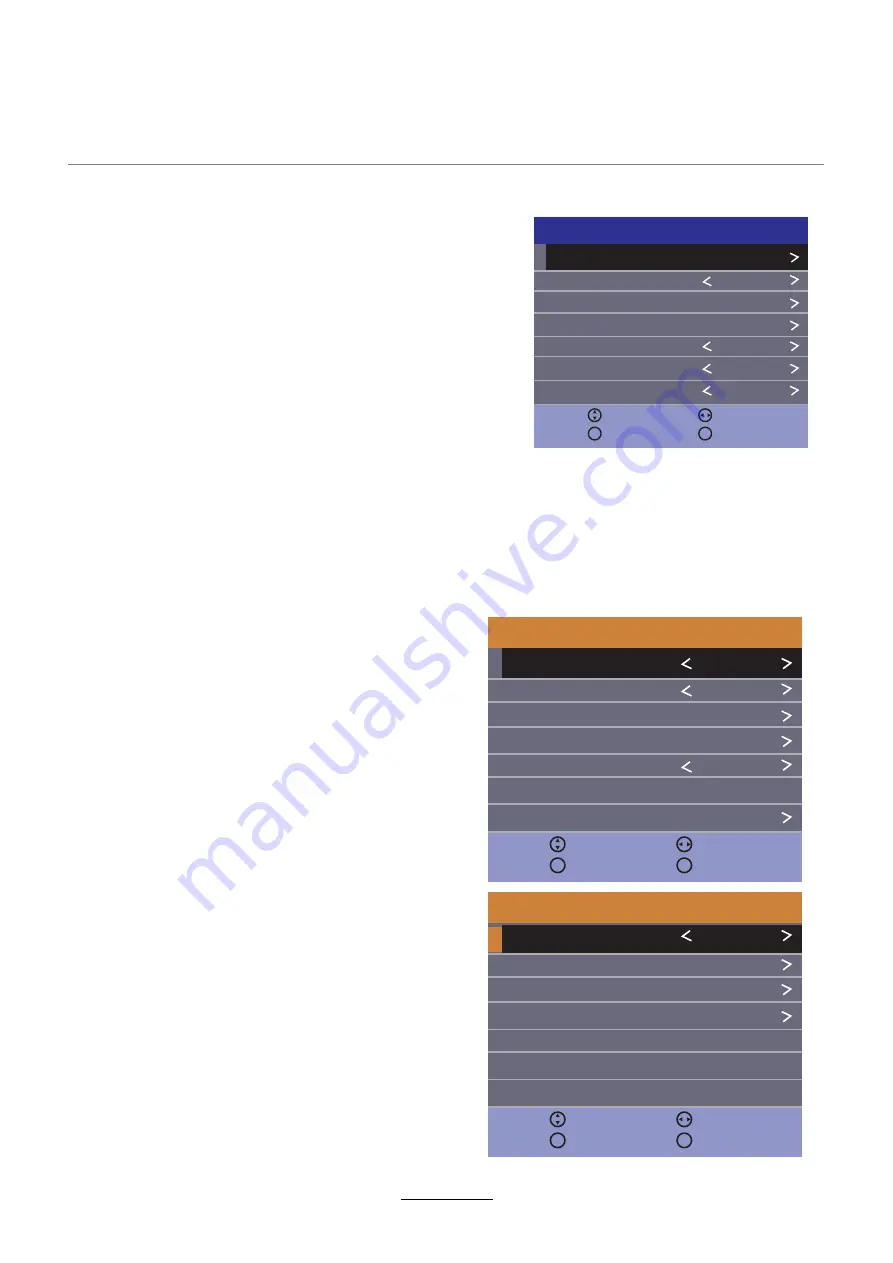
1
Clock:
Display the time.
Time Zone:
Allows you to select the time zone.
Off Time:
Press OK button to enter the submenu,
you could set the time when the TV set will be turned
off automatically, you could also set the frequency.
On Time:
Press OK button to enter the submenu, you
could set the time when the TV set will be turned on
automatically, you could also set the frequency,
volume and program.
Sleep Timer:
Allows you to setup the sleep timer
among: 10min, 20min, 30min, 60min,
90min,120min,180min, 240min and off.
Auto Standby:
According to the latest ERP regulation, this unit will
switch off itself automatically if no change in status
within the last 4 hours of operation.
OSD Timer:
Adjust in seconds how long you want to
displayed the on-screen menu. Select between 5, 10,
15, 20, 25, 30 or Never.
Clock
Time Zone
Off Time
On Time
Sleep Timer
Auto Standby
OSD Timer
-- -- -- --
Canary GMT
Off
3 H
15
Move
Adjust
Back
MENU
Exit
TIME
EXIT
Language:
Allows you to select menu language.
TT Language:
Setting the character set for teletext.
Audio Language (can be selected in DTV
mode):
Allows you to select first and second
audio language.
Subtitle Language (can be selected in DTV
mode):
Allows you to select first and
Hearing Impaired:
Allows you to select hearing
impaired.
second
subtitle language.
Aspect Ratio:
Setting for the aspect ratio (16: 9,
4: 3, Auto)
PVR File System:
Setup the PVR file system.
Changes the background when there
Filst Time Installation:
Blue Screen:
Display the First Time
Installation menu.
Reset:
If the factory settings of the device
restores. In this process, you will lose all
settings of the device.
Software Update(USB):
Starts the software
update via a USB storage.
5.SETUP Menu
Language
TT Language
Audio Language
Subtitle Language
Aspect Ratio
English
West
16:9
Move
Adjust
Back
MENU
Exit
SETUP
EXIT
Hearing Impaired
Off
PVR File System
Reset
Software Update (USB)
Move
Adjust
Back
MENU
Exit
SETUP
EXIT
First Time Installation
Blue Screen
Off
is no input between clear and a blue background.
Содержание LED19IHRDH
Страница 1: ...INSTRUCTION MANUAL LED19IHRDH LED24IFRDH...
Страница 2: ......
Страница 4: ...Preface Safety Information Safety Precautions TECO LED LCD colour television 4...
Страница 5: ...Safety Information Safety Precautions 5 This LED LCD television is for indoor use only...
Страница 6: ...Safety Information Safety Precautions 6...
Страница 26: ...26 Troubleshooting...
Страница 28: ......
Страница 30: ......
Страница 32: ...www teco com au IBI PV1...


