

TECNO RS SEATING SYSTEM
WALL MOUNT INSTALLATION INSTRUCTIONS
page 2 of 2 | Rev. 05-05-16
© 2016 Forms+Surfaces® | All dimensions are nominal. Specifications and pricing subject to change without notice. For the most current version of this document, please refer to our website at www.forms-surfaces.com.
T 800.451.0410 | www.forms-surfaces.com
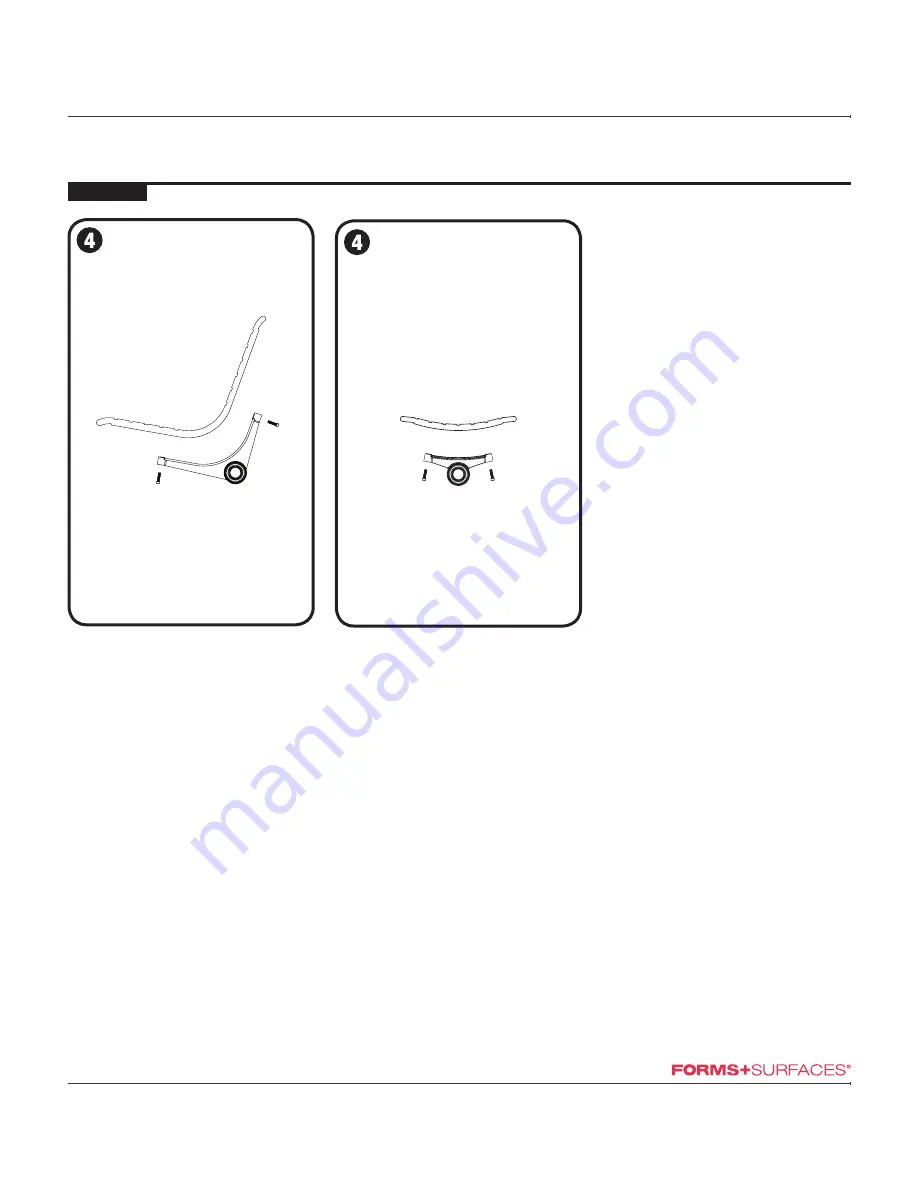
STEP BY STEP
FOR WALL MOUNT CONFIGURATIONS.
For configurations with backed seats
• Position backed seat on seat bracket
ensuring that mounting holes line up.
• Insert M8 x 35 socket head cap screws
(d) using an M8 hex key to secure
backed seat to seat bracket.
• Tighten screws until snug.
NOTE: Forms+Surfaces recommends
applying Loctite
®
or similar thread-
locking adhesive.
For configurations with backless seats
• Position backless seat on seat bracket
ensuring that mounting holes line up.
• Insert M8 x 35 socket head cap screws
(d) using an M8 hex key to secure
backed seat to seat bracket.
• Tighten screws until snug.
NOTE: Forms+Surfaces recommends
applying Loctite
®
or similar thread-
locking adhesive.
d
d
d
d