


1
WS 6502
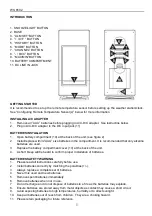
INTRODUCTION
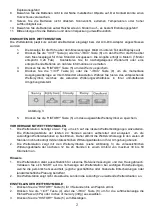
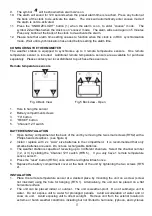
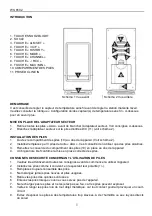
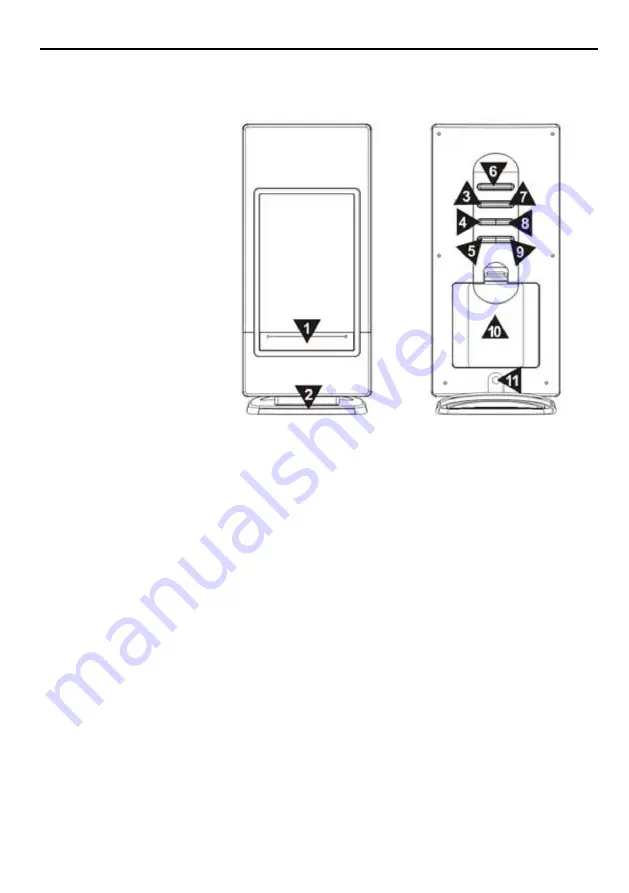
1. SNOOZE/LIGHT BUTTON
2. BASE
3.
”ALM SET” BUTTON
4.
”+ / C/F ” BUTTON
5.
”HISTORY” BUTTON
6.
”MODE” BUTTON
7.
”CHANNEL” BUTTON
8.
”- / RCC” BUTTON
9.
”MAX/MIN” BUTTON
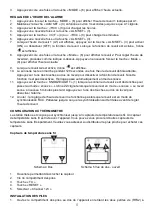
10. BATTERY COMPARTMENT
11. DC LINE IN JACK
Fig. 1 Front View
Fig. 2 Back view
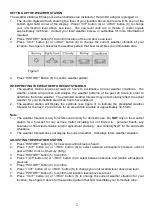
GETTING STARTED
It is recommended to set up the remote temperature sensor before setting up the weather station/clock.
See
”Configuring Remote Temperature Sensor(s)” below for more information.
INSTALLING A/C ADAPTER
1.
Remove all
”AAA” batteries before plugging in A/C-D/C adapter. See instructins below.
2.
Plug in A/C-D/C adapter to the D/C input jack (11)
BATTERIES INSTALLATION
1.
Open battery compartment (10) at the back of the unit. (see figure 2)
2.
Install/replace with 3x
”AAA” size batteries in the compartment. It is recommended that only alkaline
batteries are used.
3.
Replace the battery compartment cover (10) at the back of the unit.
4.
A short bleep will be heard to confirm proper installation of batteries.
BATTERIES SAFETY WARNING
1.
Please read all instructions carefully before use.
2.
Install batteries correctly by matching the polarities (+/-).
3.
Always replace a complete set of batteries.
4.
Never mix used and new batteries.
5.
Remove spent batteries immediately
6.
Remove batteries when not in use.
7.
Do not recharge and do not dispose of batteries in a fire as the batteries may explode.
8.
Ensure batteries are stored away from metal objects as contact may cause a short circuit.
9.
Avoid exposing batteries to high temperatures, humidity or to direct sunlight.
10. Keep all batteries out of reach from children. They are a choking hazard.
11. Please retain packaging for future reference.
Содержание WS 6502
Страница 49: ...7 ...


