Technika TK9PD14 Скачать руководство пользователя страница 3

1

Read these instructions. 
Keep these instructions. 
Heed all warnings. 
Follow all instructions. 
Do not use this apparatus near water. 
Clean only with a slightly damp cloth. 
Do not block any ventilation openings. 
Install  in  accordance  with  the  manufacturer’s 
instructions. 
Do not install or operate near any heat sources such as 
radiators, stoves, or other apparatus that produce heat. 
Unplug this apparatus during lightning storms or when 
unused for long periods of time.
Refer all servicing to qualified service personnel. Servicing 

is  required  when  the  apparatus  has  been  damaged 
in  any  way,  such  as  the  power-supply  cord  or  plug  is 
damaged, liquid has been spilled or objects have fallen 
into the apparatus, the apparatus has been exposed to 
rain or moisture, does not operate normally, or has been 
dropped.

Warning: 

To reduce the risk of fire or electrical shock, do 

not expose this product to rain or moisture. The product 
must not be exposed to dripping and splashing and no 
object filled with liquids such as a vase of flowers should 
be placed on the product.
No  naked  flame  sources    such  as  candles    should  be 
placed on the product.

Caution:

  Changes  or  modifications  not  expressly 

approved  by  the  manufacturer  could  void  the  user’s 
authority to operate this device.
Caution: Usage of controls or adjustments or performance 
of procedures other than those specified herein may result 
in hazardous exposure.

IMPORTANT 

This  equipment  generates,  uses  and  can  radiate  radio 
frequency  energy  and,  if  not  installed  and  used  in 
accordance  with  the  instructions,  may  cause  harmful 
interference to radio communication. However, this is no 
guarantee that interference will not occur in a particular 
installation.  If  this  equipment  does  cause  harmful 
interference to radio or television reception, which can 
be determined by turning the equipment off and on, the 
user is encouraged to try to correct the interference by 
one of the following measures:

Reorient or relocate the receiving antenna.

• 

Increase the separation between the equipment and 

• 

receiver.
Connect  the  equipment  into  an  outlet  on  a 

• 

circuit  different  from  that  to  which  the  receiver  is 
connected.
Consult  the  dealer  or  an  experienced  radio/TV 

• 

technician for help.

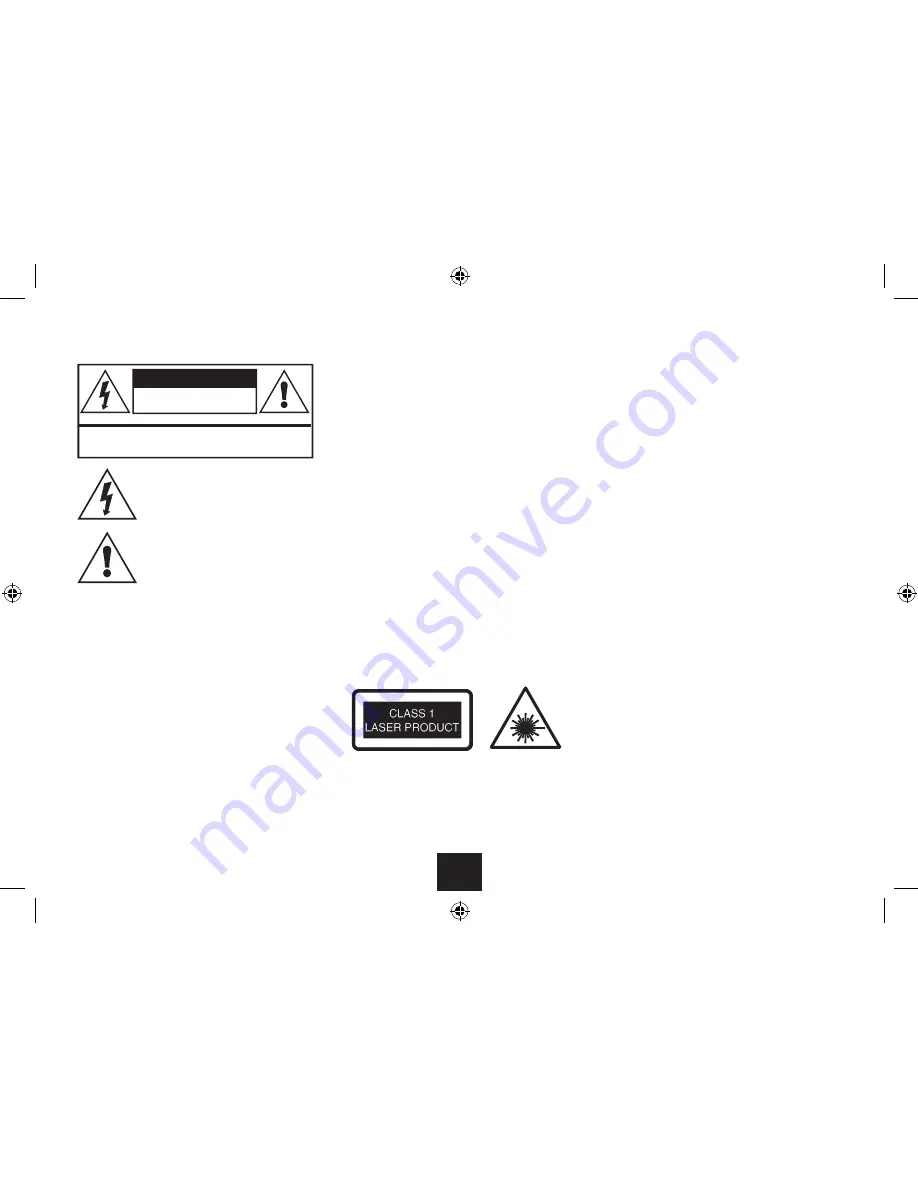
This  symbol  indicates  that  there  are 
important  operating  and  maintenance 
instructions 

in 

the 

literature 

accompanying this unit.

This  symbol  indicates  that  dangerous 
voltage  constituting  a  risk  of  electric 
shock is present within this unit. 

IMPORTANT SAFETY INFORMATION

These  labels  tell  you  that  the  unit  contains  a  Laser 
component. Do not stare at the laser lens.
When the disc tray is open a safety interlock disconnects 
power to the laser. Do not defeat this safety interlock.

CAUTION!

RISK OF ELECTRIC SHOCK

DO NOT OPEN

TO REDUCE THE RISK OF ELECTRIC SHOCK 

DO NOT REMOVE COVER (OR BACK) 

Содержание TK9PD14

Страница 1: ...Owner s Handbook TK9PD14 9 Portable DVD Player ...

Страница 2: ......

Страница 3: ...tmentsorperformance ofproceduresotherthanthosespecifiedhereinmayresult in hazardous exposure IMPORTANT This equipment generates uses and can radiate radio frequency energy and if not installed and used in accordance with the instructions may cause harmful interference to radio communication However this is no guarantee that interference will not occur in a particular installation If this equipment...

Страница 4: ...ot service the internal player battery Have it examined and replaced if needed by a competent service centre Replace the handset battery only with a battery of the same voltage and type Discard used batteries in accordance with recycling regulations in force in your area BATTERY NOTES The player s internal Lithium Polymer battery has no Memory Effect and can be recharged safely whether it is fully...

Страница 5: ...ter 12VDCVehicle Accessory Cigarette Lighter Adapter Securing strap Operating Manual If any items are missing or damaged contact your nearestTESCO store for a replacement Have your receipt ready when you call Retain the packaging If you dispose of it do so having regard to any recycling regulations in your area INDEX Safety information and cautions 1 Introduction 3 Player features 4 Controls and c...

Страница 6: ...ion India North Korea Pakistan Region 6 China THIS PLAYER PLAYS REGION 2 AND REGION FREE UNIVERSAL 0 DISCS IMPORTANT NOTE DVD discs contain various features Many features are determined by the program or software content on the DVD disc itself Some procedures in this manual cannot be performed if the disc does not support the feature Also some discs may need special settings which are unsupported ...

Страница 7: ...LS AND CONNECTIONS FRONTVIEW Navigation function buttons see next page for details 1 Power indicator 2 Remote control sensor 3 Charge indicator 4 Disc loading door 5 Door opening catch 6 PRESS VOL VOL e a dcb f ...

Страница 8: ... Previous button 4 Volume up button 5 MENU MODE Enter select 1 Cursor right button 2 Cursor down button 3 Cursor left button 4 Cursor up button 5 CONTROLS AND CONNECTIONS SIDEVIEW Play Pause Enter button see above 1 Setup button 2 Source button 3 USB port 4 Headphone jack 5 AV out jack 6 Power switch 7 DC In jack 8 VOL VOL e b c d a AV OUT ON OFF DC IN 9 12V SETUP SOURCE a d g b c e f h ...

Страница 9: ...T socket Connect the YELLOW plug to the CompositeVideo input of theTV Connect theWHITE and RED plugs to the Audio inputs of theTV IMPORTANT BEFORE CONNECTING ANY EQUIPMENT ENSURE IT IS SAFELY SWITCHED OFF AND DISCONNECTED FROMTHE MAINS SUPPLY HEADPHONE CONNECTION Connect a pair of headphones as shown This connection disconnects the internal speakers of the DVD player WARNING Listening at loud volu...

Страница 10: ... tilting the screen you can also rotate it in a clockwise direction To rotate the screen set the screen in a vertical position and gently turn it clockwise 1 You can rotateitbyamaximumof180 2 sothatthescreen faces behind the player 3 To operate the player with the screen facing upwards Rotate the screen fully 180 Carefully lay the screen onto the player 4 NOTE Whenadjustingthescreendososlowly NEVE...

Страница 11: ... button 15 Program button 16 Zoom button 17 Repeat button 18 Slow button 19 Setup button 20 Down cursor button 21 REMOTE CONTROL Left cursor button 22 Enter button 23 Title button 24 Up cursor button 25 Subtitle button 26 Angle button 27 Numeric keypad 28 Step button 29 Search button 30 STEP SEARCH MUTE SOURCE DISPLAY 0 9 8 7 6 5 4 3 2 1 10 MENU AUDIO ANGLE SUBTITLE TITLE SETUP REPEAT SLOW ZOOM PR...

Страница 12: ...and at an angle of no more than 30º for reliable operation If handset operation is erratic in sunlight move the player into the shade BATTERY REPLACEMENT If the handset behaves erratically or fails to operate the battery should be replaced Press the catch at the side of the battery 1 compartment Slide out the battery cage 2 Remove the old battery 3 Place the new battery in the cage with the polari...

Страница 13: ... to the body of the DVD player to enable it to be mounted to a front seat headrest Fitting the strap Load the DVD or CD you want to play 1 With the screen open lay the straps on the player as 2 shown The clips should be behind the screen Rotate the screen by 180 3 Lay the screen onto the player 4 180 ...

Страница 14: ...bs Hold the player against a vehicle headrest and pass 6 the straps around the headrest as shown Secure the player by passing the ends of the straps 7 through the clips and tightening them The player can now be connected to the vehicle 8 power supply and operated via the remote control ...

Страница 15: ...ortable operation from the AC mains via an AC adaptor or from the 12V DC outlet in a car via the DC adaptor The internal battery can also be charged from either the AC or DC adaptor CAUTION UseonlytheACandDCadaptorssuppliedwith the unit CONNECTINGTHE AC OR DC ADAPTOR Connect the DC plug of the supplied adaptor mains or vehicle into the DC In jack on the side of the player Plug the Adaptor into the...

Страница 16: ...display the ROOT or TITLE menu The ROOT menu is the basic menu of a DVD disc and contains all the information relating to the disc If there is one title and nothingelsethediscmayplay Removing a disc Press the button twice to stop the disc if it is playing Press the OPEN button to open the disc lid Lift the disc from the front left corner remove it from the player and return it to the case To chang...

Страница 17: ...r will be displayed at the top of the screen when certain functions areexecuted orwhentheDISPLAYbuttononthehandset is pressed When different discs are loaded the indicators may change To change the on screen display Press the DISPLAY button repeatedly Thedisplaymodeswillchangeonthescreen To switch off the on screen display Press the DISPLAY button repeatedly until you reach the DISPLAY OFF option ...

Страница 18: ...g16Xg32XgNormal Press to resume play To set the volume Press the VOL or VOL button to turn the volume up or down Thevolumelevelwillbedisplayedbriefly When the volume level reaches 14 a warning will be displayedabouthearingdamage To raise the volume above this level press ENTER Youcannowincreasethevolumelevelbeyond 14 Muting the sound Press the MUTE button to mute and un mute the sound To stop the ...

Страница 19: ...hapter numbers DVD or Track number CD with the numeric keypad Use the 10 button to enter numbers greater than 9 As you complete each entry the next line will be highlighted Continue to enter all the chapters tracks in your program in this way Press or to step between the first and second pages of program entries Exiting program entry If you want to leave the program entry screen and erase the prog...

Страница 20: ...cted a folder Press or to navigate to a picture Press ENTER to start play Thepicturewilldisplay Aslideshowwillstartoftheotherpicturesinthisfolder Press to pause and re start the slide show To return to the main screen Press the MENU button Thumbnail view Press to stop a slideshow and display thumbnails Thepictureswilldisplayinsetsof12 Press or to move along a row Press or to move between rows To m...

Страница 21: ... photos etc PROGRAM Transition effect wipe direction etc STOP Thumbnail mode Next picture Previous picture Picture mode Invert Mirror Contrarotate Rotate clockwise ZOOM Switch to zoom mode Zoom in Zoom out Pan when in zoom mode To display these button functions on screen Stop the slideshow Navigate to Menu at the bottom of the thumbnail screen Press ENTER ...

Страница 22: ...edia files may contain only files or may have one or more folders with media files within the folders Use or to browse for a folder or file Press ENTER to select the item If you have selected a file Thefilewillstarttoplay If you have selected a folder Press or to navigate to a file Press ENTER to start play Thefilewillstarttoplay EYE TOWER PARLIAMENT AVI AVI AVI Playback control Playback of media ...

Страница 23: ...r Playing media files Media files can be played in the same way as those saved to CD ROM The player will not playWAV files stored on USB drives Dock the USB drive to the USB port on the side of the player Press the SOURCE button Select the Media source then the USB option AfolderviewfromtheUSBdrivewillnowbedisplayed The procedure to play music photos or movies from the drive is the same as playing...

Страница 24: ...e or button Navigating the setup screens Press the button to move down to the list of settings Press the or button to move up or down the list When the setting you want to change is highlighted press the button Alistofoptionsforthissettingwillopen Press the or button to move up or down the list of options Press ENTER to select an option Press to move back to the list of settings From the list of s...

Страница 25: ... setting Choose ON or OFF OSD language Set the language for the on screen display menus Screen saver setting Choose ON or OFF GENERAL SETUP PAGE Choose the General setup page to Change theTV display format Enable disable multi angle selection Change the on screen language setting Switch closed captions on or off Switch the screen saver on or off Set up Auto Standby Auto Standby Choose an Auto Stan...

Страница 26: ...Digital Choose from LT RT or Stereo factory setting The Dual Mono sub option enables you to choose normal operation stereo to route the left or right channel soundtrack to both speakers or to set for mono sound The Dynamic sub option enables you to set the dynamic range of the sound The factory setting is Off change to a higher setting if you are listening in a noisy place ...

Страница 27: ...turn to theVideo setup page Select the Contrast option and adjust the picture contrast in the same way as Brightness Select the Hue option and adjust the picture hue in the same way as Brightness Select the Saturation option and adjust the picture saturation in the same way as Brightness VIDEO SETUP PAGE Choose theVideo setup page to Set the screen brightness contrast hue and saturation NOTE These...

Страница 28: ...Subtitle Disc menu Default Choose this setting to change theTV signal format PAL is the correct setting for Europe Set the default audio language This language will be selected when a disc is loaded if available on the disc Set the default subtitle language This language will be selected when a disc is loaded if available on the disc Off is the factory setting Set the default disc menu language Th...

Страница 29: ...ome discs prohibit rapid scanning or title and chapter skip You can t advance through the opening credits and warning information at the beginning of movies Handset erratic inoperative Point the handset at the player not the screen Flat handset battery distance too far from player or Handset too far from player or obstructed AFTER USINGYOUR PLAYER Remove the disc from the tray Remove any USB media...

Страница 30: ... covered by a warranty for 12 months from the date of purchase If a fault develops during this period please contact the TESCO electrical help line Please have your original purchase receipt with you when you call This warranty in no way affects your consumer rights UK Waste electrical products batteries should not be disposed of with household waste Separate disposal facilities exist for your nea...

Страница 31: ......

Страница 32: ... Cheshunt Herts EN8 9SL TK9PD14V0 4 Technika Helplines Landlines 0800 323 4060 Freephone from a BT landline Mobiles03301234060 Callscostnomorethancallstogeographicnumberseg 01or02andareincludedininclusiveminutesand discount schemes ...

Отзывы: