PG 8
PG 9
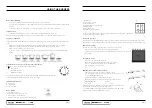
FIRST TIME USE OF THE APPLIANCE
USING THE OVEN
Preparing your appliance for the first time
•
Please wipe out the oven interior prior to operation with warm soapy water and polish dry with a soft clean cloth.
•
New appliances can have an odour during first operation from components manufactured with the aid of oils.
It is recommended to ‘run in’ your oven before you cook for the first time. Run the an empty oven at 180°C for
approximately 1 to 2 hours. Ensure that the room is well ventilated.
•
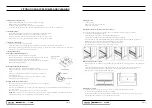
Please install oven furniture as outlined in the “Fitting Oven Accessories and Cleaning” section.
•
If your appliance is fitted with solid hotplates, turn heat setting to high for 3 minutes to fully harden the coating.
When cooled, apply a thin coating of cooking oil to seal the surface.
•
The grill element may have oils left on the grill during manufacture. Before you cook on the grill for the first
time, turn on for 15 minutes with 10mm of water in the bottom of the grill dish.
Using the gas oven
Always follow the instructions for putting the shelves and side racks into the oven, to avoid accidents.
•
Do not line the oven with foil, it will damage the enamel.
•
Do not touch the hot surfaces or heating elements inside the oven.
•
Do not use the oven door as a shelf.
•
Do not push down on the open oven door.
•
Do not place shelves on top of upper most shelf runner as there are no stops for shelf withdrawal.
•
After each use, always check that the control knobs are turned to 0 (off).
Using the oven of your gas cooker
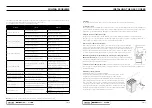
Set: 1) Temperature
2) Gas Oven Function
This knob lights the gas burner inside the oven. The cooking temperature is
set by turning the knob anti-clockwise to the value required, between Min.
and Max.
Tip: when using the grill burner can not adjust temperature.
Installation and replacement of ignition battery
Turn the cover anti-clockwise to take the cover off. Check the “+” / “-“ of
the battery and make sure the “-“ is on the inner side. Then insert the
battery. Place the cover on and turn clockwise to complete installation.
Battery ignition control
Completely open the oven door, turn the temperature knob anti-
clockwise to the highest temperature setting, and press in the igniter.
Once burner is ignited, hold the temperature knob in for a few seconds
to allow it to heat up. If the burner is not lit after 15 seconds, stop trying,
leave the oven door open, waiting one minute before trying again.
NOTE:
AA battery required
Lighting the burner by hand
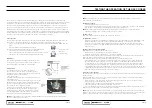
Completely open the oven door and turn the temperature knob anti-clockwise. Place a
lit match close to the end of the flame pipe (A) in the centre of the bottom of the oven
and press the temperature knob. Once the burner has ignited, keep the knob pressed
down for a few seconds to allow the thermocouple to heat up and check that the burner
has lit properly through the inspection hole (B). The cooking temperature is set by
turning the knob clockwise to the value required, between 50° and 231°.
If the burner accidentally goes out, turn the knob to the off ( ) position and wait at least
one minute before trying to relight it.
Adjusting the minimum setting.
The oven thermostat has a screw for regulating the minimum
setting, accessed by removing the thermostat knob. When the type
of gas used changes, the minimum setting must be adjusted as
follows:
•
Light the oven burner and keep it operating at the highest
setting for 10/15 minutes with the door closed. Then turn the
knob to the minimum temperature setting, remove the knob
and use a straight-head screwdriver to adjust. Firstly, turn the
knob in clockwise direction tightly then anticlockwise to adjust
the flame. For natural gas you should turn one of a circle while
1/8 circle for LPG
•
When using bottled gas, the adjuster screw must be turned fully
clockwise.
•
When using town or natural gas, adjust the screw so that when the thermostat knob is turned from the
maximum to the minimum setting, the flame always remains stable and uniform. Close the oven door and
check that the burner remains on at the minimum setting.


