background image

English

   - 16 -

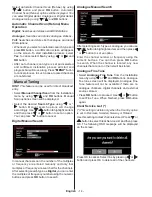
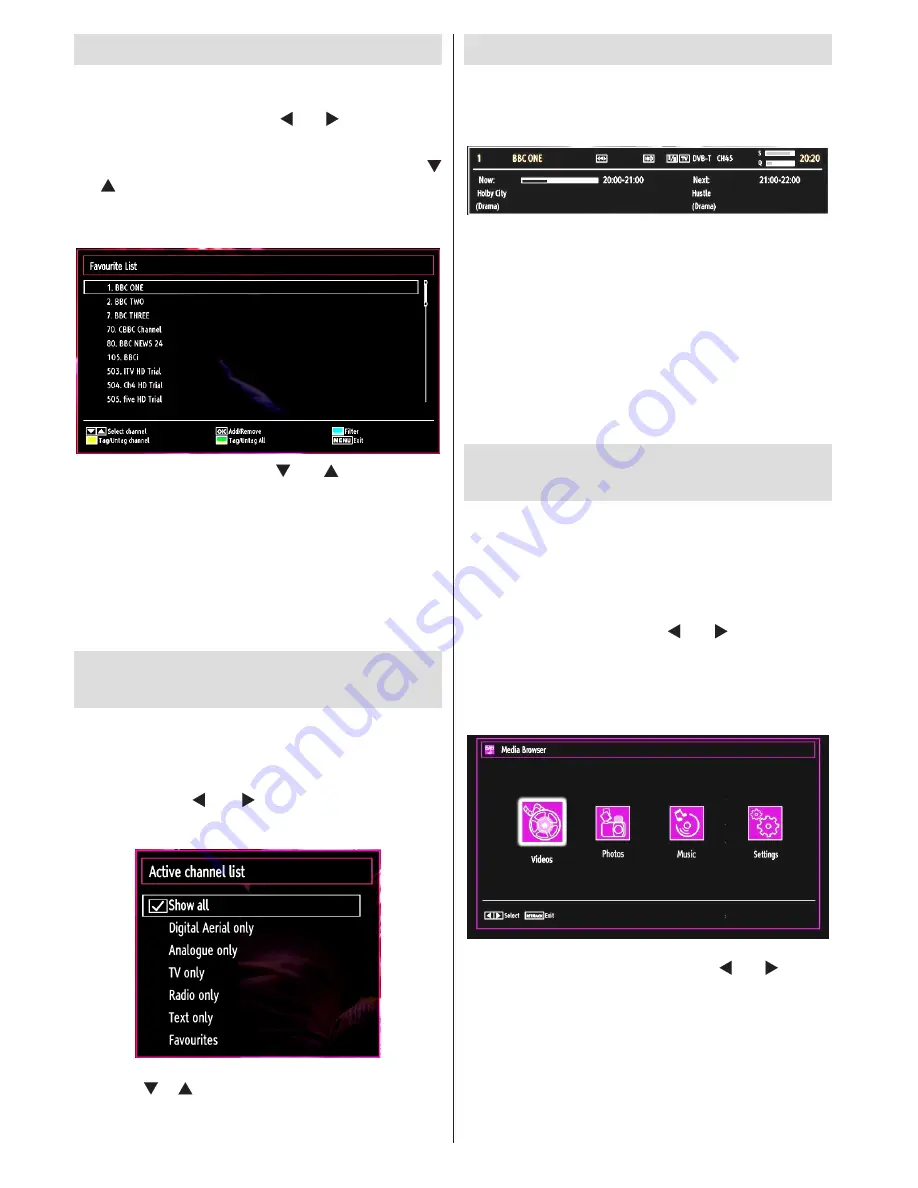
Managing Stations: Favourites

You can create a list of favourite programmes.

Press 

• 

“MENU”

 button to view main menu. Select 

Channel List item by using “ ” or “ ” button. Press 

OK

 to view menu contents.

Select 

• 

Favourites

 to manage favourite list. Use “

”/“ ” and 

OK

 buttons to select 

Favourites

.

You can set various channels as favourites so that 

• 

only the favourite channels are navigated.

Select a channel by using “

• 

” or “ ” button. Press 

OK

 button to add selected channel to favourites list. 

Press 

OK

 button again to remove. 

Button Functions

OK

• 

: Add/remove a station.

YELLOW

• 

: Tag/untag a channel.

GREEN

• 

: Tag/untag all channels.

BLUE

• 

: Displays filtering options.

Managing Stations: Sorting 

Channel List

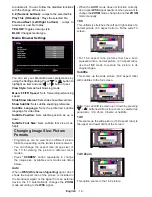
You can select broadcasts to be listed in the channel 

list. To display specific types of broadcast, you should 

use Active channel list setting.

Select Active  channel  list  from  the  Channel  list 

menu by using “ ” or “ ” button. Press 

OK

 button 

to continue.

You can select a broadcast type option from the list 

by using “ ” /“ ” and

 OK

 buttons.

On-Screen Information

You can press 

“INFO”

 button to display on-screen 

information.  Details  of  the  station  and  current 

programme  will  be  displayed  on  the  information 

banner.

The  information  banner  gives  information  on  the 

channel  selected  and  the  programmes  on  it.  The 

name  of  the  channel  is  displayed,  along  with  its 

channel list number. 

Hint: Not all channels broadcast 

the  programme  data.  If  the  name  and  time  of  the 

programme are not available, then information banner 

will be displayed with blanks.


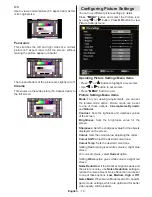
If the selected channel is locked, you must enter the 

correct four-digit numeric code to view the channel 

(default code is 

0000

). “

Enter PIN

” will be displayed 

on the screen in such a case:

Media Playback Using Media 

Browser

If the USB stick is not recognized after power off/on 

or First Time Installation, first, plug the USB device 

out and power off/on the TV set. Plug the USB device 

in again.

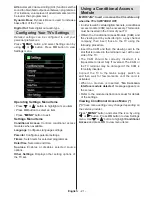
To  display  Media  Browser  window,  press  either 

“MENU”

 button on the remote control and then select 

Media Browser by pressing “ ” or “ ” button. Press 

OK

 button to continue. Media Browser menu options 

will be displayed. 

Also, when you plug USB devices, media browser 

screen will be displayed automatically:

You can play music, picture and video files from the 

connected USB memory stick. Use “ ” or “ ” button 

to select Videos, Photos, Music or Settings. 

Содержание 16-850

Страница 1: ...16 850 COLOUR TELEVISION WITH REMOTE CONTROL OPERATING INSTRUCTIONS For assistance please call our Tesco Electrical Helpline on 0845 456 6767 ...

Страница 2: ...s Channel List 15 Operating the Channel List 15 Moving a Channel 15 Deleting a Channel 15 Renaming a Channel 15 Locking a Channel 15 Managing Stations Favourites 16 Button Functions 16 Managing Stations Sorting Channel List 16 On Screen Information 16 Media Playback Using Media Browser 16 Viewing Videos via USB 17 Viewing Photos via USB 17 Slideshow Options 17 Playing Music via USB 17 Media Browse...

Страница 3: ...This appliance is intended solely for private domestic use and may not be used for industrial and commercial purposes We exclude liability in principle if the device is not used as intended or unauthorized modifications have been made To operate your LCD TV in extreme ambient conditions may cause the damage of the device Preparation For ventilation leave a free space of at least 10 cm all around t...

Страница 4: ... Batteries including those which are heavy metal free should not be disposed of with household waste Please dispose of used battery in an environment friendly manner Find out about the legal regulations which apply in your area Don t try to recharge batteries Danger of explosion Replace batteries only with the same or equivalent type This symbol on the product or on its packaging means that your e...

Страница 5: ...e the power cord should principally be separated from the mains socket prior to a longer period of non usage i e during vacations Electrical device not in the hands of children Never let children use electrical device unsupervised Children can t always recognize properly the possible dangers Batteries accumulators can be life threatening when swallowed Store batteries unreachable for small childre...

Страница 6: ...de When the TV is not in use please switch off or disconnect the TV from the mains plug This will also reduce energy consumption Disconnect the TV from the mains socket when it will not be used for prolonged periods Note that annually using the TV set in Power Save Mode has more power efficiency than disconnecting the TV from the mains plug instead of keeping stand by mode Therefore disconnect the...

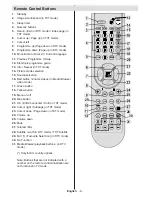
Страница 7: ...Red button Zooms videos in Media Browser 16 video mode Green button 17 Yellow button 18 Menu on off 19 Blue button 20 OK Edit Channel list Hold in TXT mode 21 Cursor right Subpage in TXT mode 22 Cursor down Page down in TXT mode 23 Volume up 24 Volume down 25 Mute 26 Teletext Mix 27 Subtitle on off in DTV mode TXT Subtitle 28 FAV Favourite Selection in DTV mode 29 No Function 30 Media Browser play...

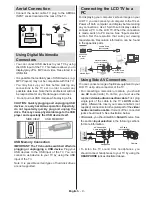
Страница 8: ...res from devices such as a High Definition Satellite Receiver or DVD Player These devices must be connected via the HDMI sockets or Component Socket These sockets can accept either 720p or 1080i signals No sound connection is needed for an HDMI to HDMI connection RF Input 2 connects to an aerial antenna system Note that if you use a decoder or a media recorder you should connect the aerial cable t...

Страница 9: ...to the TV s Side AV socket Afterwards insert your video cable s not supplied connector into the YELLOW input located on the plural side of the supplied AV connection cable Colours of the connected jacks should match To enable audio connection you must use RED and WHITE inputs of the side AV connection cable Afterwards insert your device s audio cable s connectors into the RED and WHITE jack of the...

Страница 10: ...are not supported Connecting the LCD TV to a PC For displaying your computer s screen image on your LCD TV you can connect your computer to the TV set Power off both computer and display before making any connections Use 15 pin D sub display cable to connect a PC to the LCD TV When the connection is made switch to PC source See Input selection section Set the resolution that suits your viewing req...

Страница 11: ...has an HDMI socket you can connect via HDMI for better video and audio quality HDMI 1 SPDIF Coax OUT 12V DC IN External device not supplied HDMI Cable When you connect to DVD player as illustrated above switch to the connected HDMI source See Input Selection section for more information on changing sources Connecting to a DVD Player via Component Sockets YPbPr or Scart Cable Some DVD players are c...

Страница 12: ...ons on the TV Main menu OSD cannot be displayed via control buttons buttons will function as volume up down as default Even if you set other functions for these buttons buttons will perform as default after a short while Volume Setting Press P V AV button once and then use buttons to increase or decrease volume so a volume level scale slider will be displayed on the screen While Tv is on button ca...

Страница 13: ...es of the next time slice Yellow button Prev Day Displays the programmes of previous day Blue button Next day Displays the programmes of the next day Numeric buttons Jump Jumps to the preferred channel directly via numeric buttons OK Options Displays programme options including Select Channel option Text button Filter Views filtering options INFO Details Displays the programmes in detail Red butto...

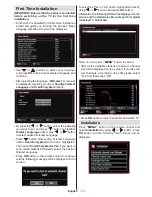
Страница 14: ... option Scan Encrypted will be then highlighted You can set Scan Encrypted as Yes if you want to scan coded stations Afterwards select the desired Teletext Language Press OK button on the remote control to continue and the following message will be displayed on the screen To select the Yes or No option highlight the item by using or buttons and press OK button Afterwards the following OSD will be ...

Страница 15: ...an press M button to cancel Digital Manual Search In manual channel scan the number of the multiplex or frequency are entered manually and only that multiplex or frequency are searched for the channels After selecting search type as Digital you can enter the multiplex or frequency number using the numeric buttons and press OK button to search Analogue Manual Search After selecting search type as a...

Страница 16: ... OK button to process Selected channel is now moved Deleting a Channel You can press GREEN button to tag untag all channels YELLOW button to tag untag channel Select the channel that you want to delete and select Delete option Press OK button to continue A warning screen will appear Select YES to delete select No to cancel Press OK button to continue Renaming a Channel Select the channel that you ...

Страница 17: ...ay on screen information Details of the station and current programme will be displayed on the information banner The information banner gives information on the channel selected and the programmes on it The name of the channel is displayed along with its channel list number Hint Not all channels broadcast the programme data If the name and time of the programme are not available then information ...

Страница 18: ...w button Starts the slideshow using all images GREEN button Views images in thumbnails RED button Sorts files by date YELLOW button Toggles viewing style BLUE button Changes media type Slideshow Options Pause button Pauses the slideshow Continue button Continues the slideshow Loop Shuffle GREEN button Press once to disable Loop Press again to disable both Loop and Shuffle Press once more to enable...

Страница 19: ...e size of the TV for viewing the picture in different zoom modes Press SCREEN button repeatedly to change the image size Available zoom modes are listed below Auto When a WSS Wide Screen Signalling signal which shows the aspect ratio of the picture is included in the broadcast signal or the signal from an external device the TV automatically changes the ZOOM mode according to the WSS signal When t...

Страница 20: ...g requirements you can set the related mode option Picture mode can be set to one of these options Cinema Game Dynamic and Natural Contrast Sets the lightness and darkness values of the screen Brightness Sets the brightness value for the screen Sharpness Sets the sharpness value for the objects displayed on the screen Colour Sets the colour value adjusting the colors Colour Shift Adjust the desire...

Страница 21: ...item shifts the image vertically towards the top or bottom of the screen Dot Clock Dot Clock adjustments correct the interference that appear as vertical banding in dot intensive presentations like spreadsheets or paragraphs or text in smaller fonts Phase Depending on the resolution and scan frequency that you input to the TV set you may see a hazy or noisy picture on the screen In such a case you...

Страница 22: ...nal Access Module IMPORTANT Insert or remove the CI module only when the TV is SWITCHED OFF In order to watch certain digital channels a conditional access module CAM can be necessary This module must be inserted in the CI slot of your TV Obtain the Conditional Access Module CAM and the viewing card by subscribing to a pay channel company then insert those to the TV using the following procedure I...

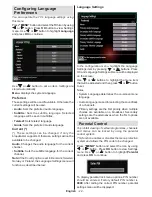
Страница 23: ... Settings menu will function as described below Language Settings In the configuration menu highlight the Language Settings item by pressing or buttons Press OK and Language Settings submenu will be displayed on the screen Use or buttons to highlight the menu item that will be adjusted and then press or button to set Notes System Language determines the on screen menu language Audio Language is us...

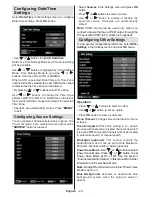
Страница 24: ...st menu Use or button to highlight Timers and press OK to continue Setting Sleep Timer This setting is used for setting the TV to turn off after a certain time Highlight Sleep Timer by using or button Use or button to set The timer can be programmed between Off and 2 00 hours 120 minutes in steps of 30 minutes Setting Programme Timers You can set programme timers for a particular programme using t...

Страница 25: ...ton to enable or disable the selected source Changes are automatically stored Note YPbPr mode can be used only when you connect a device that has a YPbPr output through the PC input with YPbPr to PC cable not supplied Configuring Other Settings To view general configuration preferences select Other Settings in the Settings menu and press OK button Operation Press or buttons to select an item Use o...

Страница 26: ...y Search optional Use or button to select Standby Search and then press or button to set this setting as On or Off If you change Standby Search to Off this function will be unavailable To use Standby search please make sure that you select Standby Search as On If the Standby Search is set to On when the TV is in standby mode available broadcasts will be searched If the TV locates any new or missin...

Страница 27: ...e Please note that ghosting may occur while displaying a persistent image LCD TVs image persistence may disappear after a short time Try turning off the TV for a while To avoid this do not leave the screen in still picture for extended periods No Power If your TV system has no power please check the main power cable and connection to the mains socket outlet Poor Picture Have you selected the corre...

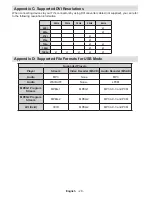
Страница 28: ...12 1360x768 60 Hz Appendix B AV and HDMI Signal Compatibility Input Signal Types Source Supported Signals Available EXT SCART PAL 50 60 O NTSC 60 O RGB 50 O RGB 60 O Side AV PAL 50 60 O NTSC 60 O YPbPr 480I 60Hz O 480P 60Hz O 576I 50Hz O 576P 50Hz O 720P 50Hz O 720P 60Hz O 1080I 50Hz O 1080I 60Hz O 1080P 50Hz O 1080P 60Hz O HDMI1 480I 60Hz O 480P 60Hz O 576I 50Hz O 576P 50Hz O 720P 50Hz O 720P 60H...

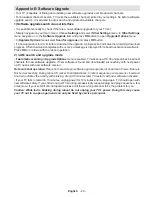
Страница 29: ...ion 24Hz 25Hz 30Hz 50Hz 60Hz 480i þ 480p þ 576i þ 576p þ 720p þ þ 1080i þ þ 1080p þ þ þ þ þ Appendix D Supported File Formats for USB Mode Supported Players Player Stream Video Decoder MSVD Audio Decoder MSAD Audio MP3 None MP3 Audio WAV AIFF None LPCM MPEG1 Program Stream MPEG 1 MPEG1 MP3 AC 3 and PCM MPEG2 Program Stream MPEG 2 MPEG2 MP3 AC 3 and PCM AVI Xvid XVID MPEG2 MP3 AC 3 and PCM ...

Страница 30: ...continue with the reboot operation 2 3 AM search and upgrade mode If Automatic scanning in Upgrade Options menu is enabled TV wakes up at 03 00 and searches broadcast channels for new software upgrade If new software is found and downloaded successfully with next power up TV opens with new software version Note on reboot operation Reboot is the last step in software upgrade operation if download o...

Страница 31: ...TION W 20 W max 1 W Standby PANEL 16 Screen Size DIMENSIONS mm DxLxH With foot 118 x 390 x 286 Weight Kg 2 40 DxLxH Without foot 49 9 x 390 x 256 Weight Kg 2 20 Digital Reception MHEG 5 ENGINE compliant with ISO IEC 13522 5 UK engine Profile 1 for UK Object carousel support compliant with ISO IEC 135818 6 and UK DTT profile Frequency range 474 850 MHz for UK models 170 862 MHz for EU models Transm...

Страница 32: ...picture through antenna position or set TV channels again if necessary 4 Switching the TV Off Press the 1 button on the remote control or press the switch on the TV so the TV will switch to standby mode Unplug cable connectors and power plugs 2 ATTENTION 12 V Input V V V V Products Battery Information for Users on Disposal of old Equipment and Batteries European Union only These symbols indicate t...

Страница 33: ...nit to the mains supply CAUTION TO PREVENT ELECTRIC SHOCK DISCONNECT FROM THE MAINS BEFORE REMOVING COVER NO USER SERVICEABLE PARTS INSIDE REFER SERVICING TO QUALIFIED SERVICE PERSONNEL SAFETY PRECAUTION THIS EQUIPMENT MUST BE DISCONNECTED FROM THE MAINS WHEN NOT IN USE DO NOT ALLOW THIS UNIT TO BE EXPOSED TO RAIN OR MOISTURE ...

Страница 34: ...P3 JPEG MPEG playback NTSC PAL playback according to disc content LPCM audio via coaxial digital audio output optional Multi Audio up to 8 support According to disc content Multi Subtitle up to 32 support According to disc content Multi Angle up to 9 support According to disc content 8 level parental control Fast forward and rewind in 5 different speeds 2x 4x 8x 16x 32x Slow motion playback in 4 d...

Страница 35: ...e the disc to direct sunlight or heat sources such as hot air ducts or leave it in a car parked in direct sunlight as the temperature can rise quickly and damage the disc After playing store the disc in its case On cleaning Before playing clean the disc with a cleaning cloth Wipe the disc from the center out Do not use solvents such as benzine thinner commercially available cleaners or anti static...

Страница 36: ...ia the remote control While playing a file you should press STOP button three times to eject Overview of the Remote Control Standby 1 Numeric buttons 2 Return back 3 Language selection Set language 4 Display time DVD menu 5 Clear 6 Stop 7 No function 8 Rapid Reverse 9 Rapid advance 10 Info 11 Zoom 12 Repeat 13 Root 14 Menu 15 Title 16 OK Select 17 Navigation Buttons 18 Subtitle 19 Angle 20 Search ...

Страница 37: ... Time counter mode selection during playback Press repeatedly to switch between modes LANG Audio language X X MENU Displays TV menu OK SELECT Enter View Play REPEAT Displays repeat options RETURN Returns back to the previous menu if available ROOT Goes back to the root folder if available SEARCH MODE Direct selection of scenes or time Selects the desired file Selects the desired file SUBTITLE Subt...

Страница 38: ...back to the initial settings If a language is selected not supported by the 7 disc the subtitle language will automatically be set to the disc s priority language Usually a circulation will happen while switching 8 to another language that is you can cancel the subtitle by pressing this button a number of times until Subtitle Off appears on the screen When the power is turned on or the disc is 9 r...

Страница 39: ... technical service SPDIF OUTPUT You can set Spdif Output as PCM or RAW If you select PCM from SPDIF Output in DVD menu and play DVD with Dolby audio you can get audio output with two channels via the speakers and the SPDIF Out If you select RAW from SPDIF Output in DVD menu and play DVD with Dolby audio speakers will be muted and you can get 5 1 Dolby audio via the SPDIF Out Troubleshooting The pi...

Страница 40: ...ound have been recorded by means of digital signals Incorporating a new video compression technology MPEG II and high density recording technology DVD enables aesthetically pleasing full motion video to be recorded over long periods of time for instance a whole movie can be recorded DVD has a structure consisting of two 0 6 mm thin discs which are adhered to each other Since the thinner the disc t...

Страница 41: ...h ar ac t er is tic s DV D c o n ta in s ex c e llen t s o u n d a n d v id eo d u e to D o l b y D i g i ta l an d M P E G 2 S y s tem Va r io u s s c r e en an d au d i o fu n c t io n s c a n b e ea s il y s e l e c t ed t h r o u g h th e o n s c r ee n m e nu C D is r e c o r d e d a s a D ig ita l S ig n a l w i th b e t ter au d i o q u al ity le s s d is t o r t io n a n d l es s d et e r ...

Страница 42: ...50181802 ...
Отзывы: