background image

10

1 GETTING STARTED

DMS-CTC-20131021-0004 v1.0

1.2.2 Top panel 

WPS button (item A)

The 

WPS

 (

) button allows you to add new wireless clients to your local network in a swift and easy way, without the need to 

enter any of your wireless settings (network name, wireless network key, encryption type).

For more information about WPS, see 

“2.4.1 How to connect your wireless client via WPS” on page 20

.

Page button (item B)

If you press the DECT pairing/paging 


button:

Briefly, the Gateway pages all connected CAT-iq 2.0 phones.

For about 15 seconds, the Gateway switches to registration mode.
For more information, see 

“Connecting a CAT-iq 2.0 phone to your Gateway” on page 27

.

A

B

Содержание TC8717C

Страница 1: ...SETUP AND USER GUIDE MediaAccess TC8717C ...

Страница 2: ......

Страница 3: ...SAFETY INSTRUCTIONS AND REGULATORY NOTICES Before you start installation or use of this product carefully read these instructions ...

Страница 4: ...of electrocution Regulatory information You must install and use this device in strict accordance with the manufacturer s instructions as described in the user documentation that is included with your product Before you start installation or use of this product carefully read the contents of this document for device specific constraints or rules that may apply in the country where you want to use ...

Страница 5: ...SETUP AND USER GUIDE MediaAccess TC8717C ...

Страница 6: ...DLNA is a registered trademark DLNA disc logo is a service mark and DLNA Certified is a trademark of the Digital Living Network Alliance Digital Living Network Alliance is a service mark of the Digital Living Network Alliance Ethernet is a trademark of the Xerox Corporation EuroDOCSIS EuroPacketCable and PacketCable are trademarks of CableLabs Inc HomePNA and HPNA are trademarks of HomePNA Inc Lin...

Страница 7: ...r wireless client via WPS 20 2 4 2 How to manually connect your wireless client 22 2 5 How to connect your phone 27 3 Admin Tool 29 3 1 Components 31 3 2 How to change the default Admin Tool password 33 3 3 How to backup or restore a configuration 34 4 The Gateway wireless access point 35 4 1 How to configure the wireless settings 36 4 2 How to start a WPS session via the Admin Tool 38 4 3 Prevent...

Страница 8: ...and services 54 7 1 1 UPnP 56 7 1 2 Port forwarding 58 7 1 3 Port triggering 60 7 1 4 Configure a DMZ Host 62 7 2 Assigning a reserved IP to a device 63 8 Support 65 8 1 Wireless connection troubleshooting 66 8 2 Network diagnostic tools 68 8 3 Gateway reset and restore options 69 ...

Страница 9: ...te Example For more information visit us at www technicolor com This sample text indicates an internal link Example If you want to know more about guide see About this Setup and User Guide on page 1 This sample text indicates an important content related word Example To enter the network you must authenticate yourself This sample text indicates a GUI element commands on menus and buttons dialog bo...

Страница 10: ...2 ABOUT THIS SETUP AND USER GUIDE DMS CTC 20131021 0004 v1 0 ...

Страница 11: ... 0 1 Getting started Introduction This chapter gives you a brief overview of the main features and components of the Gateway After this chapter we will start with the installation Do not connect any cables to the Gateway until instructed to do so ...

Страница 12: ...or more information see 6 2 Firewall on page 52 Advanced network tools like port forwarding port triggering and DMZ For more information see 7 Advanced configuration on page 53 Local networking features MoCA 2 0 to interconnect your local MoCA devices for example your set top box via your coax network Wireless access for your local network devices via the integrated IEEE 802 11b g n 2 4 GHz and IE...

Страница 13: ...e integrated rechargeable battery if you purchased a battery This guarantees that the following functions will not be impacted The connected phones or dial function for a connected alarm system The CAT iq 2 0 phones All voice related features Easy configuration The Admin Tool allows you to configure your Gateway and network via your web browser For more information see 3 Admin Tool on page 29 For ...

Страница 14: ...DMS CTC 20131021 0004 v1 0 1 2 Getting to know the Gateway This section introduces you to the different components of the Gateway Topic Page 1 2 1 Front panel 7 1 2 2 Top panel 10 1 2 3 Back panel 11 1 2 4 Bottom panel 13 ...

Страница 15: ...ices offered by the Gateway Power LED US DS LED 2 4 GHz 5 GHz XB3 Dual Band WiFi 802 11ac State Description Solid on The Gateway is powered on from the electrical outlet Blinking Power failure or running on battery Off The Gateway is powered off State Description Solid on Upstream and downstream channel locked Blinking Locking upstream or downstream channel Off The Gateway is powered off ...

Страница 16: ... GHz access point is disabled State Description Solid on One or more wireless clients connected to the 5 GHz access point no wireless activity Blinking One or more wireless clients connected to the 5 GHz access point wireless activity Off The 5 GHz access point is disabled State Description Solid on The telephone connected to the Tel1 port is on the hook Blinking The telephone connected to the Tel...

Страница 17: ...1 0 Battery LED State Description Solid on Battery level is OK or recharging Blinking If the Power LED is Solid on bad battery Blinking low battery Off If the Power LED is Blinking the battery level is OK Off bad battery or no battery installed ...

Страница 18: ...ss settings network name wireless network key encryption type For more information about WPS see 2 4 1 How to connect your wireless client via WPS on page 20 Page button item B If you press the DECT pairing paging button Briefly the Gateway pages all connected CAT iq 2 0 phones For about 15 seconds the Gateway switches to registration mode For more information see Connecting a CAT iq 2 0 phone to ...

Страница 19: ...page 41 Power or charge a USB device Tel ports item C The Tel ports allows you to connect a traditional phone or DECT base station to your Gateway Single line customers can use the Tel 2 Alarm port to connect an auto dial alarm system For more information see 2 5 How to connect your phone on page 27 Ethernet switch item D The Ethernet switch allows you to connect an Ethernet device for example a c...

Страница 20: ...us Description Top LED Green Solid on Connected to a Gigabit Ethernet device Blinking Connected to a Gigabit Ethernet device and sending receiving data Off Not connected to a Gigabit Ethernet device Bottom LED Amber Solid on Connected to a 100Mbps 10Mbps device Blinking Connected to a 100Mbps 10Mbps device and sending receiving data Off Not connected to a 100Mbps 10Mbps device State Description So...

Страница 21: ...wing services are not interrupted during power failure The connected phones or dial function for a connected alarm system The DECT phones Basic voice features A B For the network name two values are available Network Name 1 SSID is the network name of the 5 GHz access point and is of the following format HOME XXXX 5 where X is an alphanumeric character Network Name 2 SSID is the network name for t...

Страница 22: ... a wireless connection your computer must be equipped with a Wi Fi Certified wireless client adapter Wired connection If you want to connect a computer using a wired connection your computer must be equipped with an Ethernet Network Interface Card NIC Start with the installation You are now ready to start with the installation of your Gateway proceed with 2 Setup on page 15 ...

Страница 23: ...d devices to the Gateway For more information see 2 3 Connect your wired devices on page 18 4 Connect your wireless devices to the Gateway For more information see 2 4 Connect your wireless devices on page 19 5 Connect your phones For more information see 2 5 How to connect your phone on page 27 Optional configuration After completing the setup procedure the Gateway is ready for use Optionally you...

Страница 24: ...ion This section helps you to connect the Gateway to your service provider s network Connecting the cables Proceed as follows 1 Take one end of the coaxial cable and connect it to your cable splitter 2 Connect the other end to the MoCA Cable port of the Gateway SN CPYYWWPPXXX CM MAC 00111100ABCD MoCA Cable ...

Страница 25: ...ord that is included with your Gateway 2 Connect the small end of the power cord to the Power port on the back of the Gateway 3 Plug the other end of the power cord into an electrical outlet 4 Wait at least two minutes to allow the Gateway to complete the start up phase SN CPYYWWPPXXX CM MAC 00111100ABCD Power ...

Страница 26: ...bit Ethernet ports and have a maximum speed of 1 Gbps Gigabit per second Procedure Proceed as follows 1 Take the yellow Ethernet cable that is included in your box 2 Plug one end of the Ethernet cable into one of the yellow Ethernet ports on the back of the Gateway 3 Plug the other end of the Ethernet cable into the Ethernet port of your network device 4 Your network device is now connected to you...

Страница 27: ...less clients The 2 4 GHz 3x3 IEEE 802 11n access point allows you to connect IEEE802 11b g n wireless clients Use this access point for wireless clients that don t support 5 GHz Procedure To connect your device via Via WPS proceed with 2 4 1 How to connect your wireless client via WPS on page 20 By manually entering the settings proceed with 2 4 2 How to manually connect your wireless client on pa...

Страница 28: ... are supported by your Gateway Push Button Configuration PBC You have to put both the wireless client and the Gateway in registration mode by pushing a hardware or software button PIN code entry on the wireless client You have to enter the Gateway s WPS PIN code on the wireless client For more information see Adding a wireless client using WPS PIN entry on the wireless client on page 38 PIN code e...

Страница 29: ...nected to the access point Troubleshooting If you are having trouble connecting your wireless client via WPS this may be caused by one of the following reasons WPS can not be correctly executed Configure your wireless manually For more information see 2 4 2 How to manually connect your wireless client on page 22 Your wireless client is out of range If possible move your wireless client closer to y...

Страница 30: ...ct your computer on Windows 7 on page 23 Windows Vista proceed with How to connect your computer on Windows Vista on page 24 Windows XP proceed with How to connect your computer on Windows XP on page 25 Mac OS X proceed with How to connect your computer on Mac OS X on page 26 On another operating system consult the help of your wireless client or operating system For the network name two values ar...

Страница 31: ...mpts you if it should turn on sharing Click Yes How to connect your computer on Windows 7 Proceed as follows 1 Click the wireless network icon in the notification area 2 A list of available wireless networks appears Double click the Gateway access point The Gateway is listed with the Network Name 1 and or Network Name 2 which is printed on the Gateway s side or back panel label For more informatio...

Страница 32: ...d click Connect To 2 A list of available wireless networks appears 3 Double click the Gateway access point 4 Windows prompts you to enter the network security key Type the Password which is printed on the Gateway s side or back panel label in the Security key or passphrase box and click Connect The Gateway is listed with the Network Name 1 and or Network Name 2 which is printed on the Gateway s si...

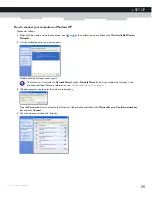
Страница 33: ... appears Double click the Gateway access point 3 Windows prompts you to enter the network security key Type the Password which is printed on the Gateway s side or back panel label in the Network key and Confirm network key box and click Connect 4 You are now connected to the Gateway The Gateway is listed with the Network Name 1 and or Network Name 2 which is printed on the Gateway s side or back p...

Страница 34: ... window prompts you to enter your WPA password In the Password box type the Password which is printed on the Gateway s side or back panel label and select the Remember this network box and click OK 4 You are now connected to the Gateway network The Gateway is listed with the Network Name 1 and or Network Name 2 which is printed on the Gateway s side or back panel label For more information see Pro...

Страница 35: ... or fax to the Tel1 port on the back panel of your Gateway Connecting a CAT iq 2 0 phone to your Gateway The Gateway is equipped with a DECT base station allowing you to connect up to five DECT phones Any CAT iq 2 0 certified DECT phone is able to connect Before you can start using your CAT iq 2 0 phone you first have to pair it with your Gateway Proceed as follows 1 On the top panel of the Gatewa...

Страница 36: ...28 2 SETUP DMS CTC 20131021 0004 v1 0 ...

Страница 37: ...rowser Accessing the Admin Tool Proceed as follows 1 Open your web browser and browse to http 10 0 0 1 using a computer or device that is currently connected to you Gateway either wired or wirelessly 2 The Gateway prompts you to enter the username and password Enter your user name default admin and password default password and click OK On Windows it is also possible to access the Admin Tool using...

Страница 38: ...30 3 ADMIN TOOL DMS CTC 20131021 0004 v1 0 3 The Admin Tool appears ...

Страница 39: ...ws you to manage the access settings of the devices in your network Parental Control Allows you to manage the access rights for Internet access Advanced Allows you to configure more advanced Internet services Troubleshooting Allows you to perform some basic troubleshooting on the Gateway and network connections Each of these items contain a number of sub menu items More detailed information about ...

Страница 40: ... wireless interface The status of the MoCA interface The status of the DECT interface The selected firewall level Tips section item D The tips section provides helpful information about the settings displayed on the current page To expand the tip click more Content panel item E The content pane displays the actual configuration page Online support item F The online support section provides links t...

Страница 41: ... corner click Change Password 3 The Change Password page appears 4 In the Current Password box type your current password 5 In the New Password and Re enter New Password box type your new password 6 Click SAVE 7 The Gateway prompts you to login with your new password The default username is admin and the default password is password The default password is password Your new password must be at lea...

Страница 42: ...r browser prompts you to save or open the backup file Save your file to a location of your choice Restoring a previously saved configuration Proceed as follows 1 Browse to the Admin Tool http 10 0 0 1 For more information see Accessing the Admin Tool on page 29 2 The At a Glance page appears Click RESTORE SAVED CONFIGURATION 3 The Gateway prompts you that restoring a saved configuration will cause...

Страница 43: ...E802 11a n ac wireless clients A 2 4 GHz 3x3 IEEE 802 11n access point that allows you to connect IEEE802 11b g n wireless clients Use this access point for wireless clients that don t support 5 GHz Wireless client The wireless client allows you to connect a wireless client to a wireless access point Both built in and external for example via USB wireless clients are available Check the documentat...

Страница 44: ...lients on your network must use this network name SSID Mode The standards that are allowed for wireless communication Only devices that support one of the selected modes can connect to the Gateway Security Mode The encryption type used to secure your wireless communication We recommend using the default encryption WPAWPA2 PSK TKIP AES as it is compatible with most of the Wi Fi devices and offers a...

Страница 45: ...en detect the presence of your network and inform the users that this network is available Click SAVE SETTINGS Enabling SSID broadcast does not mean that everyone can connect to your network They still need the correct wireless network key password to connect to the Gateway network It only informs them that your network is present SSID broadcasting is required for WPS ...

Страница 46: ...ears click ADD WIFI PROTECTED SETUP WPS CLIENT 5 The Add WiFi Client page appears 6 Click PAIR 7 Within two minutes press the PAIR button of your wireless client Adding a wireless client using WPS PIN entry on the wireless client 1 Browse to the Admin Tool http 10 0 0 1 using a computer or device that is currently connected to you Gateway either wired or wirelessly For more information see Accessi...

Страница 47: ...p 10 0 0 1 using a computer or device that is currently connected to you Gateway either wired or wirelessly For more information see Accessing the Admin Tool on page 29 3 On the Gateway menu click Connection and then click WiFi 4 Click ADD WIFI PROTECTED SETUP WPS CLIENT 5 The Add WiFi Client page appears 6 In the WPS Pin Method list click Enabled 7 In the Connection Options list select Pin Number...

Страница 48: ...ick WiFi 3 The WiFi page appears In the SSID list under Mac Filter Setting select the access point for which you want to set up the Mac filter 4 In the MAC Filtering Mode list click Allow All to allow all wireless clients The Wireless Control List will not be used Allow to block wireless clients by default except if they are listed in the Wireless Control List Deny to allow wireless clients by def...

Страница 49: ...orts The following file systems are supported NTFS FAT32 FAT16 EXT3 EXT4 Configuration The only thing that you need to do is to plug your USB memory stick or external hard disk in one of the USB port s of your Gateway Accessing the shared content on Windows Proceed as follows 1 On the Windows Start menu click Computer 2 An Explorer window appears In the panel click Network 3 If Explorer prompts yo...

Страница 50: ...detected devices Double click BRCM LVG this is the Gateway s file server 5 The following window appears Double click the storage folder 6 Your connected USB devices are now displayed as a folders Double click one of the folders to access the content files stored on the USB device ...

Страница 51: ...ternet security Overview The Gateway offers various options to secure your Internet connection Topic Page 6 1 Parental control 44 6 1 1 Manage sites 45 6 1 2 Manage services 47 6 1 3 Manage devices 49 6 1 4 View parental control reports 51 6 2 Firewall 52 ...

Страница 52: ...to specific website based on the URL or keywords For more information see 6 1 1 Manage sites on page 45 Prevents access to specific application or services for example FTP For more information see 6 1 2 Manage services on page 47 Prevents devices from accessing your network For more information see 6 1 3 Manage devices on page 49 ...

Страница 53: ... either wired or wirelessly For more information see Accessing the Admin Tool on page 29 2 On the left menu click Parental Control 3 The Managed Sites page appears 4 In the Enable Managed Sites list click Enable How to block a specific website Proceed as follows from the Managed Sites page 1 Under Blocked Sites click ADD 2 The Add Blocked Domain page appears 3 In the URL field type the address of ...

Страница 54: ...ed block time should be applied 5 Click SAVE Mark computers as trusted for all websites When a device is marked as trusted all Managed Sites rules will be ignored Proceed as follows 1 Under Trusted Computers look for your device and click Yes in the Trusted column 2 The device is now able to access all web sites unless prevented by other parental control functions that you configured If you want t...

Страница 55: ... the protocol that is used for example TCP In the Start Port box type the start port of the port range for example 21 In the End Port box type the end port of the port range If the service only uses one port enter the same value as in the Start Port box for example 21 8 If you want this rule only to be applied at specific time frames click No in the Always Block list and define when to apply the r...

Страница 56: ...n a device is marked as trusted all managed services rules will be ignored Proceed as follows 1 Under Trusted Computers look for your device and click Yes in the Trusted column 2 The device is now able to use all web services unless prevented by other parental control functions that you configured ...

Страница 57: ...st If your device is not listed enter the computer name and MAC address under Custom Device 4 If you want this rule only to be applied at specific time frames click No in the Always Allow list and define when to apply the rule a Under Set Allow Time enter a start time and end time b Under Set Allow Days select the days for which the selected block time should be applied 5 Click SAVE Adding blocked...

Страница 58: ...e days for which the selected block time should be applied 5 Click SAVE If you want to have different time schedules depending on the day you have to group them in separate rules One rule for weekdays for example block the device from 8 00 PM until 10 00 PM One rule for the weekend for example block the device from 8 00 AM until 10 00 PM ...

Страница 59: ...puter or device that is currently connected to you Gateway either wired or wirelessly For more information see Accessing the Admin Tool on page 29 2 On the Parental Control menu click Reports 3 The Report page appears Under Report Filters select a report type and time frame and click GENERATE REPORT 4 The Generated report table now lists all log entries 5 Optionally you can Click PRINT to print th...

Страница 60: ...ing to the Gateway allows all other traffic Minimum Security Low Allows all secure applications This is the default configuration Custom Security Allows you to create your own security level Changing the security level Proceed as follows 1 Browse to the Admin Tool http 10 0 0 1 using a computer or device that is currently connected to you Gateway either wired or wirelessly For more information see...

Страница 61: ...tion This chapters covers the more advanced features The following topic are available Topic Page 7 1 Port configuration for applications and services 54 7 1 1 UPnP 56 7 1 2 Port forwarding 58 7 1 3 Port triggering 60 7 1 4 Configure a DMZ Host 62 7 2 Assigning a reserved IP to a device 63 ...

Страница 62: ...onse to an outgoing message originating from one of your computers the Gateway sends the incoming message to this computer But the Gateway will not be able to resolve the destination if The incoming message arrives on a different port as the outgoing message Then the Gateway will not know that the two messages are related There is no outgoing message Solutions To avoid this problem the Gateway off...

Страница 63: ...4 v1 0 The Gateway allows you to define a number of trigger ports When a device sends data over one of these ports the Gateway will automatically assign a number of related ports to the device For more information see 7 1 3 Port triggering on page 60 ...

Страница 64: ...is for you If the application is UPnP enabled UPnP will create these entries automatically You can access the Admin Tool without having to remember the address of the Gateway Enable UPnP on the Gateway 1 Browse to the Admin Tool http 10 0 0 1 using a computer or device that is currently connected to you Gateway either wired or wirelessly For more information see Accessing the Admin Tool on page 29...

Страница 65: ...ff click on the message and turn it on 4 Right click Technicolor TC8717C and click View device web page 5 The Admin Tool appears How to use UPnP to access your Gateway on Windows XP If you computer runs Windows XP 1 Go to My Network Places 2 The My Network Places window appears 3 Double click Technicolor TC8717C 4 The Admin Tool appears ...

Страница 66: ...see 7 2 Assigning a reserved IP to a device Procedure Proceed as follows to do so 1 Browse to the Admin Tool http 10 0 0 1 using a computer or device that is currently connected to you Gateway either wired or wirelessly For more information see Accessing the Admin Tool on page 29 2 On the left menu click Advanced 3 The Port Forwarding page appears In the Enable Port Forwarding list click Enabled I...

Страница 67: ...r as in the Starting Port box 7 In the Service IP address box type the IP address of the computer to which you want to assign the service 8 Click ADD 9 Your service is now listed in the Port Forwarding table All incoming requests for the selected service will now be directed to the selected device The Gateway also automatically configures its firewall to allow this service ...

Страница 68: ...the incoming port can differ from the target port Procedure 1 Browse to the Admin Tool http 10 0 0 1 using a computer or device that is currently connected to you Gateway either wired or wirelessly For more information see Accessing the Admin Tool on page 29 2 On the Advanced menu click Port Triggering 3 The Port Triggering page appears In the Enable Port Forwarding list click Enabled In the Port ...

Страница 69: ...nge If you only want to specify one port use the same number as in the Target Port From box 5 Click ADD 6 Your service is now listed in the Port Triggering table All incoming requests for the selected service will now be directed to the selected device The Gateway also automatically configures its firewall to allow this service ...

Страница 70: ...ur DMZ host uses a fixed IP address If not the device might get a new IP address after some time through DHCP and the port forwarding rule will no longer be applied to the device and another device may suddenly be acting as DMZ host For more information see 7 2 Assigning a reserved IP to a device How to configure a device as DMZ host 1 Browse to the Admin Tool http 10 0 0 1 using a computer or dev...

Страница 71: ...sk that you are accessing the wrong device How to assign a reserved IP Proceed as follows to do so 1 Browse to the Admin Tool http 10 0 0 1 using a computer or device that is currently connected to you Gateway either wired or wirelessly For more information see Accessing the Admin Tool on page 29 2 On the left menu click Connected Devices 3 The Devices page appears If your device is already listed...

Страница 72: ...64 7 ADVANCED CONFIGURATION DMS CTC 20131021 0004 v1 0 ...

Страница 73: ...ing configuring or using your Gateway If the suggestions do not resolve the problem look at the support pages on www technicolor com or contact your service provider Topics This chapter describes the following topics Topic Page 8 1 Wireless connection troubleshooting 66 8 2 Network diagnostic tools 68 8 3 Gateway reset and restore options 69 ...

Страница 74: ...int is enabled on page 67 Poor wireless connectivity or range Try the following Check the signal strength indicated by the wireless client manager If the signal is low try to reposition the Gateway If you are connected to the 5 GHz access point try connecting to the 2 4 GHz access point instead Change the wireless channel Use WPAWPA2 PSK TKIP AES as encryption For more information see 4 1 How to c...

Страница 75: ...eway either wired or wirelessly For more information see Accessing the Admin Tool on page 29 2 Under Gateway click Connection and then click WiFi 3 The WiFi page appears Click the EDIT button next to the access point that you want to modify 4 The Edit page appears 5 In the Wireless Network list click Enabled 6 Click SAVE SETTINGS Cannot connect via WPS If you are having trouble connecting your wir...

Страница 76: ...Browse to the Admin Tool http 10 0 0 1 using a computer or device that is currently connected to you Gateway either wired or wirelessly For more information see Accessing the Admin Tool on page 29 2 On the Troubleshooting menu click Diagnostic Tools 3 The Network Diagnostic Tools page appears The following tools are available Test Connectivity Results Check for IPv4 Address Results Check for IPv6 ...

Страница 77: ...information see Accessing the Admin Tool on page 29 2 On the Troubleshooting menu click Reset Reboot Gateway 3 The Reset Reboot Gateway page appears Click RESET to restart the Gateway RESET WIFI MODULE to restart just the wireless module only RESET WIFI ROUTER to restart the wireless and router modules RESTORE WIFI SETTINGS to activate the Gateway default settings for wireless only All changes to ...

Страница 78: ...an unfolded paperclip to push the recessed Reset button on the back panel of the Gateway for approximately 5 seconds and then release it Restore the factory default settings of the Gateway use a pen or an unfolded paperclip to push the recessed Reset button on the back panel of the Gateway for at least 15 seconds and then release it 3 The Gateway restarts SN CPYYWWPPXXX CM MAC 00111100ABCD Reset ...

Страница 79: ......

Страница 80: ...ced are service marks trademarks or registered trademarks of their respective companies Specifications subject to change without notice DMS CTC 20131021 0004 v1 0 TECHNICOLOR WORLDWIDE HEADQUARTERS 1 5 rue Jeanne d Arc 92130 Issy les Moulineaux France www technicolor com ...

Отзывы: