

USB 3.0 TO SATA ADAPTER
USER MANUAL
EN
IntroductIon
The USB3.0 to SATA Adapter is an ultra and durable USB3.0 device for you easy to
convert your hard drives of SATA into USB 3.0 super high speed.
1.0 safety InstructIons
Put the device always on a stable and straight surface. In case of falling it can be
damaged.
Don’t place the device into direct sunlight or in places with high temperature. This can
damage the device or shorten his average useful life.
Don’t place it in the near of heat sources, like radiators or other heat producing devices.
Don’t expose the device to rain, water, wetness or high humidity.
Don’t place it in the bathroom or the kitchen in the near of a sink, avoid the direct
contact with water.
Prior to the first use of our product make a backup of your data.
We are not liable for any loss of data, unless you can accuse us intension or gross
negligence.
In any case, liability for loss of data is limited to the effort that is necessary to restore
from existing backup copies.
1.1 SPECIFICATIOn
Compatible to SATA 1.5/3/6G specification
Compatible to USB3.0/2.0/1.1 specification
Transfer rate up to 3Gbps
Supports 2.5’’ SATA I/II/III hard disk
Plastic design, slim and easy to carry
Blue LED for data access
Meets the UASP transport protocol (USB Attached SCSI Protocol)
Supports Windows 2000/2003/XP/Vista/7/8/10/Linux/Mac 10.3 or above (only USB2.0)
1.2 SySTEM REQUIREMEnTS
USB2.0: Windows 2000/2003/XP/Vista/7/8/10/Mac 10.3 or higher
USB3.0: Windows 2000/2003/XP/Vista/7/8/10
1.3 LED STATUS
Lights up when power on. Blinking when there is data flow.
1.4 PACKAGE COnTEnT
1 x USB3.0 to SATA Adapter
1 x User Manual
2.0 InstallatIon
2.1 HARD DRIvE InSTALLATIOn
1. Connect the 2.5” Hard Disk onto the USB 3.0 to SATA Adapter.
2. Connect to USB port of PC.
2.2 vERIFy HARD DRIvE InSTALLATIOn
After install Hard Drives to adater, please connect this to host computer with USB
interface, then the system should detect your hard drive automatically. The string will
end with
“USB Device”
.
•
UnDER WInDOWS:
To verify your installation, select
Control Panel > System > (Hardware) > Device
Manager
. Your hard disk, whether it’s formatted, should be displayed under the Disk
drives group.
- 3 -
* The screenshot is an example from Windows Vista. Actual disk drive string varies
according to your disk brand and model.
When the adapter is connected to your computer via USB interface, an USB device
monitor icon will appear on the notification area of the taskbar.
•
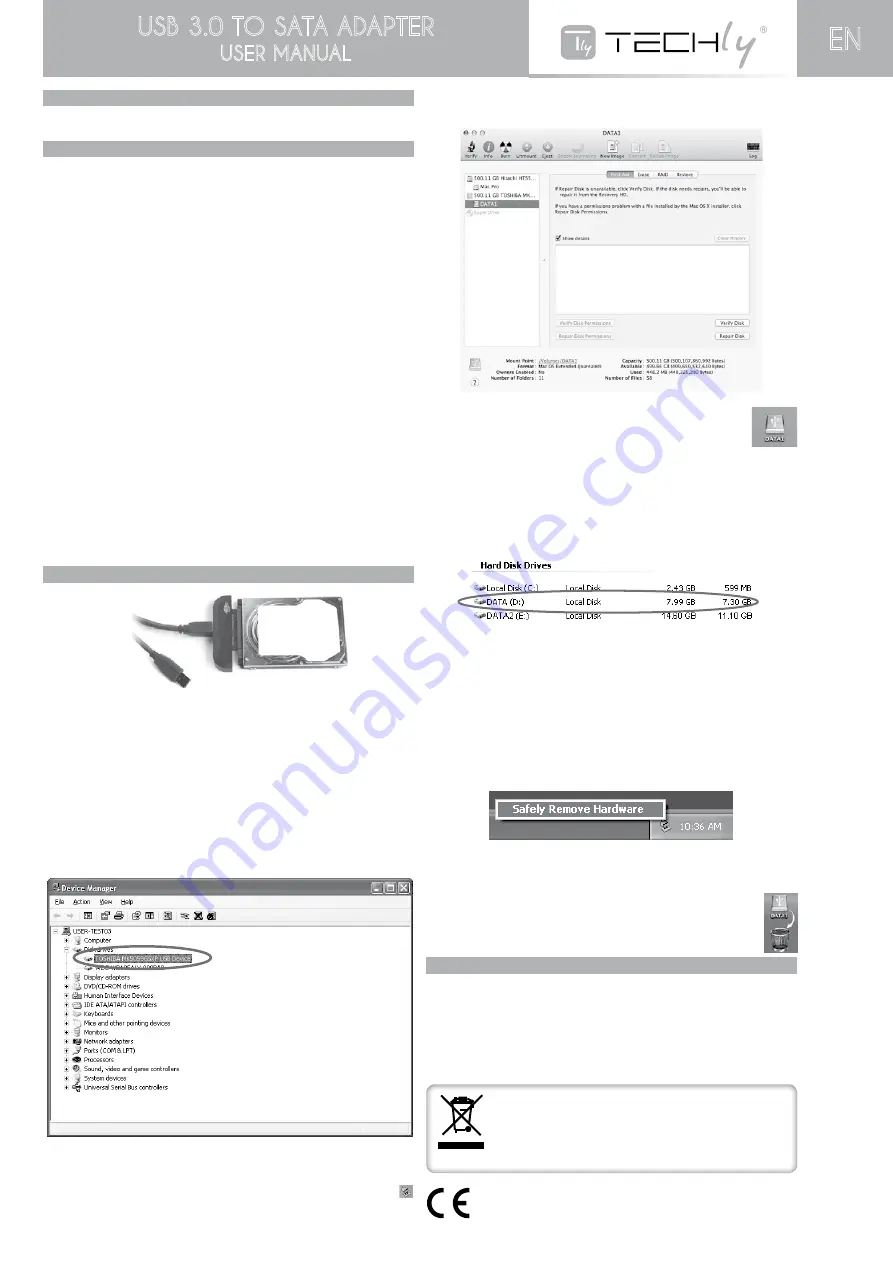
UnDER MAC: (OnLy FOR USB2.0)
To verify your installation, open the
Disk Utility
. Your hard disk should be displayed.
When the adapter is connected to your computer via USB interface, the
attached hard drive will be mounted to the desktop and appears as a
removable media device.
2.3 USInG THE HARD DRIvE
Now you are ready to use the attached hard drives as an external storage device. A
brand new hard drive must be partitioned and formatted first. You can use Windows
Disk Management utility in Windows 2000/ XP/ Vista/ 7/ 8 or other disk management
software to perform disk‐related tasks. Please refer to your software documentation
for instructions. Under Windows, the external hard drive(s) should be displayed in
My
Computer
.
* Drive name and letter vary according to your configuration. You can read and write
files from and to the connected adapter as you would with an ordinary hard drive.
2.4 SAFELy UnPLUG THE EnCLOSURE
When the adapter is connected to your computer via USB interface, the adapter
supports USB hot-plugging feature. Before unplugging the adapter from your
computer, please use the unplug/eject hardware icon in the system tray to safely
remove the device.
•
UnDER WInDOWS:
1. In the notification area, right click the unplug/eject icon and
select Unplug or eject
hardware
or
Safely Remove Hardware or Safely Remove USB Disk
.
2. Select the device you want to unplug, then click
Stop
and
OK
.
3. When Windows notifies you that it is safe to do so, click
OK
and unplug the adapter
from your computer.
• Under MaC oS (only for USB2.0)
Under Mac, remember to drag the corresponding disk icon representing the
drive to the trashcan before unplugging the device. When prompted, click
OK and now you can unplug the device.
3.0 InstallatIon notes
1. If the computer fails to detect the adapter, make sure all of your connections are
secure.
Make sure your Drive is formatted using a file system that is compatible with your
computer. Make sure the drive letter for the hard drive is available. Use the device
manager to search for the device.
2. Users are advised to "safely remove the hardware" form the computer before
unplugging the cable or turning off the device.
In compliance with EU Directive WEEE this product is marked with
this symbol. It means that used electrical and electronic products
should not be mixed with general household waste. There is a
separate collections system for these products in compliance
with WEEE directive, otherwise contaminative and hazardous
substances can pollute the environment.
EC Declaration of Conformity with the CE sign, Techly® ensures that the
product is conformed to the basic European standards and directives


