background image

Tuning, Adjusting & Maintaining 

the 1/10 Night Crawler

Tuning the 1/10 Night Crawler

Shock Location:


The 1/10 Night Crawler has two mounting locations. The 

position can be easily adjusted by simply moving the top 

of the shock to another hole. The standard location (lower 

hole) works best on  jagged rocks or rougher terrain by 

raising the chassis providing more “belly” clearance. 

Moving the top of the shock to the upper hole will reduce 

the amount of droop and lower your chassis. This works 

better on smooth, steep rocks and “sidehilling” and 

increases stability.

Upper Track Rods:


Raising or lower the upper track rods will change how the 

1/10 Night Crawler reacts under power when climbing and 

descending. The links have been placed in the middle 

position for a more neutral setting. Generally on high 

traction rock we suggest mounting the links in the upper 

holes while on loose or slippery rock use the bottom 

holes. Both front and rear link adjustments will change the 

handling of your 1/10 Night Crawler, experiment with the 

settings and see what suits your driving style.

  Adjusting Gear Mesh:

Incorrect gear mesh is the most common cause of stripped spur 
gears. To set the gear mesh, one method is to cut a narrow strip 
of notebook paper and thread it in between the gears. Loosen 
the motor screws and slide the motor and pinion gear into the 
spur gear. Retighten the motor screws and then remove the strip 
of paper. Or you can loosen the motor and carefully slide the 
motor leaving a small amount of backlash (play) between the 
spur and pinion gears. It should not be tight and if you look 
up-close there should be slight movement of the spur before 
contacting the teeth on the pinion gear.

Gear Ratio:


When using higher gear ratios (bigger pinion), it is extremely 
important to monitor the temperatures of the battery and motor. If 
the battery is extremely hot, and/or the motor is so hot that you 
cannot touch it, most likely you are over geared and drawing a 
lot of current. The pinion gear installed on the 1/10 NIght Crawler 
is a 20-tooth pinion provides the power for most crawling 
situations.

Periodically examine your 1/10 Night Crawler for the following:

• 

Keep your vehicle clean using a brush to remove dirt and 
dust.

• 

Look for cracks in the suspension arms and other molded 
parts.

• 

Check that the tires are still secure to the wheels.

• 

Check that all the wheel bearings are clean and lubricated.

• 

Using your tools, attempt to tighten all the screws and nuts.

• 

Transmission gears

o  Check the compound gear for wear.
o  Check the spur gear for wear.
o  Check the pinion gear.

• 

Take the shocks off the vehicle and check, especially if they 
appear to be leaking, as it is time to rebuild them. 

• 

Look over all the wiring and connections for bare wire or any 
place which could lead to a short circuit.

• 

Verify that the ESC is securely mounted to the chassis.

• 

Verify the receiver is still securely mounted to the chassis.

• 

Turn on the radio. If the Green LED is off or dim, replace the 
4 AA batteries in the transmitter.

After you become familiar with driving your 1/10 Night Crawler, 

you may need to reset or make adjustments for better driving 
performance.

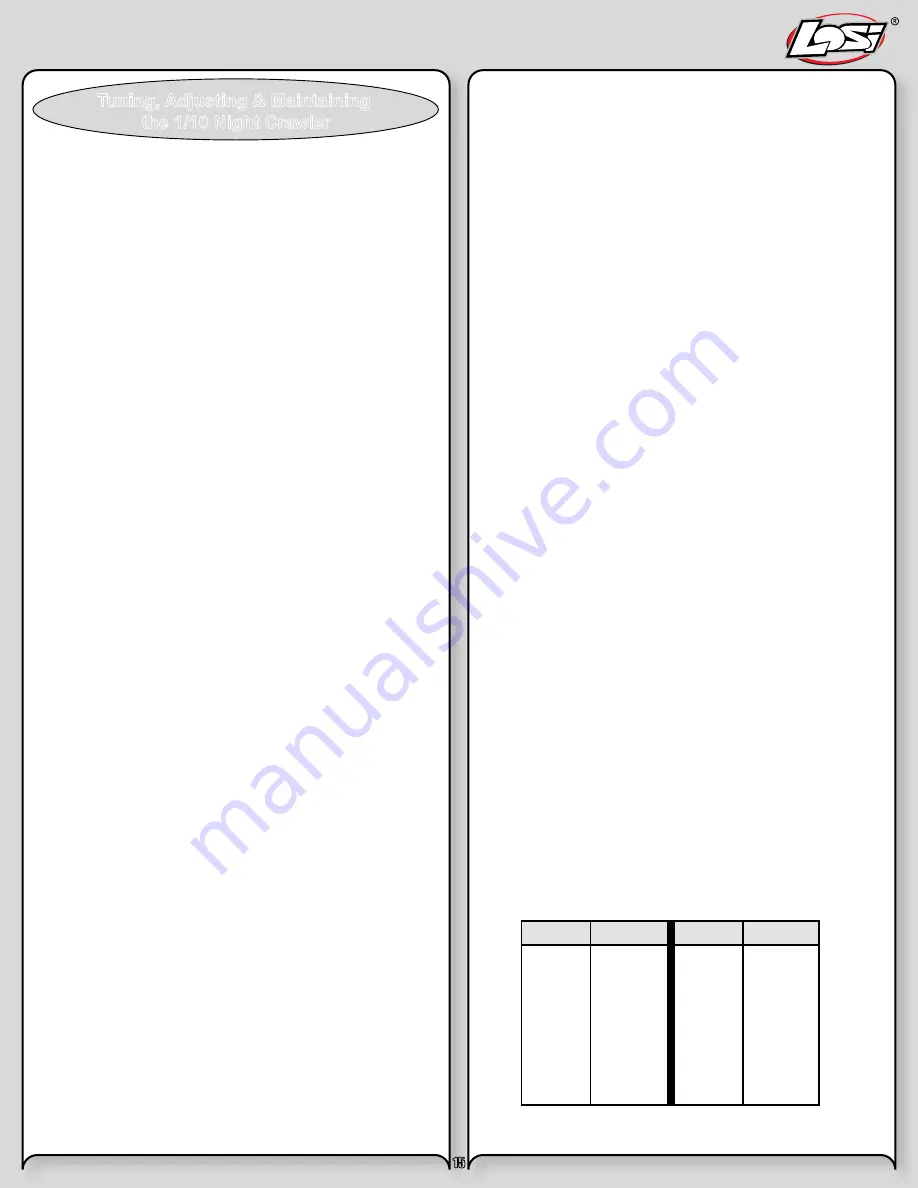
Gear Ratio Chart

1 2           1 0 4 . 1 9
1 3             9 6 . 1 8
1 4             8 9 . 3 1
1 5             8 3 . 5 5
1 6             7 8 . 1 4
1 7             7 3 . 5 5
1 8             6 9 . 4 6

1 9             6 5 . 8 0
2 0             6 2 . 5 1
2 1             5 9 . 5 4
2 2             5 6 . 8 3
2 3             5 4 . 3 6
2 4             5 2 . 0 9
2 5             5 0 . 0 1

P i n i o n       R a t i o

P i n i o n       R a t i o

15

Содержание Night Crawler

Страница 1: ...or registering your Losi Product you will be automatically entered for a chance to win the Losi Pick Your Prize Sweep stakes The winner will be allowed to select a total prize package of 1 000 retail...

Страница 2: ...Product Online Register your 1 10 Night Crawler now and be the first to find out about the latest option parts product updates and more Log on to www LOSI com and follow the product registration link...

Страница 3: ...d General The 1 10 Night Crawler is not a toy This product is not intended for use by children without direct adult supervision Avoid an area that has many pedestrians or crowds of people Keep in mind...

Страница 4: ...V power source to charge your batteries You would need to use or purchase a hobby grade 12V power supply before charging If you are going to be using a charger other than a peak detection charger it i...

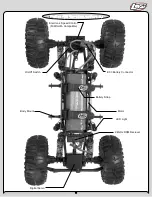
Страница 5: ...LED Light Body Mount Digital Servo 2 4GHz DSM Reciever EC3 Battery Connector Electronic Speed Control NiMh LiPo Compatible On Off Switch Motor Battery Strap 5 The Losi 1 10 Night Crawler Overview...

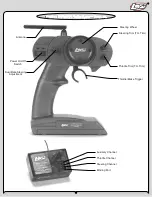
Страница 6: ...l Rate Steering Adjustment Antenna Steering Trim TH Trim Steering Wheel Throttle Brake Trigger Auxiliary Channel Throttle Channel Steering Channel Binding Port Throttle Trim TH Trim 6 The Losi LSR 300...

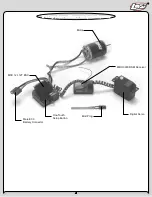
Страница 7: ...Motor Digital Servo Bind Plug One Touch Setup Button Male EC3 Battery Connector MSC 12L 12T ESC MRX 3000 DSM Receiver 7 1 10 Night Crawler Electronics System Overview...

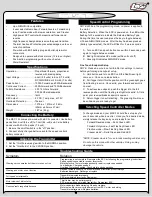
Страница 8: ...ired with EC3 battery plug and bullet style motor connectors Designed to operate with stock motors 12 turns or higher Push button programming with one touch setup Water Resistant Operation Proportiona...

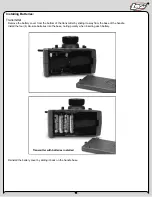
Страница 9: ...ottom of the transmitter by sliding it away from the base of the handle Install the four 4 AA size batteries into the base noting polarity when inserting each battery Reinstall the battery cover by sl...

Страница 10: ...de the battery under the straps Pull tight the straps and lay the strap on the exposed loop surface When installing optional Crawler LiPo packs remove both hook and loop straps and install one strap t...

Страница 11: ...to the Losi LSR 3000 transmitter see page 9 Use alkaline or rechargeable batteries only 4 Install the battery pack see previous page The battery pack should be fully charged before installation 5 Turn...

Страница 12: ...es such as 27MHz or 75MHz neither will you experience any overlapping interference from other 2 4GHz systems Transmitter The Losi LSR 3000 transmitter has several adjustments available to increase you...

Страница 13: ...icle Notice the LED is now blinking 4 You are now ready to turn on the transmitter You should notice on the back of the transmitter a similar blinking LED under a translucent cover 5 Both the receiver...

Страница 14: ...he steering assembly The vibrations of running off road tend to loosen screws and nuts Be careful driving when the battery is nearly discharged or the car is running slowly You could lose enough power...

Страница 15: ...ould not be tight and if you look up close there should be slight movement of the spur before contacting the teeth on the pinion gear Gear Ratio When using higher gear ratios bigger pinion it is extre...

Страница 16: ...s are good and or if rechargeable are fully charged Replace them if needed If the power light is blinking then the transmitter batteries are weak and should be replaced Short radio range If the radio...

Страница 17: ...Damage Limits CONT D If you as the Purchaser or user are not prepared to accept the liability associated with the use of this Product you are advised to return this Product immediately in new and unu...

Страница 18: ...3 or e mail us at productsupport horizonhobby com with any questions or concerns regarding this product or warranty United Kingdom Electronics and engines requiring inspection or repair should be ship...

Страница 19: ...ted below followin the provisions of the European R TTE directive 199 5 EC EN 300 328 Technical requirements for Radio equipment EN 301 489 1 301 489 17 General EMC requirements Signed for and on beha...

Страница 20: ...49 99 LOSA99150 Losi Nut Driver Set US 4pc 54 99 LOSA99162 Losi Nut Driver 7mm 14 99 LOSA99170 Shock Matching Tool 29 99 LOSA1030 Spindle Carrier Set 9 99 LOSA1033 Upper Suspension Link Mount 3 99 LO...

Страница 21: ...29 LOSA4012 LOSA1033 LOSA6206 LOSA6308 LOSA4037 LOSA4037 LOSA6206 LOSA6956 LOSA6358 LOSA6358 LOSA3175 LOSA6947 LOSA6947 LOSA3175 LOSB2370 LOSA6229 LOSA4037 LOSA4037 LOSA4037 LOSA1030 LOSA6256 LOSA3194...

Страница 22: ...LOSA1034 LOSA4039 LOSA6245 LOSA6256 LOSB9996 LOSB9996 LOSB9996 LOSA8200 LOSB2460 LOSB2290 LOSB9499 LOSB3012 LOSB3015 LOSB3012 LOSA6213 LOSA6213 LOSA6206 LOSA6206 LOSA6947 LOSA6947 LOSA6109 LOSB3014 LO...

Страница 23: ...LOSA6947 LOSA6947 LOSA4012 LOSA6294 LOSA6206 LOSA6358 LOSA3174 LOSA6358 LOSA2030 LOSA3184 LOSA6937 LOSA3185 LOSA6956 LOSA2030 LOSA3194 LOSB3525 LOSA3175 LOSA6956 LOSA1033 LOSA6221 LOSA6210 LOSA6206 LO...

Страница 24: ...LOSA5022 LOSB2827 LOSA5015 LOSA5012 LOSA5079 LOSA6100 LOSA5046 LOSB2828 LOSA5156 LOSA5023 LOSA6206 LOSA6258 LOSB7002 LOSB7002 LOSA7020 LOSA7682B 21 1 10 SCALE ELECTRIC READY TO RUN ROCK CRAWLER...

Отзывы: