23
Replacing Brake pads
Brake pads usually have a wear line indicator, but a good guide for knowing to replace them is when the
grip has worn out and definitely before you get down to the metal.
To replace your brake pads
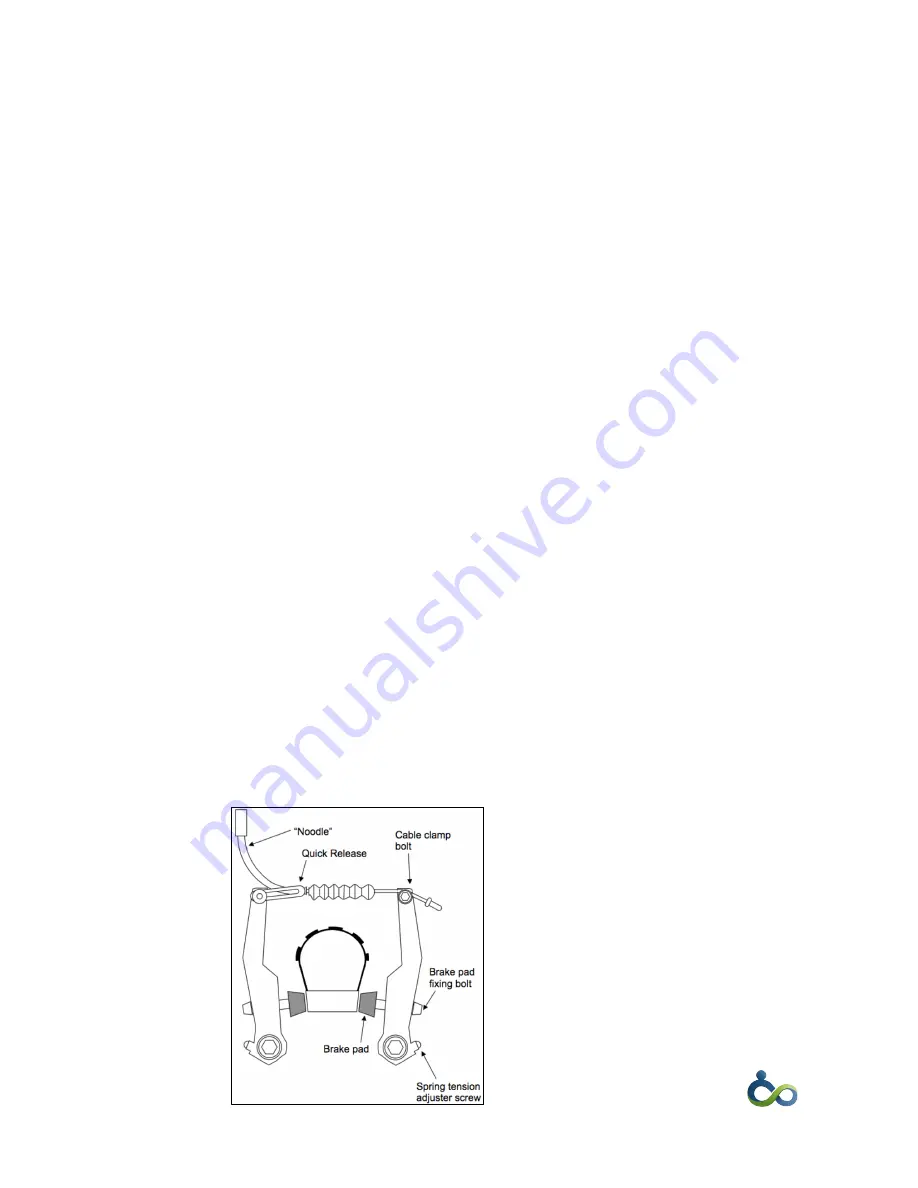
1. Release the brake cable tension.
2. Push both brake arms together and release the L shaped noodle from the housing stop, the
brakes should spring open.
3. Once you have released the brakes, unscrew the brake pad fixing bolt and remove the brake pad.
4. Replace the rake pad (ensuring you keep the nuts and washers in the same order as they were on
the old pads), reconnect the brake cable, then adjust and tighten as explained previously.
Brake Cable Adjustment
Brakes need to be effective! You should be able to fully apply the brake, stopping the bike;
long before the brake levers meet the handlebars.
Brake can be made more effective by shortening the brake cable, this increases the cable tension.
There are two ways to adjust the cable length.
Adjusting the cable using the Barrel Adjuster
The Barrel Adjuster is found on the brake lever, unscrewing the adjuster increases the cable tension and
makes the brakes more responsive. If the brakes are too close to the rims you can screw in the adjuster,
this decreases the cable tension.
The barrel adjuster only allows for a limited amount of adjustment, often you need to take up more slack
from the cable.
Adjusting the cable from the cable clamp bolt
1. Loosen the cable clamp bolt.
2. Unscrew the barrel adjuster on the brake lever half way.
3. Pull the cable nice and tight.
4. Hold the cable tight whilst tightening the fixing bolt back up again.
5. Then screw the barrel adjuster all the way in.
This should leave the brake pads a few millimeters away from the rim. Don’t worry if you follow these
instructions and the adjustment is not perfect. This is not an exact science and sometimes you will have to
loosen or tighten the cable a bit more to get things just right.
Figure 4


