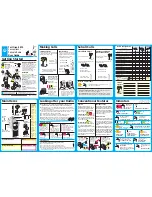
Setting up the TEAM PT-2208S
Unpack carefully your UHF radio PT-2208S. Please check whether the supplied material matches
with the positions listed below. In case of loss or damage of a part contact your carrier at once.
This transceiver is a heavy duty Freenet radio, which can be optionally modified by your dealer
also into a professional transceiver together with the Freenet channels. In this unit only the chan-
nels 1 – 3 are already factory-preset to the Freenet channels, i.e. the number of the rotary channel
selector position corresponds with the actual Freenet channel. The positions 4 – 16 are free
according to the factory setting. The TX output power on the Freenet channels is reduced to 500 mW
in the radiated field according to the European regulation. See in the chapter “technical data“ for
the table of the Freenet channel numbers together with the corresponding frequencies. When the
unit remains in pure Freenet operation, it is free of charge and registration in most European
countries.
If you want to use the unit as a professional transceiver, you have to contact your local tele-
communication authorities. You may be required to pay costs of registrations and annual fees for
every unit and for every frequency. If your application is passed, you can go to your dealer and
let him set your PT-2208S to the permitted frequency(ies) and adjustments.
Mounting of the Accumulator
At first turn the rear panel towards you. Place the accumulator ( 9 ) in that way
on the unit’s rear panel that the 4 slip planes of the unit grip into the correspond-
ing guiding slots of the accumulator, and that the accumulator’s charging
contacts show into the direction of the unit’s base. Then push the accumulator
under simultaneous slight pressure on its back into the direction of the unit’s top
side, until the latch on the unit’s base clicks into place. Now the unit is ready for
radio operation.
Detaching of the Accumulator
Turn again the unit’s rear panel towards you. To release the accumulator from
the unit you have to pull the latch on the unit’s base with your finger towards the
unit’s front panel, while pushing simultaneously the accumulator towards the
unit’s base. After the accumulator is slid out of the unit’s slip planes you can take it off.
Removing and mounting of the belt clip
Turn the rear panel towards you.
Mounting of the Belt Clip
Pull the springy support of the belt clip a bit out of its rest position by using your
index finger and your middle finger. When the support is parallel to belt clip’s main
part insert it from above into the corresponding guide on the back of the accumu-
lator. Push the belt clip into the direction of the unit’s base until the belt clip’s latch
clicks into place.
Detaching
The latch of the belt clip is located on the accumulator’s back near the top side.
Pull the latch with your fingernail away from the accumulator’s back and push
simultaneously the belt clip towards the unit’s top side. After the belt clip is slid out
of its guide you can take it off.
12
ENGLISH
battery pack
belt clip
charger
wrist loop
adapter
manual
Declaration
of Conformity
antenna
manual 04.02.2005 14:27 Uhr Seite 12


