


10
11
12
13
14
15
16
Step 10
Step 15
✓
✓
✓
!
REPLACEMENT
INSTRUCTIONS
(CONTINUED)
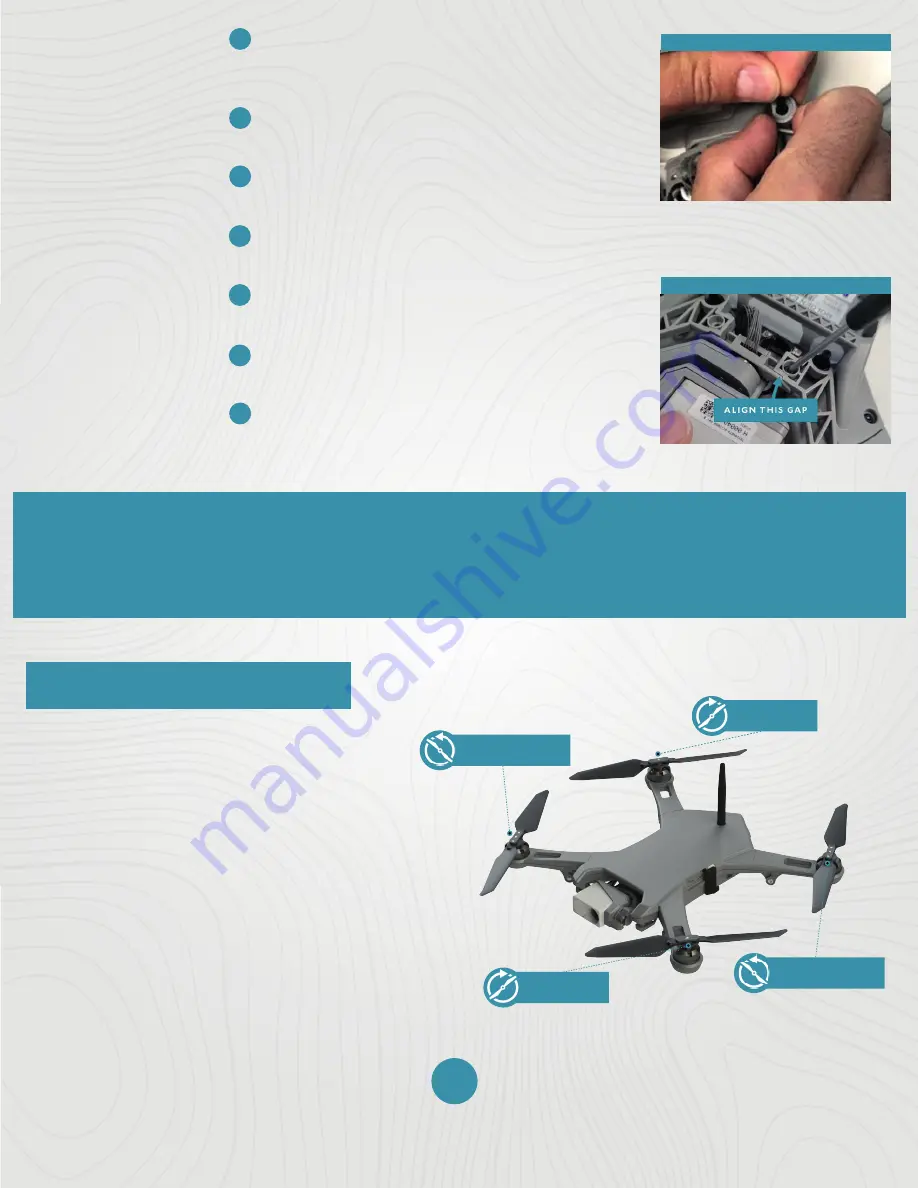
Hold the bracket in place and pull the end of
the silicone damper through the hole in the
bracket (as shown in the image to the right).
Make sure that the damper is properly seated
in the bracket.
Repeat this procedure for the remaining
dampers.
Align the threaded inserts on the gimbal
under the holes on the gimbal brackets.
Place the two (2) M3 x 8mm screws into the
holes on the gimbal brackets.
Align the gaps (as shown in the image to the
right).
Use a Torx T8 screwdriver to tighten the
screws to 0.6 N*m (0.44 ft-lbs).
Manually move the gimbal pitch and roll axis and check for binding or obstructions.
Ensure that no wires are pinched.
Power on the system and confirm the gimbal properly functions and is properly oriented.
SYSTEM
CHECKOUT
PROPELLER REPLACEMENT
Individual damaged or worn propellers require
the entire 2-prop assembly to be replaced, but
are easily installed, removed, or replaced with
a simple push-and-twist method that requires
no tools or hardware.
The propeller assemblies are keyed so that
CCW and CW props cannot be inadvertently
mounted to the wrong hub.
The two CW prop assemblies have black rivets
that secure their blades, and the two CW
propeller motors have a black ring below the
spring.
The two CCW prop assemblies have silver
rivets that secure their blades, and the two
CCW propeller motors have a silver ring below
the spring.
NOTE:
CW prop assemblies lock into place by turning
it in a CCW direction, and CCW prop assemblies lock
into place by turning it in a CW direction.
CLOCKWISE
PROPELLER (CW)
COUNTERCLOCKWISE
PROPELLER (CCW)
COUNTERCLOCKWISE
PROPELLER (CCW)
CLOCKWISE
PROPELLER (CW)
05
© 2022 Teal Drones, Inc.
SUP-00005, REV A


