Spectrum
™
Final Setup
17
Final Setup
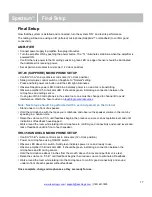
Now that the system is installed and connected, turn the system “ON” and test its performance.
The testing will be done using an IR (infrared) microphone (Sapphire™ or Handheld) to confirm good
connectivity.
AMPLIFIER
•
Connect power supply to amplifier, then plug into outlet.
•
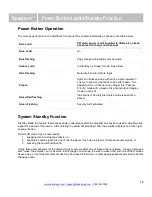
Turn the amplifier ON by pushing the power button. The “TL” illuminates solid blue when the amplifier is
powered ON.
•
Confirm there is power to the IR ceiling sensor: A green LED on edge of sensor should be illuminated
that indicates it is receiving power.
•
Set all gain/volume dials to mid scale (12 o’clock position)
IRT-60 (SAPPHIRE) MICROPHONE SETUP
•
Confirm "Ch A" volume dial is at mid scale (12 o’clock position)
•
Slide gain/volume control switch on Sapphire to "Normal" setting.
•
Press and hold power mic button until the LED light illuminates.
•
Observe Sapphire power LED. Solid blue indicates power is on and mic is transmitting.
•
Observe amplifier Ch A indicator LED. It should be green, indicating a connection between the
microphone and ceiling sensor.
•
If using two IRT-60 microphones in the same room, one must be changed to channel B to avoid
interference. Watch the how-to video on
Note: Next steps should be performed with a second person as the listener
•
Stand under or in front of a speaker.
•
Hold the microphone with the top at your collarbone and observe the speaker volume in the room by
speaking in a natural voice.
•
Raise the volume on Ch A until feedback begins, then reduce volume to an acceptable level and until
indications of feedback have stopped.
•
Walk around the room while talking into microphone to confirm good connectivity and sound levels and
lack of feedback under/in front of each speaker.
IRH-35 HANDHELD MICROPHONE SETUP
•
Confirm "Ch B" volume control is set to mid-scale (12 o’clock position)
•
Power on microphone using ON/OFF switch.
•
Observe LED above mic switch. Solid green indicates power is on and ready to use.
•
Observe amplifier Ch B indicator LED. It should be green, indicating a connection between the
microphone and IR ceiling sensor.
•
Hold the microphone about 3 inches from the mouth, above chin level and perform voice test.
•
Raise the volume on “Ch B” until feedback begins, then reduce volume to eliminate all feedback.
•
Walk around the room while talking into the microphone to confirm good connectivity and sound
under/in front of each speaker without feedback.
Once complete, charge microphones so they are ready for use.
Содержание Spectrum IMA-840
Страница 1: ...Spectrum IMA 840 Classroom Audio System Installation Manual ...
Страница 7: ...Spectrum System Diagram 6 www teachlogic com support teachlogic com 760 631 7800 ...
Страница 23: ...P N UMM 840 20210610 541 Main St Longmont CO 80501 TeachLogic com Support TeachLogic com 760 631 7800 ...


