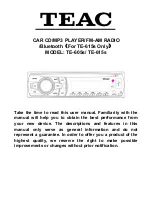
Panel
Note
:
If the control panel is dirty, wipe off the dirt with soft, dry cloth only. And use a cotton swab
soaked in isopropyl alcohol to clean the socket on the back of the control panel.
Basic Operations
Reset the unit
Operating the unit for the first time or after replacing the car battery, you must reset the unit.
Press RESET button to restore the unit to its original factory settings.
Power on/off
Press PWR button to turn on the unit. Hold PWR button on front panel to switch the unit off.
Volume control
Rotate VOL knob on the front panel or press VOL+/- button on RC to adjust the volume level.
Turning the sound off
Short press PWR button on the front panel or press MUTE button on RC to turn the sound off. Press it again
to turn the sound on.
Setting the sound characteristics
Repeatedly press SEL button on the front panel or RC to select the audio settings: BASS => TRED => BAL
=> FAD=> X-BASS=> DSP=> DX=> STEREO=> VOLUME. Rotate VOL knob on front panel adjust each
setting.
Setting other features
Press and hold SEL button on the panel, and then shortly press this button repeatedly to select a setting. Or
repeatedly press SEL button on the RC to select a setting. Rotate Volume knob on the panel or press
VOL+/VOL- on the RC to adjust each setting, press SEL button to confirm the each setting: VOL ADJ
→
AREA EUR(Only for Radio mode)
→
CLOCK 24HR
→
SUBWOOF ON/OFF
→
BEEP ON/OFF
VOL
When VOL is selected, rotate the volume knob clockwise to boost the default startup volume, rotate the
volume knob counterclockwise to decrease the default startup volume.
DIS
Long press DIS button to enter time setting (default hour setting), rotate the volume knob clockwise to
increase the hours, short press VOL button to switch to minutes setting. Then rotate the volume knob
clockwise to increase the minutes, press DIS button to confirm input.
BEEP
10) Present 1/Play or pause button
11) Present 2/Repeat button
12) Present 3/Introduce button
13) Present 4/Random button
14) Present 5/Down 10 button
15) Present 6/Up 10 button
16) AUX-IN Jack
17) Release button
18) USB slot
19) Open button
20) IR sensor
21) DISC Slot
1
)
Mode button
2
)
Power /mute button
3
)
EQ button
4
)
Volume /Sel button /Subwoofer on or off
5
)
AS/PS button
6
)
DIS button
7
)
Fast rewind/Previous track/
Accept
(For TE-615s Only)
8
)
Band button
9
)
Fast forward/Next track/Reject
(For TE-615s Only)
Содержание TE-605s
Страница 8: ...www phonic teacaudio com...


