auto tuning.
“DTV”, "AV","YPbPr", "VGA", "HDMI1", "HDMI2",
CH
+/-
+/-
+
-
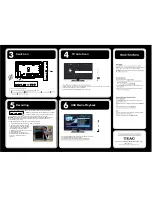
1. Connect a USB/Hard Disk Drive (HDD) at the side panel as shown by the picture as below.
2. After USB/HDD is connected, you will need to format it before doing any recording.
3. Follow instructions below to enter DVR menu to format USB / HDD:
A Connect your antenna to the RF port.
Connect to the power cord, and turn on the power by the SWITCH.
3UHVVŻŹWRVHOHFW³'79VHWWLQJ´PHQXDQGSUHVVŸźWRVHOHFW³7XQLQJ´SUHVV2.NH\WRHQWHU7KHQSUHVV
ŸźNH\WRVHOHFW³$XWR6FDQ´WKHPHQXZLOODSSHDU
B
C
Recording
n
a
c
S
o
t
u
A
V
T
n
o
h
c
t
i
w
S
USB Media Playback
A Connect a USB/Hard Disk Drive (HDD) at the side panel of the unit.
B Press MEDIA button on the remote control.
2.
WARNING
: Formatting an external drive would erase all memory in the system. Please make sure
that no important documents are stored in the external drive before formatting. TEAC is not
responsible for any loss of data.
TEAC CUSTOMER SUPPORT HOTLINE (TCS)
1300 553 315
Between Monday to Friday – AEST 8:30AM to
6
PM
E
NOTE:
For best performance with external HDDs, use a HDD
with an external power supply. Use only USB for recording.
$&32:(5,1
SWITCH
L-i n
R-in
Video
0,1,
YPbPr
USB1
HDMI1 HDMI2
Coax
˄
TV upgrade only
˅
USB2
RJ45
(
PVR record / Media
)
240602000541
240602000541
0,1,
YPbPr
USB1
˄
TV upgrade only
˅
USB2
RJ45
(
PVR record / Media
)
A. Activate Instant Recording by pressing [REC] in Live TV mode.
B. The current channel will begin recording,
default recording time is 2 hours. To adjust
recording duration press [REC] again to
choose between 3 minutes to 24 hours.
C. Alternatively you can set the recording to end
when the program ends.
'3UHVV>6723@WRVWRSUHFRUGLQJ
Recorded programs can be viewed from the
DVR menu – access it by pressing
[Rec.list].


