background image

ENGLISH   

- 13 -

%5,*+71(66

&2175$67

&2/285

6+$531(66

7,/7

9&502'(

3,&785(02'(

2))

0$18$/

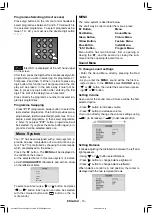
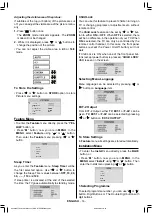
Setting Picture Mode

This  item  is  used  to  change  the  picture  mode.  By
pressing  “ ”  or  “ ”  button  you  may  select  one  of

these options: 

BRIGHT

,

 STANDARD

,

 SOFT

,

 MANU-

AL

.

%5,*+71(66

&2175$67

&2/285

6+$531(66

7,/7

3,&785(02'(

&2/2857(03

0$18$/

1250$/

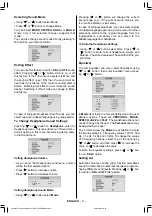
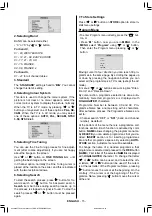
Setting Colour Temp

This item is used to change the Colour Temperature.
By pressing “ ” or “ ” button you may select one of

these options: 

COOL

,

 WARM

,

 NORMAL

.

Note:

  Colour Temperatures  transitions  are  become

slowly.

%5,*+71(66

&2175$67

&2/285

6+$531(66

7,/7

3,&785(02'(

&2/2857(03

0$18$/

1250$/

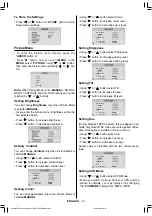
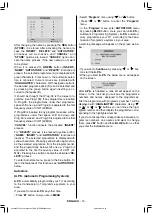
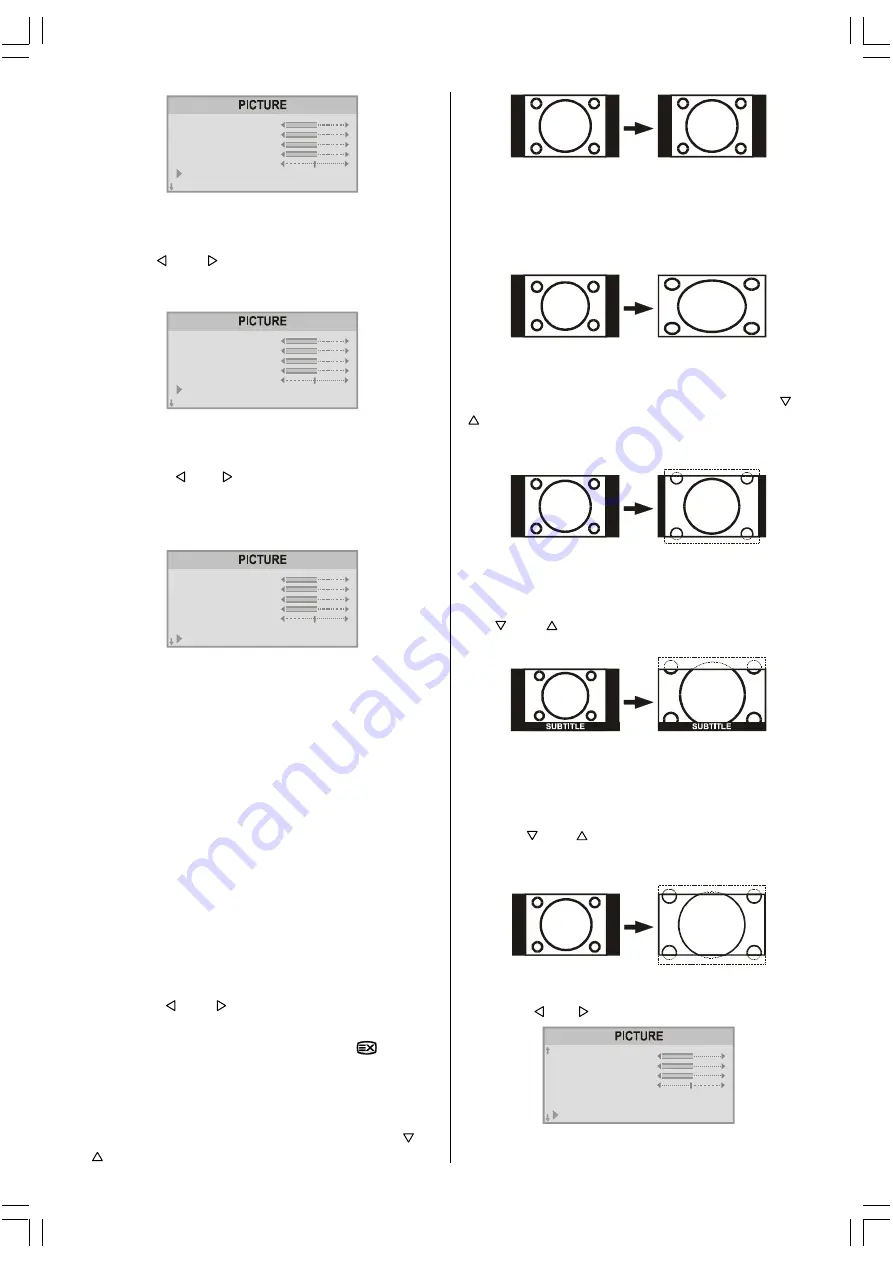
Setting Zoom

You can change the screen size according to the pic-

ture aspect ratio. Select the optimum one from the fol-

lowing 

ZOOM

 modes.

AUTO:

When  a 

WSS  (Wide  Screen  Signalling)

  signal,

which shows the aspect ratio of the picture, is includ-

ed in the broadcast signal or the signal from an exter-

nal device, the TV automatically changes the 

ZOOM

mode  to 

16:9

  mode  or 

4:3

  mode  according  to  the

WSS

 signal.

• When the 

AUTO

 mode does not function correctly

due to poor 

WSS

 signal quality or when you want to

change the 

ZOOM

 mode, change to another 

ZOOM

mode manually.

Using the different screen formats

Press  the  “ ”  or  “ ”  button  to  select  the  different

modes: 

4:3, 16:9, CINEMA, SUBTITLE 

and

 ZOOM

.

You can also access these settings with “

” button.

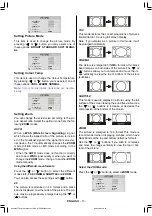
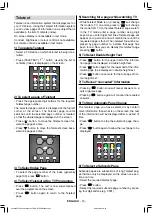
4:3

The picture is reproduced in 4:3 format and a black

band is displayed on either side of the picture.The pic-

ture may be progressively enlarged using the “ ” or

“ ” buttons.

16:9

This mode restores the correct proportions of pictures

transmitted in 16:9 using full screen display.
Note: If you display a 4:3 picture in thid mode, it will

be enlarged horizontally.

CINEMA

The picture is enlarged to CINEMA format, a thin black

band remains on both sides of the picture.The “ ” or

“ ” buttons allow you to compress and move the im-

age vertically to view the top or bottom of the picture

(subtitles).

SUBTITLE

This mode is used to display 4:3 pictures using the full

surface of the screen leaving the sub-titles visible. Use

the  “ ”  or  “ ”  buttons  to  increase  or  decrease  the

compression at the bottom of the screen.

ZOOM

The  picture  is  enlarged  to  16:9  format.This  mode  is

recommended  when  displaying  pictures  which  have

black bands at the top and bottom (letterbox format).
Use the “ ” or “ ” buttons if you wish to compress

and move the image vertically to view the top or bot-

tom of the picture.

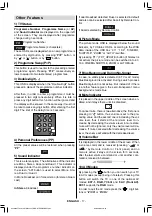
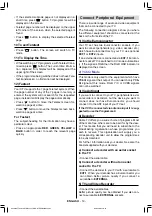
Select the ZOOM mode:

Press the “ ” or “ ” button to select a 

ZOOM 

mode.

&2175$67

&2/285

6+$531(66

7,/7

3,&785(02'(

&2/2857(03

=220

0$18$/

1250$/

$872

EU2816STF&2816W-MAV-1541-ENG-STEREO-AK45.p65

09.09.2003, 10:54

13

Содержание EU2816STF

Страница 1: ...OWNER S MANUAL IMPORTANT WARRANTY INFORMATION INSIDE PLEASE READ FOR INQUIRIES CALL 1800 656 700 OR WWW TEAC COM AU EU2816STF 2816W MAV 1541 ENG STEREO AK45 p65 09 09 2003 10 54 1 ...

Страница 2: ...o be a valid warranty Such equipment or parts must be sent to the nearest authorised TEAC Service Centre After the repair the unit will be available for collection by the owner or it will be returned to the owner The warranty does not cover freight or insurance In all cases of in transit damages or loss a claim must be filed against the carrier by the purchaser 7 In home service will only be provi...

Страница 3: ...quire Warranty Service please contact the TEAC Service Centre 3 Please have your purchase receipt as your proof of purchase and the following details completed for a valid Warranty Owner s Name Owner s Address Postcode Model Name No Serial No Dealer s Name Dealer s Address Postcode 4 Please ensure that your product is packed appropriately upon return to the service centre If you have any other que...

Страница 4: ... Screen 22 Poor Picture 22 No Picture 22 Sound 22 Remote Control 22 No solution 22 Specifications 22 Remote Control 5 Control Panel Buttons and Rear Panel 6 Safety and Precautions 7 Attention 7 Preparation 8 Features 8 Before Switching on your TV 8 Power connection 8 Connections to the RF input socket 8 How to connect other devices 8 Inserting batteries in the remote control handset 8 Switching th...

Страница 5: ... F AV Yellow FEATURE Feature Menu Blue INSTALL Installation Menu Hold Update Picture Mode Change Index Page Reveal Expand Mix Teletext Time Red SOUND Sound Menu Green PICTURE Picture Menu Mute I II Mono Stereo Dual I II Volume P CH Programme Down PP Personal Preference M Menu Cursor Down Cursor Left Picture Mode Change AUTO 4 3 16 9 CINEMA SUBTITLE ZOOM EU2816STF 2816W MAV 1541 ENG STEREO AK45 p65...

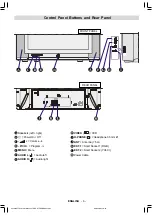
Страница 6: ...rs left right Power On Off Volume P CH Program MENU Menu AUDIO L Audio left AUDIO R Audio right VIDEO VCR H PHONE Headphone 3 6 mm Ø ANT Antenna 75 W EXT 1 Scart Socket 1 RGB EXT 2 Scart Socket 2 YCbCr Power Cable EU2816STF 2816W MAV 1541 ENG STEREO AK45 p65 09 09 2003 10 54 6 ...

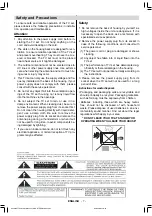
Страница 7: ...peration and maintenance Attention 1 Pay attention to the power supply cord before in stalling the TV set Do not hang anything on the cord and avoid treading on the cord 2 The slots on the housing back are designed for ven tilation to ensure reliable operation of the TV set and prevent overheating They must never be cov ered or blocked The TV set must not be placed near a heat source or it might b...

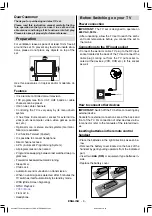
Страница 8: ...uning Sleep timer Child Lock Automatic sound mute when no transmission When no valid signal is detected after 5 minutes the TV switches itself automatically to stand by mode WSS Wide Screen Signaling NTSC Playback YCbCr Mode Front AV in Headphone Before Switching on your TV Power connection IMPORTANT The TV set is designed to operate on 240V AC 50 Hz After unpacking allow the TV set to reach the a...

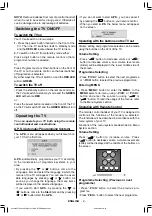
Страница 9: ... or button As soon as you change the language the menu items will be displayed in the selected language If you want to start A P S by pressing the or buttons come to the Start item and by pressing or button start the A P S If you do not want to start A P S you can cancel it by pressing the 79 button on your remote control When you start A P S the below menu will appear on the screen Operating with...

Страница 10: ...d in the middle on the screen All the selected items in this menu system is indicat ed with HIGHLIGHTED characters and with an arrow on the leftside of items 6281 3 785 785 167 352 5 0 To select a sub menu use or button and press or button Each option can also be selected with the coloured button and button on the re mote control MENU The menu system is described below The short way in order to en...

Страница 11: ...ent sound mode e g If the current sound mode is ste reo it will be stereo or visa versa In case of bilingual broadcast you can select original or dubbed language again using mode menu So when somebody listens to the original language from the loudspeakers somebody else can listen to the dubbed language from headphone To Store the Headphone Settings Using or button select Store Press or button to s...

Страница 12: ...e Mode is selected MANUAL Using or button select Colour Press button to increase colour level Press button to decrease colour level 5 71 66 2175 67 2 285 6 531 66 7 7 3 785 02 2 285 7 03 0 18 1250 Setting Sharpness Using or button select Sharpness Press button to increase peaking level Press button to decrease peaking level 5 71 66 2175 67 2 285 6 531 66 7 7 3 785 02 2 285 7 03 0 18 1250 Setting T...

Страница 13: ...ton to select the different modes 4 3 16 9 CINEMA SUBTITLE and ZOOM You can also access these settings with button 4 3 The picture is reproduced in 4 3 format and a black band is displayed on either side of the picture The pic ture may be progressively enlarged using the or buttons 16 9 This mode restores the correct proportions of pictures transmitted in 16 9 using full screen display Note If you...

Страница 14: ...is feature to prevent children turning on TV or changing programs or adjustments etc without remote control The Child Lock feature can be set by or but ton to either ON or OFF When OFF is selected there will be no difference in the operation of your TV When ON is selected the TV can only be controlled by the remote control handset In this case the front panel buttons except the Power On Off button...

Страница 15: ...s M button now you are in MENU In the MENU select Program using or button Then enter the Program menu pressing or button 6281 3 785 785 167 352 5 0 Moving cursor to four direction you can reach 30 pro grammes in the same page By scrolling the pages up or down by pressing the navigation buttons you can select all the programmes in TV mode except the AV mode In menus or buttons are working like Dire...

Страница 16: ... from the programme list and the programmes below shift one up Prog 00 is adjusted to the first frequency value of VHF1 40 MHz Pressing blue button cancels the activated DE LETE process To enter Autostore menu press to the blue button To learn the features of this function see AUTOSTORE below Autostore A P S Automatic Programming System A P S automatically programmes your TV according to the trans...

Страница 17: ... The picture mode OSD is displayed below the sound indicator by TV Status OSD s According to the WSS data inside of the OSD box 4 3 16 9 CINEMA SUBTITLE ZOOM or AUTO is written By pressing TXT_UPDATE button if Teletext is not active the picture mode can be switched into 4 3 16 9 CINEMA SUBTITLE ZOOM or AUTO Mode 7 Blue Background During No Signal In case no valid signal is detected in TV or AV mod...

Страница 18: ...ng will change the mode to TV one more press to will change the mode from TV to the latest Teletext page we left In the TV mode enter a page number using digit keys As you enter digits first line of teletext page will appear on top screen and will remain there until the requested page is found Then teletext line will be re placed by page number to indicate that page has been found Now you can disp...

Страница 19: ...t to connect peripherals e g video decoder etc which have Euroconnectors to your TV use optional EXT 1 or EXT 2 inputs If an external device is connected via EXT 1 Eurocon nector socket TV is switched to AV mode automatical ly If the signal is RGB then the RGB OSD indicator is displayed on the screen 2 YCbCr Mode This mode is only used for the equipment which have YCbCr signal at their output You ...

Страница 20: ...l under programme number 0 Replace the aerial cable in the aerial socket ANT of your video recorder once you have stored the test signal 9 Camera and Camcorder To connect to Front AV input F AV Connect your camera or camcorder at the front side of your TV Connect your equipment to the TV via VIDEO yel low AUDIO R red and AUDIO L white inputs You should connect the jacks to the input in the same co...

Страница 21: ...ER VIDEO HEADPHONE AUDIO CAMERA Antenna Connections 9 8 9 8 W W 9 8 DQWHQQD 9 DQWHQQD 5RXQG RKP FRD LDO FDEOH 5RXQG RKP FRD LDO FDEOH ODW RKP WZLQ OHDG FDEOH 5HDU RI 79 5HDU RI 79 2XWGRRU QWHQQD RQQHFWLRQV EU2816STF 2816W MAV 1541 ENG STEREO AK45 p65 09 09 2003 10 54 21 ...

Страница 22: ...you pressed the correct buttons on the remote control Try once more Sound You can not hear any sound Did you perhaps interrupt the sound pressing button Are external speakers connected to the TV Sound is coming from only one of the speakers Is the balance set to one direction extreme See SOUND menu Remote Control Your TV no longer responds to the remote control Press the 79 button on the remote co...

Страница 23: ... EU2816STF 2816W MAV 1541 ENG STEREO AK45 p65 09 09 2003 10 54 23 ...

Отзывы: