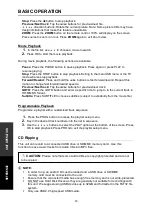
motion to increase the speed. The max speed is x20. Press PLAY to resume playing.
Using SD/MMC Memory Cards
Insert the SD/MMC Memory card into the CARD slot.
Using USB Drives and SD/MMC Cards
BASIC OPERATION
13
External System Connection
Connect to external output devices like TVs, amplifiers or headphones. Ensure that the
settings
Connecting to TV and Stereo Amplifier
Mini-plug: Connect to the AUDIO/VIDEO OUT jack of the portable DVD player.
Yellow plug: Connect to the VIDEO IN jack of the TV.
Red plug: Connect to the AUDIO IN R jack of the stereo amplifier.
White plug: Connect to the Audio In L jack of the stereo amplifier.
DVD/CD Playback
1.
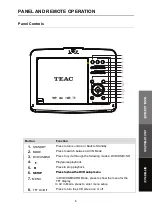
Connect the unit to power and turn it on using the side
POWER
switch.
2.
Open the DVD compartment by pressing the
OPEN
button.
3.
Place the CD or DVD with the printed label facing upwards, then close the tray.
4.
Use the playback control buttons to start playback.
5.
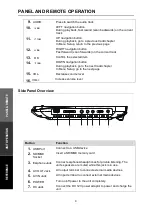
Adjust the volume to the desired level using the
VOL+/-
buttons.
Note:
If the unit is connected to an external screen such as TV, ensure that the TV is
switched to the correct input mode such as AV Mode.
During DVD/CD playback, the following actions are available.
Pause:
Press the
button to pause playback. Press again to resume playing.
Stop:
Press the
button to stop playback.
Forward/Rewind:
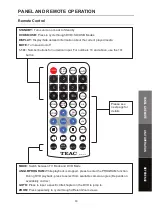
Press and hold the
/
buttons to fast forward/rewind. Repeat this
Previous/Next track:
Tap the
/
buttons for previous/next track.
GOTO:
Press the GOTO button and enter a title and chapter number to jump to.
Other functions are available depending on the disc format and content.
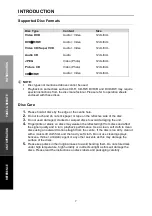
This unit supports playback of JPEG, MP3, WMA, XVID and AVI files.
Using USB drives
1.
Connect the unit to the power supply and switch the unit on.
2.
Insert the USB memory stick into the USB 2.0 port.
3.
If there is no disc loaded in the unit, it will auto-detect the USB stick and start to read
and playback compatible media files. Otherwise, press the
DVD/USB/SD
button to
switch to USB input.
1.
Connect the unit to the power supply and switch the unit on.
2.
SAFETY
INFORMA
TION
INTRODUCTION
PANEL
& REMOTE
UNIT OPERA
TION
REFERENCE

