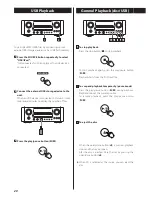
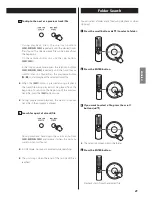
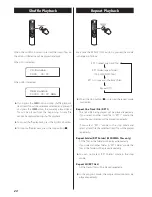
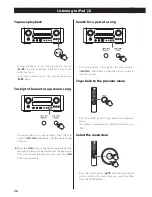
background image

ENGLISH

19

4

 Place a disc on the tray with the printed label 

facing up.

<

  The disc must be loaded centrally into the disc tray. If 

the disc is not correctly loaded, it may not be possible 
to open the tray again once it has closed.

<

  Never place more than one disc on the tray.

<

  Do not stick labels or tapes on the disc.

<

  Do not use irregularly-shaped discs.

5

  Press the open/close button (

L

) to close the tray.

<

  Keep fingers clear of moving tray to avoid trapping 

them.

<

  It takes a few seconds for the unit to load a disc. No 

buttons will work during loading. Wait until the total 
number of the tracks/files and the total play time of 
the disc are displayed.

Audio CD

The total number of the tracks and total play time of 
the disc are displayed.

MP3/WMA disc

The total number of files of the disc is displayed.

CD/Stop

T016  72:00

CD/Stop

Total file 010

6

 Press the play/pause button (

y

/

J

) to start 

playback.

Disc playback starts from the first track/file.

 Audio CD

MP3/WMA disc

<

 M P3/ WM A   f il e s   re co rd e d  o u t   o f   f o l d e r s   a re 

automatically put in the “ROOT“’ folder, and playback 
starts from the first file of the ROOT folder.

<

  If there are folders that has no MP3/WMA file, this unit 

skips them.

<

  During playback of MP3/WMA file, “title_artist_album“ 

is scrolled across the display.

<

  The unit stops automatically when playback of all the 

tracks/files has finished.

<

  If you load a disc, and then press the play/pause 

button (

y

/

J

) (or the SHUFFLE button of the remote 

control unit) without having first closed the disc tray, 
the disc tray closes and playback starts.

CD/Play

T003 00:42 MP3

CD/Play

T003  00:42

current file number

current track number

elapsed time of the current track

EN_CR-H500NT_T_C.indb   19

09.10.6   5:31:29 PM

Содержание CR-H500NT

Страница 1: ...ENGLISH FRAN AIS ESPA OL CQX1A1497Z Z CR H500NT AM FM Stereo CD Receiver OWNER S MANUAL MODE D EMPLOI MANUAL DEL USUARIO...

Страница 2: ...NNEL IMPORTANT SAFETY INSTRUCTIONS 1 Read these instructions 2 Keep these instructions 3 Heed all warnings 4 Follow all instructions 5 Do not use this apparatus near water 6 Clean only with dry cloth...

Страница 3: ...dards Apple is not responsible for the operation of this device or its compliance with safety and regulatory standards RealAudio is a trademarks or a registered trademark of RealNetworks Inc For U S A...

Страница 4: ...the European model for example in this manual DO NOT MOVE THE UNIT DURING PLAYBACK During playback the disc rotates at high speed Do NOT lift or move the unit during playback Doing so may damage the d...

Страница 5: ...s should be returned to their cases after use to avoid dust and scratches that could cause the laser pickup to skip Do not expose discs to direct sunlight or high humidity and temperature for extended...

Страница 6: ...or less WMA stands for Windows Media Audio Audio encoded at 128 kbps should sound close to regular audio CD quality Although this player will play lower bit rate MP3 files the sound quality becomes n...

Страница 7: ...a on a surface fix the claw to the slot in the antenna base Connect the loop antenna s wires to the AM antenna terminals Place the antenna on a shelf or hang it on a window frame etc in the direction...

Страница 8: ...8 LINE IN B A SUBWOOFER SPEAKER Speaker Connections...

Страница 9: ...mm 1 2 inch or less no more as this could cause a short circuit of the outer insulation Twist the wires tightly together to avoid tangles How to connect 1 Turn the terminal cap counter clockwise to lo...

Страница 10: ...er etc CAUTION Turn off the power of all the equipment before making connections Read instructions of each component you intend to use with this unit Be sure to insert each plug securely To prevent hu...

Страница 11: ...corder ex a cassette deck or a CD recorder etc with the CR H500NT connect the output jacks of the recorder to the AUX 1 IN jacks of the CR H500NT connect the input jacks of the recorder to the AUX 1 O...

Страница 12: ...12 Part Names main unit A B E C D F G H I J L N M K...

Страница 13: ...previous menu of iPod This button is equivalent to the MENU button on your iPod In FM mode use this button to select stereo or monaural K Skip m In CD USB mode use these buttons to skip tracks files...

Страница 14: ...ode use this button to set the repeat playback of the iPod or USB In CD mode use this button to set the repeat playback of the CD h SHUFFLE In USB iPod mode use this button to start shuffle playback o...

Страница 15: ...iPod p RECORD Use this button to start recording to an USB device q DIMMER Use this button to dim the display r SLEEP Use this button to set sleep timer s INFO RDS For Europe INFO For North America Wh...

Страница 16: ...usted In this case replace the batteries with new ones For more information about collection of batteries please contact your local municipality your waste disposal service or the point of sale where...

Страница 17: ...press the TUNER iPod USB PHONO AUX 1 2 or CD button on the remote control unit to select the source directly Basic Operation 1 C Adjust the volume To protect the speakers from a sudden high volume sou...

Страница 18: ...ween 10 to 10 Press the TONE button repeatedly to select BASS or TREBLE And then press the scroll buttons button to adjust the sound level within 5 seconds 1 Press the STANDBY ON button to turn the un...

Страница 19: ...displayed MP3 WMA disc The total number of files of the disc is displayed CD Stop T016 72 00 CD Stop Total file 010 6 Press the play pause button y J to start playback Disc playback starts from the fi...

Страница 20: ...nd the tray will open Afer the disc is ejected close the tray by pressing the open close button L When CD is selected as the source you can eject the disc 1 3 You can play MP3 WMA files by connecting...

Страница 21: ...the beginning To return to the beginning of the previous track file press the button twice During programmed playback the next or previous track file in the program is played E Search for a part of a...

Страница 22: ...al File 0130 Repeat steps 2 and 3 to programme more tracks files If you made a mistake press the CLEAR button The last programmed number will be deleted Up to 32 tracks files can be programmed If you...

Страница 23: ...end of the programme press the PROGRAM button repeatedly until P END briefly appears on the display Then select a track file using the scroll buttons 5 b The track file is added to the programme To d...

Страница 24: ...H is pressed the repeat mode is cancelled Repeat One Track File RPT 1 The track file being played will be played repeatedly If you select another track file in RPT 1 mode the track file you selected...

Страница 25: ...remaining time of the current track 1 Press the SOURCE button repeatedly to select USB iPod 2 Connect your iPod using the USB cable supplied with iPod The iPod automatically turns on and starts playb...

Страница 26: ...the song being played will be played from the beginning If you want to play the previous songs press the button twice or more Search for a part of a song During playback hold down the skip buttons an...

Страница 27: ...screen or CR H500NT display to show the menu When the iPod is connected hold down the MENU button for more than 4 seconds to select which display to be used Direct Mode default Select this to use the...

Страница 28: ...to suitable level before recording If not the recording quality becomes poor Note The recorded files are saved in the AUDIO folder The FILE NAME is fixed up automatically in regular sequence like Audi...

Страница 29: ...to select a folder 2 Press the ENTER button 3 Press the scroll buttons to select the file which you want to delete from the USB device 4 Hold down the CLEAR button for more than 4 seconds Delete is di...

Страница 30: ...l the station you want to listen to is found On the remote control press the scroll buttons repeatedly The frequency changes by a fixed step FM 50 kHz steps AM 9 kHz steps Auto tuning mode Turn the MU...

Страница 31: ...his mode when the signal is weak Reception will be forced monaural reducing unwanted noise When you try to listen to another broadcast but its signal cannot be tuned in the FM mode changes to Stereo a...

Страница 32: ...utton FM 10 00 CH__ 108 00MHz 4 Within 4 seconds select the preset number for this station Press the scroll buttons 5 b FM 10 00 CH12 108 00MHz Preset Tuning 2 5 Within 4 seconds press the PROGRAM but...

Страница 33: ...symbols will be displayed If there is no radio text data RDS mode will be automatically switched to PROGRAM SERVICE mode RDS TRAFFIC ANNOUNCE When you select TRAFFIC ANNOUNCE TRAFFIC ANNOUNCE will bli...

Страница 34: ...b to select an item and then press the ENTER button Select your desired one from among 31 kinds of PTY programmes The programme type will blink 4 Turn the MULTI JOG knob within 3 seconds to start sear...

Страница 35: ...discs etc Rock Music practical modern music generally composed and played by young musicians Easy Listening popular music usually lasting for less than 5 minutes Light Classics M classical music inst...

Страница 36: ...rrect password for the network if required See How to input characters below Now the unit starts to connect to the Internet When connection is established successfully the internet radio menu is displ...

Страница 37: ...Stations for internet radio stations or Podcasts for Podcasts Turn the MULTI JOG knob to select the item and then press the ENTER button A list of search methods appears 5 Select a search method Turn...

Страница 38: ...ng Celtic Songs D Playing Finding stations Podcasts The internet radio menu contains various ways of finding stations and Podcasts Last listened You can select the station Podcast from the ones you li...

Страница 39: ...eliability Description Genre Location Playing Signal strength for wireless LAN URL Description Language City State Country Bookmark Storing the current station Podcast as favourite Press and hold the...

Страница 40: ...stations in the internet radio menu as follows Station list w My Added Stations Accessing the radio portal 1 Open your Internet browser and access http www wifiradio frontier com 2 Click on the Regist...

Страница 41: ...available both on Windows and on Mac Preparations for Shared Media 1 Connect your computer to the LAN 2 Connect the CR H500NT to the LAN page 10 If you have a problem connecting to the LAN see page 4...

Страница 42: ...aring Center 4 Set Public folder sharing to On read only 5 Set Password protected sharing to On Preparations for Shared Folders Windows XP 1 Check the name of the Domain or the Workgroup your computer...

Страница 43: ...cess the computer from CR H500NT you need the user account name and the password of the computer 2 In System Preferences open Sharing 3 Activate Personal File Sharing and Windows Sharing 4 Open Direct...

Страница 44: ...AFP and Share files and folders using SMB In the same window activate On for the account you want to use for file sharing Setting up Music Player 3 Preparation on the unit for Shared Folders both Win...

Страница 45: ...3 2 3 5 6 3 5 6 7 Last listened Station list Music Playback Mode Media Sharing If you turn off the unit or change the source while playing back the Music Player Music Playback Mode will be cancelled...

Страница 46: ...source while playing back the Music Player Music Playback Mode will be cancelled 1 2 4 3 5 6 7 3 5 6 7 Last listened Station list Music Playback Mode Listening to Music Player 2 File Sharing 6 Select...

Страница 47: ...ear To go back to the previous screen press the BACK button Browse Main menu 6 Select the Domain or the Workgroup your computer belongs to then select your computer Turn the MULTI JOG knob to select t...

Страница 48: ...ur network environment or if you have a problem connecting to the Internet perform the initial setup wizard to establish the Internet connection again Follow the menu items as follows Main Menu w Syst...

Страница 49: ...r Europe the unit uses the 24 hour military clock For North America the unit uses the 12 hour clock When no action is taken for 1 minute the time adjust mode will be cancelled Press the stop button H...

Страница 50: ...until On time is displayed On time appears on the display and the hour value blinks 2 Press the scroll buttons to set the hour value and press the ENTER button The minute value blinks 3 Press the scro...

Страница 51: ...it off It will not be turned on when the On time is reached Timer Operation Timer Recording You can set the various external USB storage devices such as USB flash memory to record programme at the des...

Страница 52: ...d when you set the sleep timer If you want to check the remaining time press the SLEEP button once The remaining time will be displayed for 3 seconds and return to the normal display Listening to an E...

Страница 53: ...rary trouble with Internet connection e Check if your Internet connection is not temporarily disconnected or disturbed Cannot find a station Podcast in the station list e The station Podcast may not b...

Страница 54: ...y back unfinalized CD R RW discs Finalize such a disc in a CD recorder and try again Sound skips e Place the unit on a stable place to avoid vibration and shock e If the disc is dirty clean the surfac...

Страница 55: ...lustrations may differ slightly from production models Information for Users on Collection and Disposal of Old Equipment and used Batteries These symbols on the products packaging and or accompanying...

Страница 56: ...Phone 905 890 8008 Rio Churubusco 364 Colonia Del Carmen Delegaci6n Coyoacim CP 04100 Mexico DF Mexico Phone 5255 5010 6000 Suites 19 20 Building 6 Croxley Green Business Park Hatters Lane Watford Her...

Страница 57: ...cha desde L 6 hasta R 6 Einstellen der Stereo Balance zwischen den Iinken und rechten Lautsprecherkanalen Betatigen Sie zum Auswahlen von BALANCE wiederholt die TONE Taste Betatigen Sie anschlief3end...

Страница 58: ...39901 Ce produit est garantie par TEAC AMERICA Inc ou TEAC CANADA Ltd dependant du pays ou I achat original aete effectue pour defectuosites de pieces et main d oeuvre Duree De La Garantie La garantie...

Страница 59: ...nia 90640 USA Tel 323 726 0303 Comment Obtenir Le Service Au Titre De La Garantie Votre appereil doit etre repare par un agent de service TEAC agree pour Ie pays ou I appareil a ete achete Si vous ne...

Отзывы: