408-6810
3 of 4
Rev A
4.2. Periodic Inspection
Regular inspections should be performed by quality
control personnel. A record of scheduled inspections
should remain with the tool and/or be supplied to
supervisory personnel responsible for the tool. Though
recommendations call for at least one inspection a
month, the inspection frequency should be based on
the amount of use, ambient working conditions,
operator training and skill, and established company
standards. These inspections should be performed in
the following sequence:
A. Visual Inspection
1. Remove all lubrication and accumulated film by
immersing the tool (handles partially closed) in a
suitable commercial degreaser that will not affect
paint or plastic material.
2. Make certain all retaining pins are in place and
secured with retaining rings. If replacements are
necessary, refer to the parts list in Figure 4.
3. Close the tool handles until the ratchet releases,
then allow handles to open freely. If they do not
open quickly and fully, the spring is defective and
must be replaced (see Section 5, REPAIR).
4. Inspect the head assembly, with special
emphasis on checking for worn, cracked, or broken
jaws. If damage to any part of the head assembly is
evident, the tool must be repaired (see Section 5,
REPAIR).
B. Crimp Height Inspection
Crimp height inspection is performed through the use
of a micrometer with a modified anvil, commonly
referred to as a crimp-height comparator. TE does not
manufacture or market crimp-height comparators.
Detailed information on obtaining and using crimp-
height comparators can be found in Instruction Sheet
408-7424.
Proceed as follows:
1. Refer to the table in Figure 1, and select a contact
and a wire (maximum size) for each crimp section
listed in the table.
2. Refer to Section 3, CRIMPING PROCEDURE,
and crimp the contact(s) accordingly.
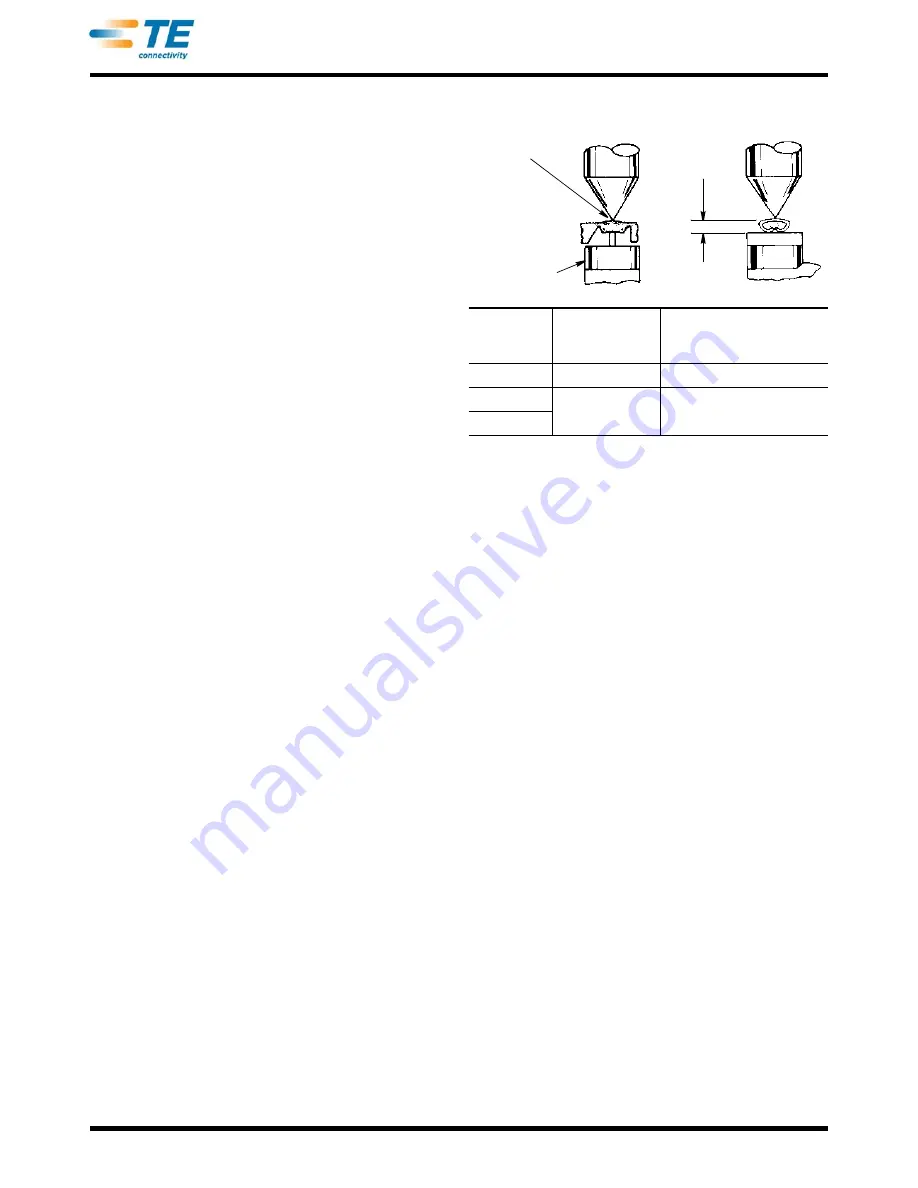
3. Using a crimp height comparator, measure wire
barrel crimp height as shown in Figure 3. If the
crimp height conforms to that shown in the table,
the tool is considered dimensionally correct. If not,
the tool must be repaired (see Section 5, REPAIR).
C. Ratchet Inspection
Obtain a 0.03-mm [.001-in.] shim that is suitable for
checking the clearance between the bottoming
surfaces of the crimping jaws.
Proceed as follows:
Figure 3
1. Select a contact and wire (maximum size) for the
tool (see Figure 1).
2. Position the contact and wire between the
crimping jaws, according to Section 3, CRIMPING
PROCEDURE (Steps 1 through 4). Holding the wire
in place, squeeze the tool handles together until the
ratchet releases. Hold the tool handles in this
position, maintaining just enough pressure to keep
the jaws closed.
3. Check clearance between the bottoming surfaces
of the crimping jaws. If the clearance is 0.03 mm
[.001 in.] or less, the ratchet is satisfactory. If
clearance exceeds 0.03 mm [.001 in.], the ratchet is
out of adjustment and must be repaired (see
Section 5, REPAIR).
If the tool conforms to these inspection procedures,
lubricate it with a THIN coat of any good SAE No. 20
motor oil and return it to service.
5. REPAIR
All parts of the tool can be replaced. Customer
replaceable parts are listed in Figure 4. A complete
inventory should be stocked and controlled to prevent
lost time when replacement of parts is necessary. If
parts that affect ratchet setting are replaced, the
ratchet must be adjusted using the spanner wrench
(see Figure 4).
Proceed as follows:
1. Loosen the ratchet nut on the back of tool (side
with wire size markings).
2. Check bottoming of tool jaws according to
Paragraph 4.2.C, Ratchet Inspection. Turn screw on
front of tool CLOCKWISE to tighten ratchet or
COUNTERCLOCKWISE to loosen ratchet.
WIRE SIZE
(AWG) MAX
CRIMP
SECTION (WIRE
SIZE MARKING)
CIRMP HEIGHT
(DIM. “A”)
20
24-20
1.14 ±0.08[.045 ±.003]
16
18-16
14
1.588 ±0.089 [.0625 ±.0035]
14
Position Point on
Center of Wire Barrel
Opposite Seam
Modified Anvil
“A”


