


46
Exit
: Set reader as exit reader
Entry \ Exit
: Set reader to ignore anti-passback
Then click
Save
. Anti-passback is now setup on the controller. The event “User already entered” will be
generated if a credential attempts to gain access without exiting first.
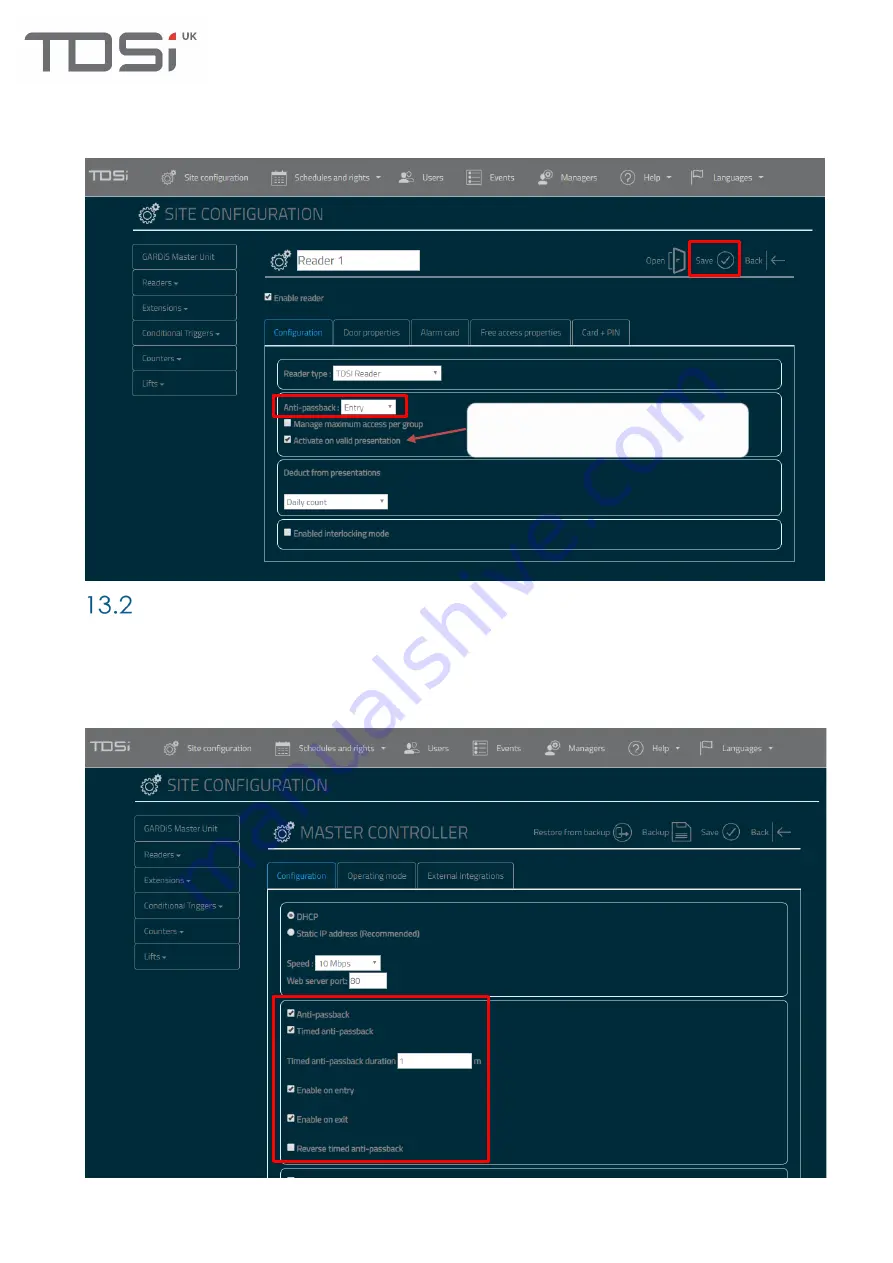
Timed Anti-passback
Step 1 Enable anti-passback settings
Click
Site configuration
from the top menu, then
click
GARDiS Master Unit
from the left-hand menu.
Tick
Anti-passback
and
Timed anti-passback
checkboxes. Set the length of time you wish to enforce
anti-passback. This can be enabled on the Entry or Exit readers.
Click Save
. Follow
step 2
from 13.1True
Anti-passback to configure the reader settings.
If you wish to update anti-passback for
credential when door is opened. Need to
configure door sense in Door properties.
Содержание GARDiS Series
Страница 1: ...GARDiS Controller Embedded Web Server User Manual UM0121 Issue 3...
Страница 4: ...Timed Anti passback 46 Troubleshooting 47 Restoring from backup 47...
Страница 8: ...8 Step 3 Click GARDiS Master Unit from menu Step 4 Enter the required IP settings Step 5 Click Save...
Страница 14: ...14 Step 14 Enter details for the new user i e last name...
Страница 19: ...19 Once selected click open This will initiate the restore process A message box will display once completed...
Страница 25: ...25...
Страница 30: ...30 This will set the selected schedule within the dropdown...
Страница 34: ...34 Step 1 Step 2 Step 3 Step 4...
Страница 49: ...49 Because everyone deserves peace of mind...


