background image

10

Chair Assembly Instructions

Step 3: 

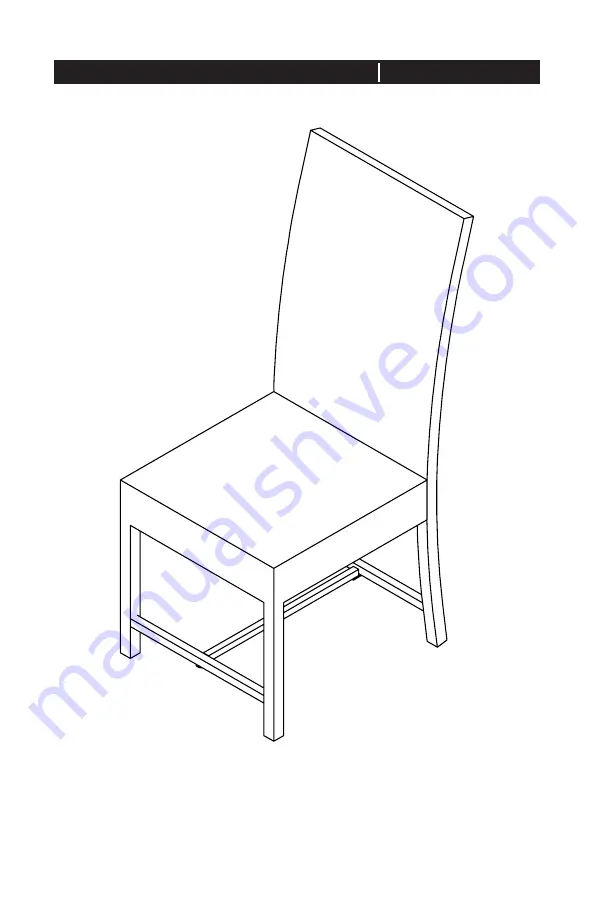
Turn the chair right-side up when finished. Place Seat Cushion (D) onto Chair Seat 
(B). Secure the cushion to the chair by connecting the fastening straps around 
Chair Back (A), see Fig. 3. Your chair is now ready to be used. Follow these steps to 
assemble the remaining three chairs. 

Содержание 22589

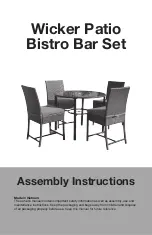
Страница 1: ...afety information as well as assembly use and maintenance instructions Keep the packaging and bags away from children and dispose of all packaging properly before use Keep this manual for future refer...

Страница 2: ...or answer any of your questions regarding the purchase of this product Please contact us at our Toll Free customer service number 1 800 599 8898 for any assistance and replacement parts Thank You Dis...

Страница 3: ...they are in the area of the product construction Some parts may contain sharp edges When assembling and using this product basic safety precautions should always be Please read all the instructions a...

Страница 4: ...le Ring BB x4 M6x30 Bolt A x1 Table Top CC x12 Washer EE x1 Hex Key B x4 Leg TABLE PARTS CHAIR PARTS AA x16 M6x40 Bolt BB x8 M6x15 Bolt A x4 Chair Back CC x24 Washer EE x1 Hex Key D x4 Seat Cushion B...

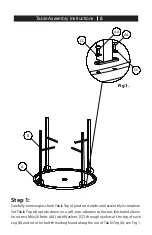
Страница 5: ...deuntilassemblyiscomplete Set Table Top A upside down on a soft non abrasive surface as illustrated above Insert two M6x20 Bolts AA with Washers CC through eyelets at the top of each Leg B and into th...

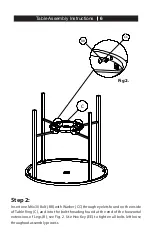
Страница 6: ...lt BB with Washer CC through eyelets found on the inside of Table Ring C and into the bolt threading found at the end of the horizontal extensions of Legs B see Fig 2 Use Hex Key EE to tighten all bol...

Страница 7: ...7 Table Assembly Instructions Step 3 Turn table right side up and carefully set the glass into the center of Table Top A The table is now ready to use...

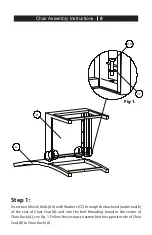
Страница 8: ...Bolts AA with Washers CC through the backend underneath of the seat of Chair Seat B and into the bolt threading found in the center of Chair Back A see Fig 1 Follow these steps to assemble the opposit...

Страница 9: ...h Washer CC through the bracket at the end of Support C into the bolt threading found underneath the footrest of Chair Seat B see Fig 2 Insert one M6x15 Bolt BB with Washer CC through the bracket at t...

Страница 10: ...ght side up when finished Place Seat Cushion D onto Chair Seat B Secure the cushion to the chair by connecting the fastening straps around Chair Back A see Fig 3 Your chair is now ready to be used Fol...

Страница 11: ...welds due to commercial use improper assembly exposure to water and sub freezing temperatures and or abuse are not covered FABRIC Fabric on cushions slings and umbrellas is warranted against separatio...

Страница 12: ...ce Normal fade of fabrics upholstery or woven materials Glass table tops Burstingorcrackingoftubingduetoexposuretowaterandfreezingtemperatures Changes in wood color due to the natural aging of the woo...

Страница 13: ...Dist by TDC USA Inc Fairfield NJ 07004 2022 All Rights Reserved Made in Vietnam Item 22589 Questions and Comments 1 800 599 8898 9 am 5 pm EST www tdcusainc com Wicker Patio Bistro Bar Set...

Отзывы: