background image

5

If the mains cable of this machine becomes damaged, 

it must be replaced by the manufacturer, its customer 

service or a similarly qualified person in order to avoid

danger.

Remove the mains plug from the wall socket...

... if a fault occurs, 

... if you do not plan to use the machine for an 

extended period of time, 

... before you clean the machine. 

To do so, always pull on the plug, not the cable.

To disconnect the machine from the mains completely,

unplug the mains plug from the wall socket.

WARNING – fire hazard

Position the machine in such a way that it is free-standing

for use; never place it directly against a wall, in a corner, 

in a cupboard, against curtains, etc.

WARNING – health hazards

Empty and clean the leftover water tray, the container for

the coffee grounds and the drip tray regularly. 

If you will not be using the machine for a prolonged period,

empty the water tank, coffee bean compartment, drip tray

and container for the coffee grounds.

Change the water in the water tank daily to prevent germs

from collecting.

Use only the cleaning and descaling agents listed in this

manual as well as the relevant cleaning utensils to clean

this machine. The use of other cleaning agents can lead 

to health hazards.

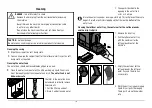
WARNING – risk of scalds/burns

Do not touch the coffee spout during or immediately 

after use. Avoid contact with coffee or hot water being 

dispensed from the spout.

The brewing unit becomes hot when preparing beverages.

Do not remove the brewing unit during or shortly after use.

After use, the surfaces of the heating element retain 

residual heat.

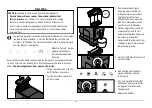
If there is too little water in the tank during preparation,

the machine will stop the brewing process. The brewing

process will automatically resume once the water tank 

has been filled and reinserted in the machine.

Содержание Esperto Caffe

Страница 1: ...Tchibo GmbH D 22290 Hamburg 97826HB 2019 08 Fully Automatic Coffee Machine Esperto Caffè Original instructions for use and warranty en ...

Страница 2: ...s is not a sign of poor quality the machine is in perfect working order 3 About these instructions 3 Intended use 3 Location 4 Safety warnings 7 Removing protective films and packaging materials 8 At a glance delivery contents 10 Initial operation prior to first use 11 Rinsing the machine 12 Adjusting the height of the coffee spout 12 Making coffee 14 Preheating the cup 14 Double beverage amount 1...

Страница 3: ...s with high humidity or high dust content The machine is suitable for use at ambient temperatures of 10 C to 40 C About these instructions This product is equipped with safety features Nevertheless read the safety warnings carefully and only use the product as described in these instructions to avoid accidental injury or damage Keep these instructions for future reference If you give this product ...

Страница 4: ...nnecting inside the body can lead to serious injuries Keep the packaging material out of the reach of children There is a risk of suffocation DANGER due to electricity Never immerse the machine mains plug or connection cable in water as this could cause an electric shock Never touch the mains plug with wet hands Do not use the machine outdoors Do not clean the machine with a water jet and do not p...

Страница 5: ...ly If you will not be using the machine for a prolonged period empty the water tank coffee bean compartment drip tray and container for the coffee grounds Change the water in the water tank daily to prevent germs from collecting Use only the cleaning and descaling agents listed in this manual as well as the relevant cleaning utensils to clean this machine The use of other cleaning agents can lead ...

Страница 6: ...t to a hot oven radiator or anything similar Route the connection cable in such a way that it is not a tripping hazard Do not let the connection cable hang down from the surface where the machine is positioned so that the machine cannot be pulled down by it Keep all cards with magnetic strips such as credit cards debit cards etc away from the drip tray and the cover for the brewing unit and all th...

Страница 7: ...ut In the water tank you will find the cleaning brush and extension piece for the coffee bean compartment Take these out of the tank 4 Remove the transport protection piece underneath the water tank 5 Clean the water tank in water with a little washing up liquid Then rinse it out thoroughly under running water and dry it 6 Reinsert the water tank into the machine and push it down as far as it will...

Страница 8: ...Opening for the water tank Filter for filtering out limescale or other particles On Off button Grind adjuster Coffee bean compartment 160 g Control panel Container for coffee grounds Leftover water tray Cover for the coffee bean compartment Drip grid Drip tray Brewing unit Cover for breweing unit ...

Страница 9: ...ns are only visible when the machine is switched on Make espresso Intense function Make caffè crema Dispense hot water Double beverage amount Warning lights orange The warning lights only illuminate when the machine requires maintenance Refill water Brewing unit Refill beans Descale Empty coffee grounds Empty system ...

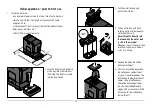
Страница 10: ... 150 mm 150 mm 3 Pull the water tank up and out of the machine 4 Fill the water tank with fresh cold tap water or drinking water up to the MAX mark Never fill water directly into the tank while the water tank is still in the machine When you reinsert the water tank into the machine push it down as far as it will go 5 Remove the lid on the coffee bean compartment 6 Pour as many coffee beans into th...

Страница 11: ... machine chapter The machine is then ready for use Rinsing the machine After switching the machine on for the first time or if you have not used the machine for longer than two days rinse the machine by allowing two cups of water to flow through it 1 Press the On Off button to switch on the machine The hot water button flashes and the heating up process starts The pump starts after a few seconds A...

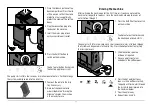
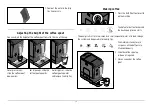
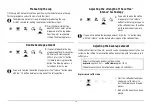
Страница 12: ...r use as soon as all the buttons are lit up continuously 2 Slide the coffee spout up or down as required 3 Place a cup under the coffee spout 7 Pour out the water in the drip tray if necessary Adjusting the height of the coffee spout You can adjust the height of the coffee spout to match the size of the cup For espresso cups slide the coffee spout downwards For large cups slide the coffee spout up...

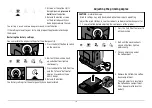
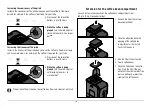
Страница 13: ...e beverage being brewed Learn more about how to do this in the chapter titled Adjusting the beverage amount When the container for the coffee grounds is full after 10 brewings the Empty coffee grounds symbol will light up m Default settings upon purchasing the machine espresso approx 40 ml caffè crema approx 125 ml 5 Empty the leftover water tray the container for the coffee grounds and the drip t...

Страница 14: ...the 2x button before pressing one of the coffee buttons m m Adjusting the beverage amount The default settings for the water quantity can be changed permanently You can customise the setting for each coffee button one setting each for espresso and caffè crema Espresso and caffè crema 1 Press the coffee button of your choice e g caffè crema to start the grinding and brewing process 2 Wait until the...

Страница 15: ...ng the coarseness of the grinder 15 3 As soon as the coffee starts being dispensed press and hold the coffee button 4 Release the button as soon as the desired quantity has been dispensed into the cup The setting is saved and two beeps will sound as confirmation If the settings are not to your taste simply repeat the procedure to change them again Restoring the factory settings You can restore the...

Страница 16: ...f the two coffee buttons e g caffè crema 6 While the coffee is being ground turn the grind adjuster anticlockwise towards to a smaller dot If the grind setting is too fine the coffee may flow very slowly or not at all 16 Extension for the coffee bean compartment You can increase the capacity of the coffee bean compartment from 160 g to 300 g Proceed as follows 1 Remove the lid of the coffee bean c...

Страница 17: ...he machine will switch off after 20 minutes If the 2x button lights up continuously the machine will switch off after 30 minutes If the Intense button lights up continuously the machine will switch off after 120 minutes 2 Press the button with your preferred switch off time You will hear 2 beeps Customising the automatic rinse The default setting of the machine is for the automatic rinse to only s...

Страница 18: ...lug or connection cable in water or any other liquids Do not clean the machine with a water jet Clean it only as described in the following instructions CAUTION material damage Do not use any caustic aggressive or abrasive products for cleaning m 3 Then push it back onto the opening in the water tank as far as it will go Rinse the water tank under running water daily This will prevent limescale de...

Страница 19: ...brewing unit straight out of the machine 4 Rinse the brewing unit under hot running water 5 Then let the brewing unit dry completely 6 Use the supplied cleaning brush to remove any leftover coffee grounds or powder from the brewing unit compartment 7 Press the brewing unit back into the machine using a little force and without pressing the orange coloured buttons You should hear and feel the brewi...

Страница 20: ...indicates that this is necessary This increases its service life and saves energy Do not use any descaling agents made on the basis of formic acid Use a standard liquid descaling agent suitable for coffee and espresso machines Other agents may damage materials in the machine and or have no effect 3 Pour a conventional liquid descaling agent suitable for coffee and espresso machines into the empty ...

Страница 21: ...ymbol and the Refill water symbol will appear and the espresso button will flash 11 Remove the water tank from the machine 12 Clean the water tank thoroughly as described in the Cleaning the water tank section of the Cleaning chapter The rinsing process will now start Rinsing process 13 Place an empty container with a capacity of at least 500 ml underneath the coffee spout Remove the drip tray if ...

Страница 22: ...beeps sound 5 Release the buttons The Empty system symbol flashes 6 Remove the water tank from the machine The Empty system symbol now lights up permanently The pump transports the remaining water out of the pipes of the machine It stops automatically as soon as there is no more water inside The residual water runs into the container below the spout Afterwards the machine will automatically switch...

Страница 23: ... The Brewing unit symbol is lit up Is the brewing unit or the brewing unit cover correctly in place If not remove the brewing unit cover and make sure the brewing unit is firmly in place see Cleaning the brewing unit in the Cleaning chapter The Descale symbol is lit up The machine needs to be descaled Do this within the next couple of days Do not wait any longer otherwise so much limescale may bui...

Страница 24: ...ances marked with this symbol must not be disposed of along with household waste You are legally obliged to dispose of old appliances separately from household waste Information about collection points where old appliances can be disposed of free of charge is available from your local authorities Technical specifications Product number 392 080 Mains voltage 220 240 V 50 60 Hz Power 1235 1470 watts...

Страница 25: ...e failure to decalcify as well as worn parts and consumables are not covered by the warranty These can be ordered via our customer care service This warranty does not restrict statutory warranty rights 25 Service and repair If contrary to our expectations a defect is found please contact our customer care service Our customer consultants will be pleased to advise you on further procedure If you ha...

Отзывы: