background image

2

Important Safety Instructions

1  Read these instructions.

2  Keep these instructions.

3  Heed all warnings.

4  Follow all instructions.

5  Do not use this apparatus near water.

6  Clean only with dry cloth.

7  Do not block any ventilation openings. Install in accor-

dance with the manufacturer’s instructions.

8  Do not install near heat sources such as radiators, heat 

registers, stoves, or other apparatus (including ampli-

fiers) that produce heat.

9  Only use attachments/accessories specified by the  

manufacturer.

10 Refer all servicing to qualified service personnel. 

Servicing is required when the apparatus has been 

damaged in any way, such as power-supply cord or 

plug is damaged, liquid has been spilled or objects 

have fallen into the apparatus, the apparatus has been  

exposed to rain or moisture, does not operate normally, 

or has been dropped.

Warning!

•  To reduce the risk of fire or electrical shock, do not 

expose this equipment to dripping or splashing and 

ensure that no objects filled with liquids, such as vases, 

are placed on the equipment.

•  Do not install in a confined space.

Service

•  All service must be performed by qualified personnel.

Caution:

You are cautioned that any change or modifications 

not expressly approved in this manual could void your 

authority to operate this equipment.

When replacing the battery follow the instructions on 

battery handling in this manual carefully.

EMC/EMI

This equipment has been tested and found to comply with 

the limits for a Class B Digital device, pursuant to part 15 

of the FCC rules.

Содержание PolyTune

Страница 1: ...USER S MANUAL PolyTune ...

Страница 2: ... is damaged liquid has been spilled or objects have fallen into the apparatus the apparatus has been exposed to rain or moisture does not operate normally or has been dropped Warning To reduce the risk of fire or electrical shock do not expose this equipment to dripping or splashing and ensure that no objects filled with liquids such as vases are placed on the equipment Do not install in a confine...

Страница 3: ...rence to radio or television reception which can be determined by turning the equipment off and on the user is encouraged to try correcting the interference by one or more of the following measures Reorient or relocate the receiving antenna Increase the separation between the equipment and the receiver Connect the equipment to an outlet on a circuit different from the one to which the receiver is ...

Страница 4: ...4 ...

Страница 5: ...5 ...

Страница 6: ...o need to check strings individually just strum tune and rock Drop D Tuning yes of course we can And switching between regular PolyTune mode and Drop D is dead simple Will it PolyTune when using a capo Yes of course Just select capo mode and you are all set to go whether you use PolyTune mode Chromatic mode or Drop D tuning mode Whether you prefer to tune your instrument polyphonically or chromati...

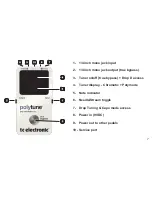
Страница 7: ...ch mono jack output true bypass 3 Tuner on off true bypass Drop D access 4 Tuner display Chromatic Polymode 5 Note indicator 6 Needle Stream toggle 7 Drop Tuning Capo mode access 8 Power in 9VDC 9 Power out to other pedals 10 Service port ...

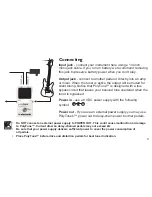
Страница 8: ...it that leaves your beloved tone unaltered when the tuner is bypassed Power in use a 9 VDC power supply with the following symbol Power out If you use an external power supply you may use PolyTune s power out to daisy chain power to other pedals Do NOT connect an external power supply to POWER OUT This could cause malfunction or damage to PolyTune Current draw on daisy chained pedals may not excee...

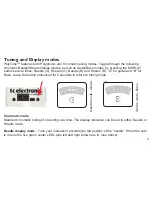
Страница 9: ... B and Stream B G for guitar and B for Bass Leave the button untouched for 2 seconds to return to tuning mode Chromatic mode Standard chromatic tuning of one string at a time The display indication can be set to either Needle or Stream mode Needle display mode Tune your instrument according to the position of the needle When the note is in tune the five green center LEDs plus left and right arrows...

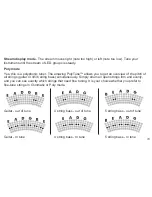
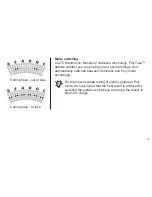
Страница 10: ...you to get an overview of the pitch of all strings guitar or 4 5 6 string bass simultaneously Simply strum all open strings firm and evenly and you can see exactly which strings that need fine tuning It is your choice whether you prefer to fine tune strings in Chromatic or Poly mode Guitar out of tune 4 string bass out of tune 5 string bass out of tune Guitar In tune 4 string bass In tune 5 string...

Страница 11: ...lyTune detects whether you are playing one or several strings and automatically switches between Chromatic and Poly mode accordingly For the most accurate tuning of electric guitars in Poly mode we have found that the best result is achieved by selecting the guitars neck pickup and using the thumb to strum the strings ...

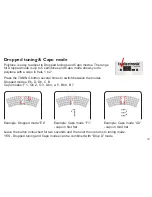
Страница 12: ...1 to 7 Press the TUNING button several times to switch between the modes Dropped modes Eb D Db C B Capo modes F 1 Gb 2 G 3 Ab 4 A 5 Bb 6 B 7 Leave the button untouched for two seconds and the tuner then returns to tuning mode YES Dropped tuning and Capo modes can be combined with Drop D mode Example Dropped mode Eb Example Capo mode F1 capo in first fret Example Capo mode G3 capo in third fret ...

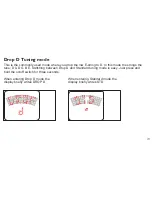
Страница 13: ...g to D In this mode the strings the tune D A D G B E Switching between Drop D and Standard tuning mode is easy Just press and hold the on off switch for three seconds When entering Drop D mode the display briefly writes DROP D When entering Standard mode the display briefly writes STD ...

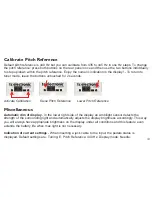
Страница 14: ...ibration Raise Pitch Reference Lower Pitch Reference Miscellaneous Automatic dim of display in the lower right side of the display an Ambilight sensor detects the strength of the surrounding light and automatically adjusts the display brightness accordingly This way you will always have appropriate brightness on the display under all conditions and this feature even extends the battery life when m...

Страница 15: ...ing sure the polarity is correct Then remount the backplate To save battery life remove the input jack when you don t play Batteries must never be heated taken apart or thrown into fire or water Only rechargeable batteries can be recharged Remove the battery when the pedal is unused for a longer period of time Dispose batteries according to local laws and regulations Low battery indication When th...

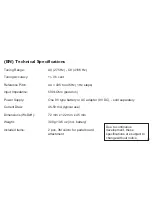
Страница 16: ...ance 500 kOhm pedal on Power Supply One 9V type battery or AC adapter 9V DC sold separately Current Draw 45 50 mA typical use Dimensions WxDxH 72 mm x 122 mm x 45 mm Weight 300 g 10 6 oz incl battery Included items 2 pcs 3M velcro for pedal board attachment Due to continuous development these specifications are subject to change without notice ...

Страница 17: ...TC Electronic Sindalsvej 34 DK 8240 Risskov info tcelectronic com ...

Отзывы: