11
DVR250-DT User Manual
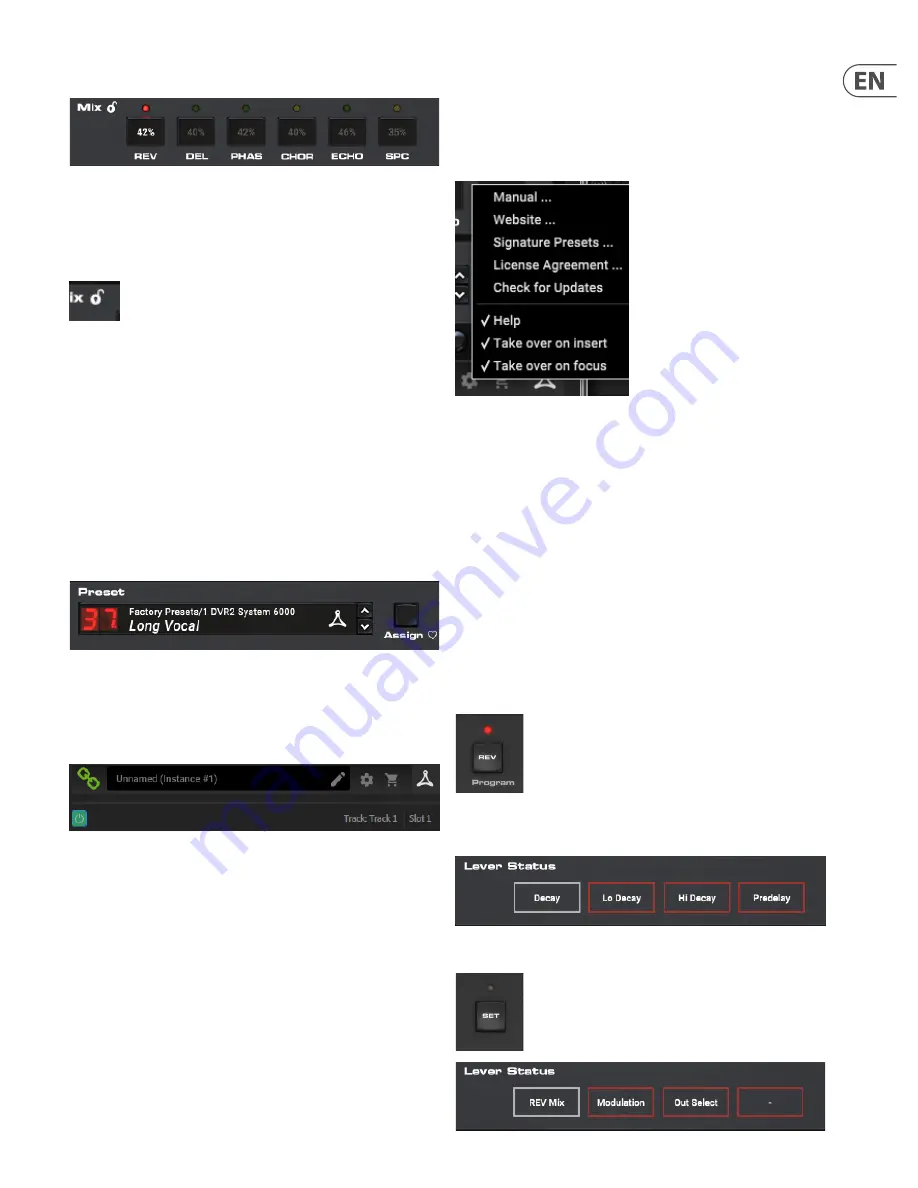
Mix
Click and drag the numbers inside each effect box to adjust the mix settings. Mix
is also directly accessible from the hardware unit for all effects by engaging the
SET button and using the white (left) lever.
Lock Symbol
Some of the parameters can be locked from being recalled when a new preset
is selected. Locked parameters will always keep their values no matter which
preset you recall.
This is especially useful with the Mix parameter.
The default presets provided in the plug-in are typically created with the intent
that the effect will be inserted on the track (as an insert effects). A Mix value has
been chosen that will work for that preset.
However, if you’d like to use the DVR250 as a send/parallel effect, the Mix
parameter should typically be set to 100%. After setting the Mix to 100%, use the
lock function to make sure it stays at 100% even if you load another preset.
Preset
Use the Preset section to recall and save presets as well as assign presets as
favorites. The Preset Up/Down arrow buttons can also be used for browsing
through the available presets. See Chapter 5 for details.
Bottom Section
The bottom portion of the plug-in window displays connection status as well as
plug-in instance name, and has several options available.
The green chain icon indicates successful connection between the hardware unit
and the plug-in. Connection issues will be indicated by yellow or red icons; see
Chapter 3 for details.
The current name of the plug-in instance appears in the middle field. If the DAW
is able to provide the name of the track where the plug-in instance is inserted,
the plug-in instance will be named after the track name. The instance can be
renamed by clicking the pencil icon.
If you install the plug-in without connecting the hardware unit to your computer,
a red dot will appear on the shopping cart icon. This will link you to more
information about buying the DVR250 unit. Once the plug-in detects a connected
hardware unit, the red dot will disappear.
The Settings icon accesses a menu with several links and options. This user
manual is available, along with links to the TC Electronic website, relevant news,
additional signature artist presets, and the user license agreement. If a red dot
appears over the Settings icon, a new version of the plug-in or firmware may be
available. Click “Check for Updates” to download and install the new file.
See Chapter 6 for details.
With the “Help” option selected, hovering the mouse over a certain item in the
plug-in window will give a brief description of the parameter’s function.
With the “Take over on focus” option selected, the currently-viewed plug-in
instance will take over control of the physical hardware unit as soon as it is
brought into focus.
When a new instance of the plug-in is inserted on a track or bus, that instance
will take over immediately if the “Take over on insert” option is checked.
4.3 Parameter Details
All 6 of the effects in the DVR250 will be described in detail here. Signal diagrams
for each effect can also be found in Chapter 8 as well.
4.3.1 Effect selection / navigation
Press one of the program buttons at the bottom of the hardware unit to select
the desired effect. The associated LED will light.
Looking at the plug-in window, the primary parameters will appear in the Lever
Status section.
Pressing the SET button will cause a secondary bank of parameters to appear.
Secondary parameters for the reverb effect:


