7
DITTO JAM X2 LOOPER User Manual
5. Operation
The Ditto X2 Jam was primarily designed around its unique ability to monitor the
tempo of the band’s performance and adjust the loop length to match. This is
called BeatSense mode.
However, knowing that you will probably want to use this looper when playing
by yourself, we’ve also included Practice and Classic modes.
5.1 Mode Descriptions
BeatSense Mode
: Tempo is acquired from a rhythm part played on a percussion
instrument so that loops can be recorded and played back in time with varying
human tempo guidance. Record and loop footswitch taps are quantized to the
nearest beats for the best loop points and loop playback is time compressed and
expanded where necessary to stay in time.
NOTE
- BeatSense mode will cause unwanted tempo changes if used without
a steady rhythmic source. When looping without external rhythm, Classic or
Practice mode will work better. See 5.2 Selecting Modes below.
Practice Mode
: Practice Loop tempo is sensed only from the guitar input while
preparing and recording the loop. This tempo is used to quantize the record and
playback actions to assist in making better loops as well as to allow playback
tempo to be increased and decreased allowing practice at different tempos.
Classic Mode
: This mode works the way the hugely successful line of multi-
footswitch Ditto pedals have worked. Loops are recorded and played back with
no assistance from or variation of tempo.
5.2 Selecting Modes
From the factory, Ditto X2 Jam is set to BeatSense mode. The Stop button is used
to cycle between the 3 modes.
To cycle through the Loop modes, quickly double tap and hold the STOP
footswitch for ~2 seconds. While your foot is on the STOP footswitch, the LOOP
footswitch LED will flash briefly to confirm a successful mode change:
•
1 green LOOP flash = Classic loop mode
•
2 green LOOP flashes = BeatSense mode
•
Red LOOP flashing continuously = Practice mode
You can confirm the current mode at any time by observing the
STOP LED behavior:
•
STOP LED off = Classic mode
•
STOP LED solid green or flashing at tempo = BeatSense mode
•
STOP LED solid red or flashing at guitar input tempo = Practice mode
The current loop mode will be retained on next power-up.
5.3 Modes Operation
The following tables will detail all of the relevant looping actions and associated
LED behavior for each mode.
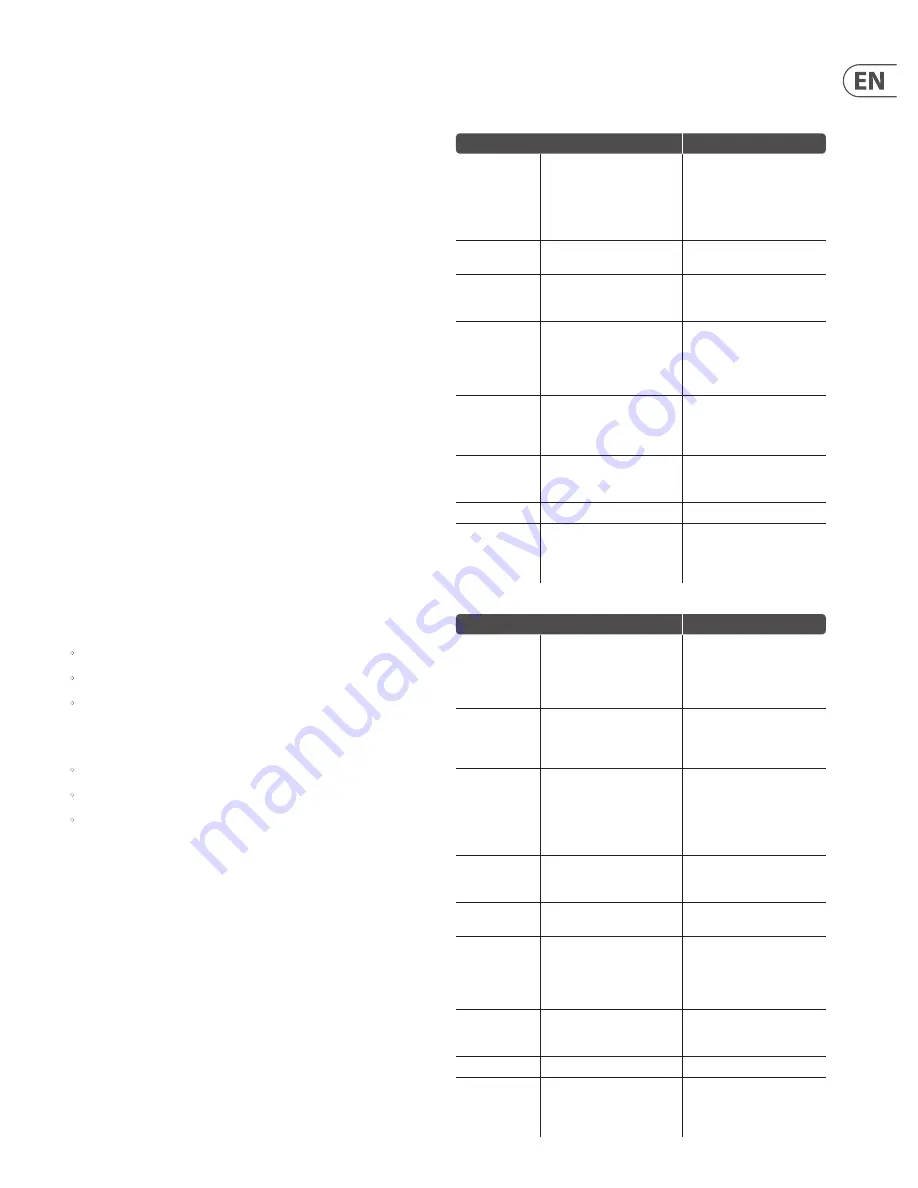
BeatSense mode (EXTERNAL mic)
LED activity
Place it
Either clip the supplied external
mic on the snare drum supports, in
the soundhole of a cajón, clipped
to the tension strings of a djembe,
or place it close to a percussion
instrument.
Loop LED flashes red during power
up only, then BeatSense LED lights
solid green until it hears a beat.
Gimme a beat!
Ask your percussionist/drummer to
play a steady groove.
BeatSense LED will flash green in
time when it’s ready.
Record
Tap the Loop button on a
downbeat and record something
cool on your guitar.
Loop and BeatSense LEDs flash in
time: Loop = red, BeatSense =
green.
Play your loop
Tap Loop button on the downbeat
where you want the loop to start
playing. Press Stop button if you
want to save the loop for later
playback.
Loop LED solid green, then blinks
at loop point. BeatSense flashes
green at tempo.
Overdub
Tap Loop during playback to enter
Overdub recording. Add as many
layers as you want. Tap Loop to end
Overdubbing.
Loop LED flashes red in time.
BeatSense shows green tempo.
Undo/Redo
Hold Loop footswitch to undo the
most recent overdub. Hold again
to redo.
Loop LED flashes green until Undo/
Redo is complete*
Stop
Tap Stop to halt loop playback.
Both LEDs flash green.
Clear
Hold Stop to clear the current loop
so you can record another. A good
place to clear is right before the
beginning of the next song.
Loop LED turns off.
BeatSense mode (ONBOARD mics)
LED activity
Place it
Place the product either beside
your foot if you want to keep time
that way (“tappin”), or place Ditto
Jam nearer to a percussion source
than your guitar amp (“groovin”).
Loop LED flashes red during power
up only, then BeatSense LED lights
solid green until it hears a beat.
Gimme a beat!
Tap a steady beat with your foot
beside the left side of Ditto Jam
to establish tempo or ask your
percussionist to play a groove.
BeatSense LED will flash green in
time when it’s ready.
Record
Tap Loop button on a downbeat
and record something cool on
your guitar. As you record, keep
tapping your foot beside Ditto Jam
or have your percussionist continue
groovin’.
Loop and BeatSense LEDs flash in
time: Loop = red, BeatSense =
green.
Play your loop
Tap Loop button on the downbeat
where you want to start looping.
Keep tappin’ or groovin’.
Loop LED solid green, then blinks
at loop point. BeatSense flashes
green at tempo.
Jam
Play something complimentary on
your guitar to go with the loop.
—
Overdub
Tap Loop during playback to enter
Overdub recording. Add as many
layers as you want. Tap Loop to
end Overdubbing. Keep tappin’ or
groovin’.
Loop LED flashes red in time.
BeatSense shows green tempo.
Undo/Redo
Hold Loop footswitch to undo the
most recent overdub. Hold again
to redo.
Loop LED flashes green until Undo/
Redo is complete*
Stop
Tap Stop to halt loop playback.
Both LEDs flash green.
Clear
Hold Stop to clear out the current
loop so you can record another. A
good place to clear is right before
the beginning of the next song.
Loop LED turns off.
Содержание DITTO JAM X2 LOOPER
Страница 12: ......