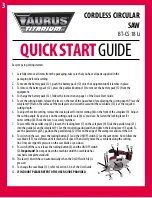
CORDLESS CIRCULAR
SAW
BT-CS 18 Li
QUICK START
GUIDE
Easy steps to getting started.
1. Carefully remove all items from the packaging, take care that you have all parts supplied in the
packaging before discarding.
2. To mount the battery pack (12) , push the battery pack (12) onto the equipment until it latches in place.
3. To remove the battery pack (12), press the pushlock button (13) to remove the battery pack (12) from the
equipment.
4. To charge the battery pack (12), follow the instruction on page 1 of the Quick Start Guide.
5. To set the cutting depth, release the lever on the rear of the guard hood for adjusting the cutting depth. Place the
soleplate (9) flat on the surface of the workpiece and raise the saw until the saw blade (15) is at the required
cutting depth.
6. To adjust the mitre setting, release the locking lever for miter setting (8) on the front of the soleplate (9). Adjust
the cutting angle. Keep an eye on the cutting angle scale (6) as you do so. Refasten the locking lever for
miter setting (8). Check the lever is securely fastened.
7. To assemble the parallel stop (21), loosen the locking lever (7) on the soleplate (9). Slide the parallel stop (21)
into the guide (a) on the soleplate (9). Set the required spacing and then tighten the locking lever (7) again. To
use the parallel stop(21), position the parallel stop (21) flat on the edge of the workpiece and start the cut.
8. To switch on the saw, press the locking button (3) and the ON/OFF switch (2) at the same time. Note: Allow the
saw blade (15) to accelerate until it reaches full speed. Then slowly move the saw blade along the cutting
line. Only exert gentle pressure on the saw blade as you do so.
9. To switch off the saw, release the locking button (3) and the ON/OFF switch
(2).
Important!
Do not put down the machine until the saw blade has
reached a complete standstill.
10. The laser (14) switches on automatically when the On/Off switch (2) is
pressed.
11. To change the saw blade (15), refer to Section 5.6.4 of the User Guide.
12.
IF IN DOUBT PLEASE REFER TO THE USER GUIDE PROVIDED.
3 2
13 12
9
15
21
a
7
8 6
3
Содержание BT-CK 18 2B-1.5 Kit
Страница 8: ...7 ...


