background image

Stückliste

***16-835***

Schraubensatz

A

B

C

D

E

F

1x Quertraverse   

(A)

1x Windenaufnahme   

(B)

2x Bügel   

(C)

2x Distanz   

(D)

1x Schaltkastenhalter   

(E)

1x Anschlussblech   

(F)

1x 16-0512,
Schutzblech hinten für Midrange Seilwinden

1x 16-2190,
Sicherungskit für alle Fahrzeugwinden
ab 3,6t, inkl. 500A Sicherung & Halter

1x Anbauanleitung AL2357
1x Gutachten
1x Aufkleber Kennzeichnung 
   (

Bitte an einer sichtbaren Stelle 

    anbringen! TÜV Relevant)

2x Schraube M12 x 130
4x Scheibe M12
2x Federring M12
2x Mutter M12

7x Schraube M10 x 30
7x Scheibe M10
7x Federring M10

2x Schraube M6 x 20
4x Scheibe M6
2x Federring M6
2x Mutter M6

2x Blechmutter M8, Typ6 

(Würth Nr.0501102005)

Содержание 16-8350

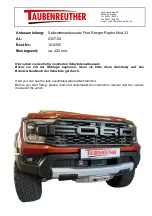
Страница 1: ...ere you can see the fully assembled winch attachment kit Before you start fitting please read and understand this instruction manual and the owners manual of the winch Am Schwimmbad 8 95326 Kulmbach T...

Страница 2: ...herungskit f r alle Fahrzeugwinden ab 3 6t inkl 500A Sicherung Halter 1x Anbauanleitung AL2357 1x Gutachten 1x Aufkleber Kennzeichnung Bitte an einer sichtbaren Stelle anbringen T V Relevant 2x Schrau...

Страница 3: ...1 Unterfahrschutz entfernen Remove the skid plate 2 Abdeckung entfernen Remove the cover...

Страница 4: ...3 K hlergrill und untere Abdeckung entfernen Remove the Radiator grille and the under cover 4 Linke Abdeckung entfernen Remove the cover left...

Страница 5: ...5 Blende entfernen Remove the cover 6 Sto f nger abbauen Remove the bumper...

Страница 6: ...7 K hlerjalousie ausbauen Remove radiator blinds 8 Stellmotor ausbauen Remove the servomotor Schraube entfernen Remove the screw...

Страница 7: ...ehen Click out the lamellas and pull off the motor Wird nicht mehr verwendet No longer in use 10 Hintere Schraube der Abschlepp se entfernen Remove the rear screw of the towing eye Das Gleiche an der...

Страница 8: ...11 A Quertraverse platzieren Place the crossbar 12 Traverse verschrauben Screw the crossbar Das Gleiche an der rechten Seite The same at the right Original Schrauben...

Страница 9: ...13 B Windenaufnahme platzieren Place the winch plate 14 Schraube hinten rechts lose lassen Leave screw loose at rear right 1 1 Original Schrauben M10 x 30 5x...

Страница 10: ...15 Verschraubung oben Screwing top M10 x 30 2x 16 C B gel aufschieben Slide on the clamps Das Gleiche an der rechten Seite The same at the right...

Страница 11: ...en Schraube M12 x 130 von au en durchschieben Place distance between bracket and winch plate push M12 x 130 bolt through from outside Das Gleiche an der linken Seite The same at the left 18 Das Gleich...

Страница 12: ...K hlerschutz hinten montieren aber nur mit der linken Schraube befestigen Mount rear radiator guard fasten only with the left screw 16 0512 20 E Schaltkastenhalter montieren Mount the switch box brack...

Страница 13: ...ten nach Anleitung an der Winde anschlie en Kabelausrichtung siehe Bild Connect the switch box to the winch according to the instructions Cable alignment see picture 22 Schaltkasten montieren Mount th...

Страница 14: ...23 Nun die Seilwinde nach Anleitung einbauen Now install the cable winch according to the instructions 24 Seilwinde platzieren Place the winch...

Страница 15: ...rd Only necessary if a Taubenreuther underride guard is mounted at the same time 26 F Anschlussblech mit den hinteren Windenschrauben verschrauben Screw the connection plate with the rear winch screws...

Страница 16: ...die Plus Leitung einbinden Mount the fairlead and connect the winch Place the fuse kit 16 2190 near the battery and connect it to the positive cable 28 Stellmotor der K hlerjalousie anstecken und an...

Страница 17: ...29 Seil auf die Winde laufen lassen Spool the Rope on the winch 30 Bohrungen am Sto f nger unten anzeichnen Mark the holes at the bottom of the bumper...

Страница 18: ...31 Bohren mit min 7mm Drill with min 7mm 32 Die Abdeckungen f r die Abschlepp sen entfernen Remove the covers for the towing eyes...

Страница 19: ...33 Schrauben entfernen Remove this screws 34 Ausschnitt anzeichnen Ma e n chstes Bild Mark the cutout Dimensions next picture...

Страница 20: ...35 Blechteile ausschneiden Cut out sheet metal parts 510mm 540mm 90mm 36 Untere Laschen und die Distanzhalter am Plastikteil abschneiden Cut the lower tabs and the spacer from the plastic part...

Страница 21: ...37 Teile verschrauben Screw parts together Rechte Seite right side Linke Seite left side M6 x 20 M6 x 20 38 F r ausreichend Rostschutz sorgen Ensure for sufficient rust protection...

Страница 22: ...39 Sto f nger wieder montieren Mount the bumper again 40 Blende wieder montieren Mount the cover again...

Страница 23: ...ufstecken und die Kontur des Seilwindenanbausatzes anzeichnen Attach the lower cover and mark the contour of the Mark the contour of the winch attachment kit 42 Nach Markierung ausschneiden Cut out ac...

Страница 24: ...43 Untere Blende wieder montieren Mount the lower cover again 44 Linke Abdeckung wieder montieren Mount the cover left again...

Страница 25: ...45 Abdeckungen f r Abschlepp sen verschrauben Screw covers for towing lugs back on 46 K hlergrill wieder montieren Mount the radiator grille again...

Страница 26: ...wiederherstellen und Abdeckung oben montieren Restore all connections and mount cover on top 48 Ausschnitt am Unterfahrschutz anzeichnen und ausschneiden Mark the cut out at the skid plate and cut it...

Страница 27: ...49 Unterfahrschutz montieren Mount the skid plate 50 Fertig Finish...

Отзывы: