background image

1. Press the "

MENU

" button on the remote control to

enter  the OSD menu. Then press    buttons to select
the "

PICTURE

".

2. Press      button to select the desired item to enter.
3. Press      button on the remote control to adjust
desired item.
4. Press the "

MENU

" button on the remote control to

return to the upper menu. 

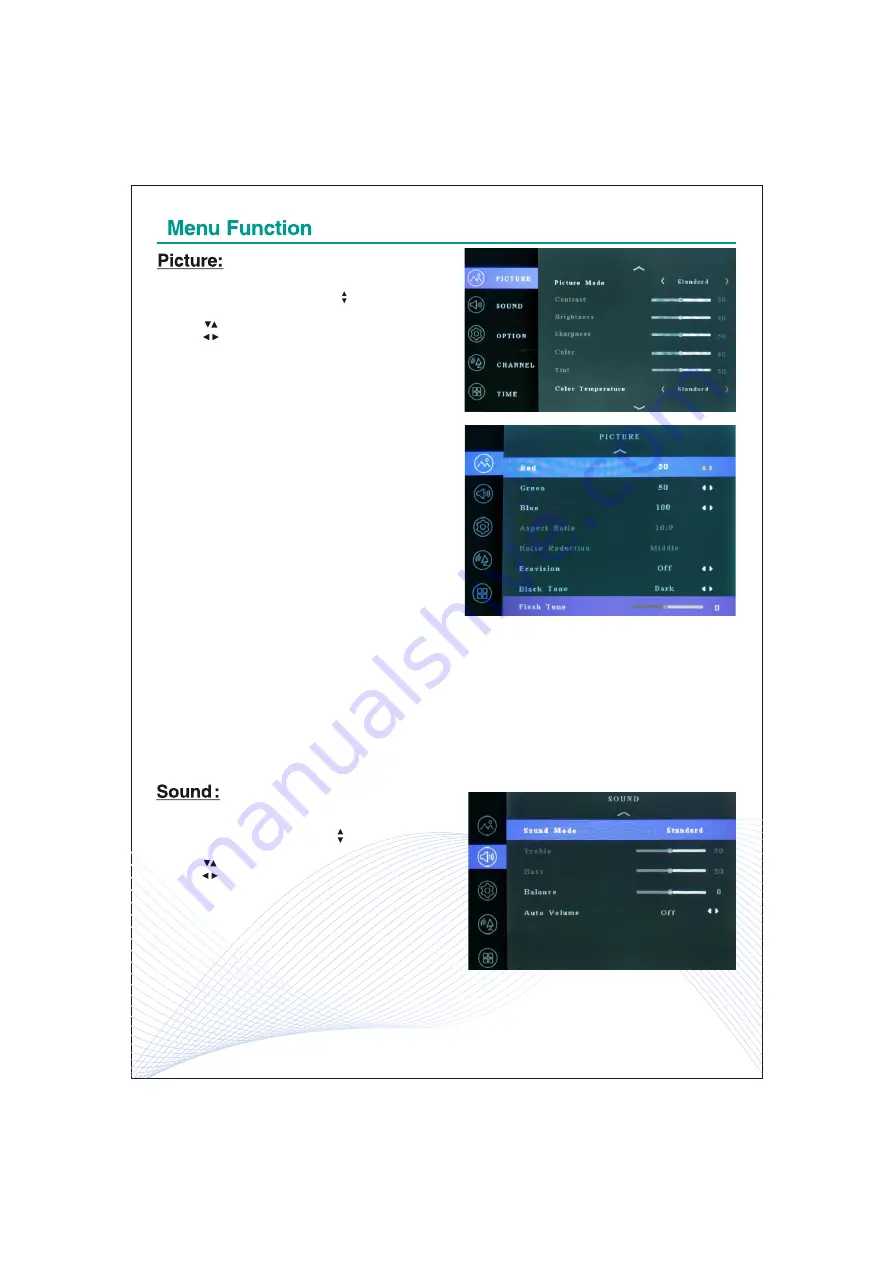
Picture Mode:

 There are four pre-programmed default

picture modes (user,mild,standard and dynamic) in this
television set.

Contrast:

 Adjust the lighter and darker areas of the

image.

Brightness:

 Adjust the absolute value of brightness.

Sharpness:

 Enhance the object edges for the picture

details.

Colour:

 Adjust the absolute value of color tones.

Tint:

 In color theory, a tint is a mixture of a color with

white, which reduces darkness, while a shade is a
mixture with black, which increases darkness. Both
processes affect the resulting color mixture's relative
brightness. A tone is produced either by mixing a color
with grey, or by both tinting and shading tint (only can
be change on NTSC signal).

Colour Temperature:

 Select the colour temperature of

the picture.

Red: 

Adjust the red color of picture

.

Green: 

Adjust the green color of picture.

Blue: 

Adjust the blue color of picture.

Aspect Ratio: 

Adjust the screen ratio 4:3, 16:9, Zoom1, Zoom2.

Noise Reduction:

 Choose the noise level High / Middle / Low / Off to improve the quality of the picture.

Eco Vision:

 Adjust the TV's brightness level to reduce over all power consumption.

Black Tone: 

This make your TV's blacks blacker than they already are.

Flesh Tone:

 Allows you to refine the flesh colors in the pictures without effecting the other colors on screen.


1. Press the "

MENU

" button on the remote control to

enter the OSD menu. Then press    buttons to select
the "

SOUND

".

2. Press      button to select the desired item to enter.
3. Press       button on the remote control to increase or
decrease the value of desired item.
4. Press the "

MENU

" button on the remote control to

return to the upper menu. 

8

Содержание croma CREL024HBB024602

Страница 1: ...Croma 60cm HD Ready LED TV CREL024HBB024602 Croma 80cm HD Ready LED TV CREL032HBC024601 Croma LED TV Thank you for selecting Croma LED TV CROMA 24 32 INCH NON SMART USER MANUAL SIZE 148 5x210mm...

Страница 2: ...1...

Страница 3: ...may have seepage issues or below ACs as this may cause electrical short circuit and permanent damage to the TV due to moisture Secure the power cord properly with cable ties or cord binders to avoid...

Страница 4: ...VGA This input allows connecting a personal computer Desktop or laptop to the TV unit with a VGA cable PC AUDIO This input allows connecting the PC audio signal to the TV AV IN 1 Connect the Video UR...

Страница 5: ...4...

Страница 6: ...7...

Страница 7: ...ightness A tone is produced either by mixing a color with grey or by both tinting and shading tint only can be change on NTSC signal Colour Temperature Select the colour temperature of the picture Red...

Страница 8: ...t Select programme edit to edit the programme you have searched OSD Language The default OSD language in this television is English OSD Timer Adjust the time of OSD Blue Screen The screen will turn bl...

Страница 9: ...ANT AV IN HDMI USB OPTICAL OUT VGA PC Audio EARPHONE Video format Audio format Picture format USB Codec attached Power Supply Power Consumption Remote Control unit Table top stand pair Wall mounting...

Страница 10: ...m picture quality Changes to certain functionalities of this television TV Guide Picture sound etc may change the power consumption Depending on such changed setting eg Retail mode the power consumpti...

Страница 11: ...The Product Name Croma Customer Care Manager In niti Retail Ltd Unit No 701 702 7th Floor Kaledonia Sahar Road Andheri East Mumbai 400069 India 1800 572 7662 12 Croma 60cm HD Ready LED TV CREL024HBB0...

Страница 12: ...You should retain the warranty card Invoice for records and shall compulsorily produce the same in the event of any repairs during the Warranty Period Instruction for Customers 13...

Страница 13: ...incompatibility arising during usage with inverter due to power sharing capabilities of the inverter 14 n Issues arising from incompatibility with mobile devices during screen mirroring or screen cas...

Страница 14: ...15...

Страница 15: ...16 This product comes with Twelve months 12 of Zero Dot Panel Replacement Warranty If the product is approved for replacement complete packing material with accessories is required...

Страница 16: ...1800 572 7662...

Отзывы: