9
L’entrée et la sortie d’eau doivent être en place et la tuyau-
terie doit être correctement localisée avant d’installer la
douche à l’emplacement choisi.
Avant de poursuivre l’installation, vérifiez l’installation du
drain et assurez-vous qu’il est bien étanche.
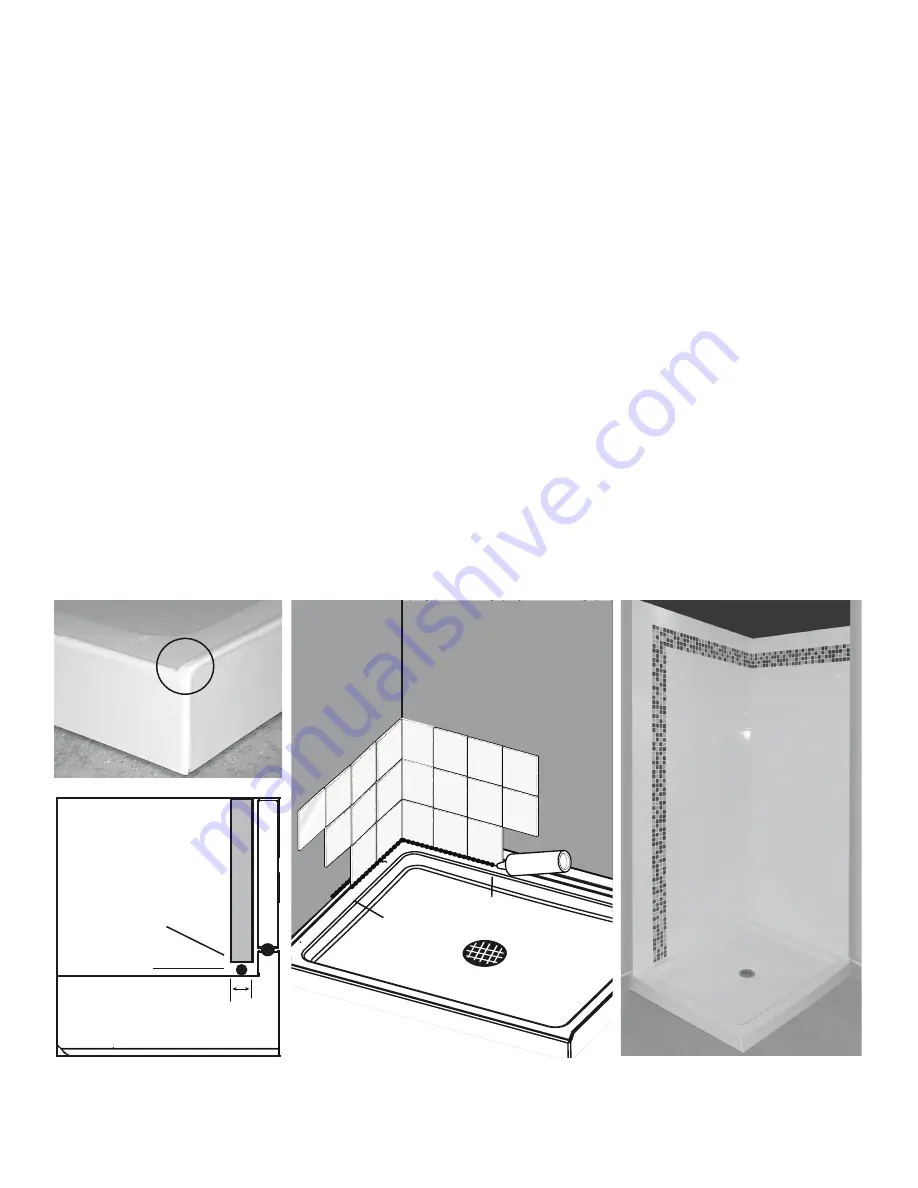
1. Le panneau hydrofuge doit être aligné avec la lèvre de
la base de la douche. Positionnez bien la base de la
douche. Appliquez un scellant n
o
II à la base du panneau
(comme indiqué en A dans les illustrations 1 et 2).
2. Les carreaux doivent être posés devant la lèvre, sur
la base (comme indiqué en B dans l’illustration 1).
Les tuiles que vous installerez doivent s’asseoir sur
la base de la douche pour assurer l’étanchéité. Les
tuiles ne devront pas avoir une épaisseur de plus
de 1/2 po (13 mm).
Une fois la base bien en place,
vous pouvez commencer l’installation de vos tuiles
murales (comme indiqué en C dans l’illustration 2).
3. Appliquez le scellant n
o
II à la base de la céramique
(comme indiqué en E dans les illustrations 1 et 2).
Après que vous aurez terminé de coller les tuiles, attendez
24 heures pour que le ciment sèche complètement avant
de procéder à l’installation des montants.
All raw plumbing must be in place and properly positioned
before installing the shower in the desired location.
Before continuing, verify the drain installation and make sure
it is watertight.
1. The waterproof panel must be aligned with the lip of the
shower base. Position the base correctly. Apply n
o
II silicone
sealant at the bottom of the panel (see A in illustrations 1
and 2).
2. The tiles must overlap the lip, onto the base (see B in
llustration 1). The tiles must sit on the base to ensure the
wall will be watertight. The tiles must not be thicker than
1/2” (13 mm). Once the base is properly installed, you may
start putting up the tiles (see C in illustrations 1 and 2).
3. Apply n
o
II silicone at the base of the tiles (see E in illus-
trations 1 and 2).
After you have finished installing the tiles, wait 24 hours
to allow the mortar to dry completely before installing the
tracks.
Silicone N
o
II /
N
o
II Scellant
Max : 1/2"
(13 mm)
GYPSE /
DRY WALL
A
B
GYPSE
Dry wall
Lèvre de la base
Base lip
Illustration 2
Illustration 1
CARREAUX / TILES
PANNEAU HYDROFUGE
WATERPROOF PANEL
PANNEAU / PANEL
A
E
C
E
Содержание LEO KD3114
Страница 22: ......


