background image


HD-R1 

Owner's Manual Addendum

4

  TASCAM HD-R1


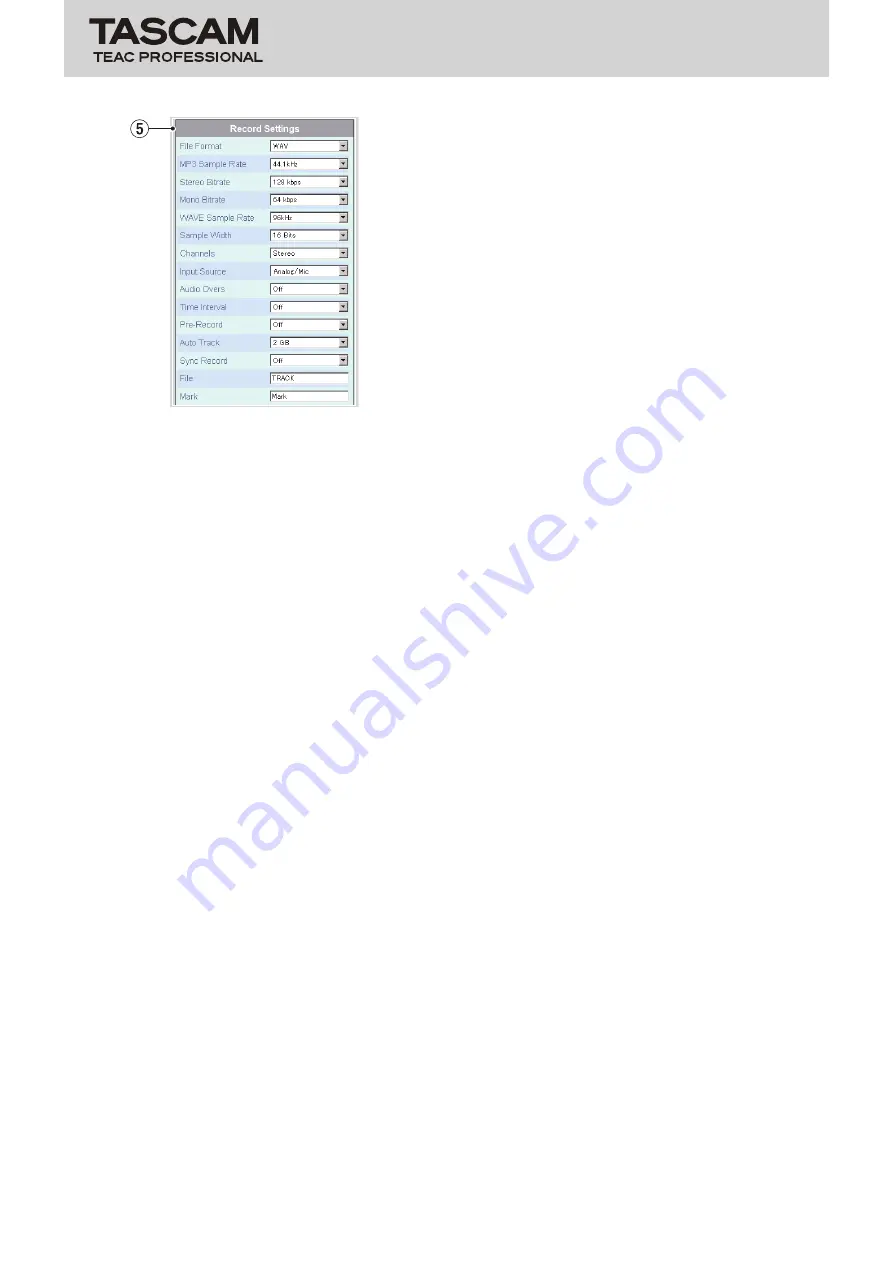
Setting Screen Record Settings section

5

  Record Settings section 

5-1 File Format

Use the pull-down menu to set the recording file 

format. 

5-2 MP3 Sample Rate

Use the pull-down menu to set the MP3 file 

recording sample rate. 

5-3 Stereo Bitrate

Use the pull-down menu to set the stereo MP3 file 

recording bit rate. 

5-4 Mono Bitrate

Use the pull-down menu to set the mono MP3 file 

recording bit rate. 

5-5 WAVE Sample Rate

Use the pull-down menu to set the WAV file 

recording sample rate. 

5-6 Sample Width

Use the pull-down menu to set the WAV file 

recording bit length. 

5-7 Channels

Use the pull-down menu to set the input channels. 

5-8 Input Source

Use the pull-down menu to set the input source. 

5-9 Audio Overs

Use the pull-down menu to turn the automatic 

creation of markers whenever the audio input 

overloads On or Off. 

5-10 Time Interval

Use the pull-down menu to set the time interval of 

markers created  automatically or turn the function 

Off. 

5-11 Pre-Record

Use the pull-down menu to turn pre-recording On 

or Off. 

5-12 Auto Track

Use the pull-down menu to set the maximum size 

of recorded audio files. 

5-13 Sync Record

Use the pull-down menu to set the threshold value 

of the sync record function or to turn it Off. 

5-14 File

Set the base name given to new audio files that are 

created. This is not a pull-down menu. Enter up to 

20 characters directly into the field. Only single-

byte alphabetic or numeral characters can be used.

5-15  Mark

Set the base name given to new markers. This is 

not a pull-down menu. Enter up to 20 characters 

directly into the field. Only single-byte alphabetic 

or numeral characters can be used.

Содержание HD-R1

Страница 1: ...bmenu of the System Settings menu which is accessed from the MENU screen Network submenu CAUTION Use a private address when IP Mode is set to Static This limitation does not apply when a global addres...

Страница 2: ...g of the current track if located more than one second from its beginning Skips to the beginning of the previous track if located less than one second from the beginning of the current track Skips to...

Страница 3: ...etup section 2 1 Media Use this to select the type of media Click the radio button to the right of a media type CF or USB to select it The one with the black dot is currently selected If the media typ...

Страница 4: ...urce 5 9 Audio Overs Use the pull down menu to turn the automatic creation of markers whenever the audio input overloads On or Off 5 10 Time Interval Use the pull down menu to set the time interval of...

Страница 5: ...Use the pull down menu to set the polarity of the busy 1 relay when it is idle 6 13 Busy 2 Signal Use the pull down menu to set the condition for generating a busy 2 signal 6 14 Busy 2 Polarity Use t...

Страница 6: ...er the Time Zone and Day light Saving Time items become available TIP In order to confirm that the unit has correctly synchronized its time with an NTP server manually set the HD R1 system time incorr...

Страница 7: ...tly to show the time accurately Daylight Saving Time This item is only enabled when Use Time Server is set to On This allows the clock to be set for daylight saving time DST or summer time Set it to O...

Страница 8: ...HD R1 Owner s Manual Addendum 8 TASCAM HD R1 Printed in China...

Отзывы: