background image


TASCAM  CD-355

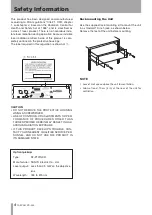
Rack-mounting the Unit

Use the supplied rack-mounting kit to mount the unit 
in a standard 19-inch rack, as shown below.
Remove the feet of the unit before mounting.

NOTE

Leave 1U of space above the unit for ventilation.
Allow  at  least  10  cm  (4  in)  at  the  rear  of  the  unit  for 
ventilation.


This product has been designed and manufactured 
according to FDA regulations "title 21, CFR, chapter 
1, subchapter J, based on the Radiation Control for 
Health and Safety Act of 1968", and is classified as 
a class 1 laser product. There is no hazardous invis-
ible laser radiation during operation because invisible 
laser radiation emitted inside of this product is com-
pletely confined in the protective housings.
The label required in this regulation is shown at 

1

.

Optical pickup:

Type: 

SF-P101NXR

Manufacturer:  SANYO Electric Co., Ltd

Laser output:  Less than 0.5 mW on the objective 

lens

Wavelength:  765 to 815 nm

CAUTION

• DO  NOT  REMOVE  THE  PROTECTIVE  HOUSING 

USING A SCREWDRIVER.

• USE OF CONTROLS OR ADJUSTMENTS OR PER-

FORMANCE  OF  PROCEDURES  OTHER  THAN 
THOSE SPECIFIED HEREIN MAY RESULT IN HAZ-
ARDOUS RADIATION EXPOSURE.

• IF THIS PRODUCT DEVELOPS TROUBLE, CON-

TACT YOUR NEAREST QUALIFIED SERVICE PER-
SONNEL,  AND  DO  NOT  USE  THE  PRODUCT  IN 
ITS DAMAGED STATE.

Safety Information

Содержание CD-355

Страница 1: ...D00989320A CD 355 Compact Disc Changer OWNER S MANUAL...

Страница 2: ...triangle is intended to alert the user to the presence of important operating and maintenance servicing instructions in the literature accompanying the appliance The lightning flash with arrowhead sy...

Страница 3: ...ufacturer or sold with the appa ratus When a cart is used use caution when moving the cart apparatus combination to avoid injury from tip over 13 Unplug this apparatus during lightning storms or when...

Страница 4: ...is no hazardous invis ible laser radiation during operation because invisible laser radiation emitted inside of this product is com pletely confined in the protective housings The label required in th...

Страница 5: ...ully to get the best performance from this unit Before Use 6 Discs 7 Name and Function 8 Remote Control Unit 9 Connection 10 Playback 1 11 Playback 2 12 Repeat Playback 13 Shuffle Playback 13 Programe...

Страница 6: ...To keep the laser pickup clean do not touch it and always close the disc tray Do not attempt to clean the unit with chemical solvents as this might damage the finish Use a clean dry cloth Keep this m...

Страница 7: ...hold the disc Should the disc become dirty wipe the surface radially from the center hole outward towards the outer edge with a soft dry cloth Never use such chemicals as record sprays antistatic spr...

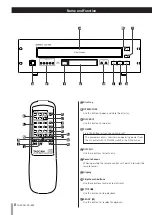
Страница 8: ...pment draws nominal non operating power from the AC outlet with its POWER switch in the OFF position E DISC NO Use these buttons to slect a disc F Remote Sensor When operating the remote control unit...

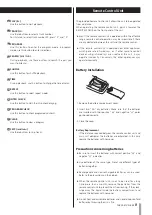
Страница 9: ...new ones Precautions concerning batteries Be sure to insert the batteries with correct positive and negative _ polarities Use batteries of the same type Never use different types of batteries togethe...

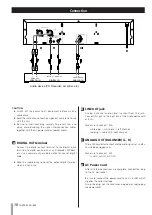
Страница 10: ...t is not in use Connection ANALOG IN ANALOG IN DIGITAL IN COAXIAL OPTICAL L R BALANCED L R UNBALANCED A C B Audio device CD Recorder Amplifier etc D B LINE OUT jack Analog 2 channel audio signal is ou...

Страница 11: ...LAY button y to start playback All the buttons and switches still function normally even when the tray is opening or closing When the unit detects a disc on the tray the disc mark will light When the...

Страница 12: ...en the button is pressed during playback of the last track of the disc the first track of same disc will be played When the button is pressed twice during playback of the first track of the disc the l...

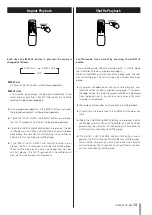
Страница 13: ...tinuously shuffle played REPEAT ALL REPEAT ONE OFF Shuffle Playback Shuffle mode turns on off by pressing the SHUFFLE button During shuffle mode SHUFFLE indicator lights In shuffle mode the tracks fil...

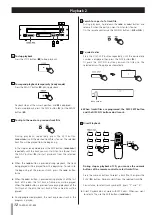
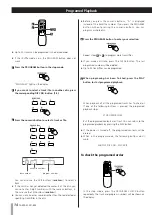
Страница 14: ...s displayed instead of the track file number If you press the PROGRAM button without pressing the numeric buttons you can program a whole disc You can also use the SKIP buttons to select a track If th...

Страница 15: ...it means a whole disc is programed If you want to rewrite a track file press the PROGRAM CHECK button repeatedly until the program number which you want to rewrite appears on the display Then select...

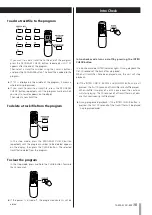
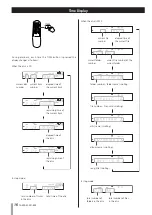
Страница 16: ...the disc total time of the disc total number of folders in the disc total number of files in the disc remaining time of the current track elapsed time of the disc remaining time of the disc When the...

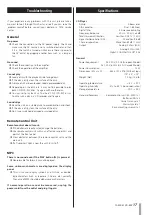
Страница 17: ...ies e Use remote control unit within an effective range 5m and point at the front panel e Clear obstacles between the remote control unit and the main unit e If a fluorescent light is near the unit tu...

Страница 18: ...9888 www tascam com 5939 Wallace Street Mississauga Ontario L4Z 1Z8 Canada TEAC MEXICO S A De C V Phone 52 555 581 5500 www tascam com Campesinos No 184 Colonia Granjes Esmeralda Delegacion Iztapalap...

Отзывы: